
Brainstorm
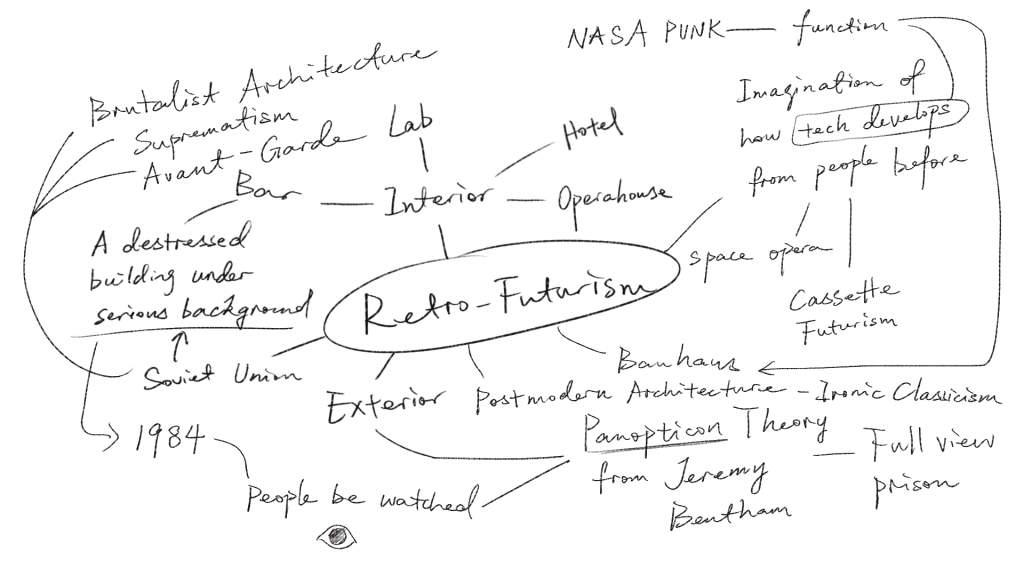
Initially, I want to create a retro-futurism themed scene. I hadn’t figured out if I wanted to do an exterior or interior scene at that point. So I did the brainstorm for both of them. I looked for relevant doctrines and objects. I extend the theme to cassette futurism, brutalism. These remind me of the Soviet Union monuments. I want to show the kind of repress feeling under a serious background in this project. It makes me think of the book 1984 which people are under constant surveillance. Thus it reminds me of the Panopticon Theory from Jeremy Bemtham. So, for the exterior scene, I wanted to create a jail, which is isolated from cities and people. And the most strict watcher of the prisoners are themselves. Regards of NASA Punk and space opera, I would like to add some more functional design in the interior scene. For the interior scene, I wanted to make a bar. Because bar is a great place to show the Ironic classism. It is a place for entertainment, but the background setting and the cold design style would make it complex.
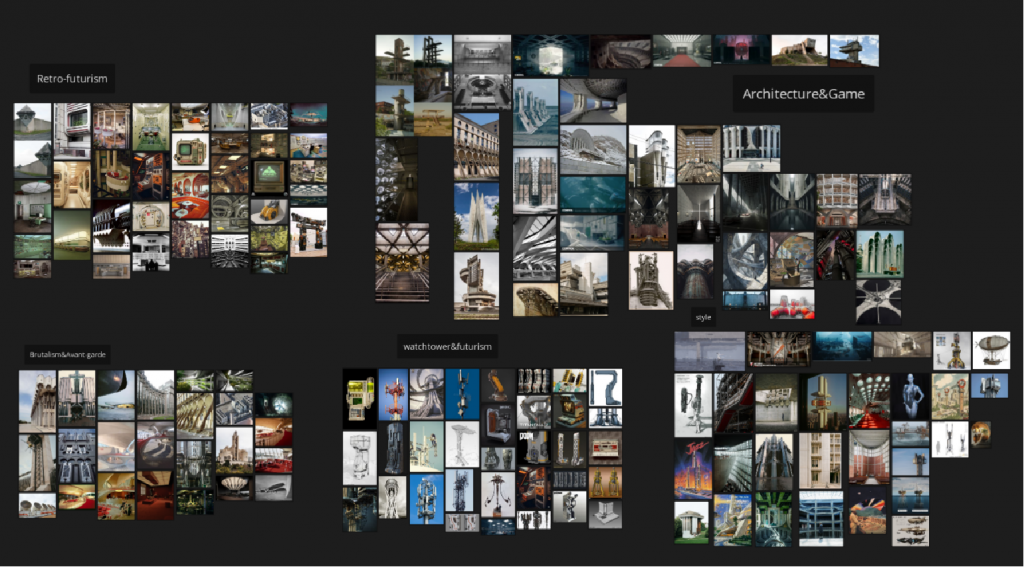
Moodboards
Research
Inspirations
Control, Soviet Union monuments,1984, Panopticon Theory, Les Espaces d’Abraxas, Barbican Centre, The Westin Bonaventure, Monument to the 50th Anniversary of Soviet Armenia in Dilijan, TWA Flight Center (Now TWA Hotel),阿瓦拉电视塔,喷泉,莫斯科宇宙征服者纪念碑,机器人与技术控制论研究所,克斯马伊阵亡士兵纪念碑,伊瓜拉达墓园Igualada cemetery,卒姆托小教堂Bruder-Klaus-Feldkapelle,陀思妥耶夫斯基剧院,中银胶囊,1984真理部原型Senate house,里昂圣埃克絮佩里火车站Gare de Lyon Saint-Exupery TGV,APPARTUS,苏联先锋建筑-苏莱曼山,Rossi’s Casa del Portuale
Research
Soviet Union avant-garde
Soviet Union Futurism Architecture
社会主义实用主义,进步和科技注意,集体主义,乌托邦主义,实验性
супрематизм, suprematism
Jeremy Bentham-Panopticon Theory, and surveillance realism
Panopticon – A prison design by Jeremy Bentham, featuring a central watchtower and surrounding cells, allowing unseen observation while prisoners remain visible.
Michel Foucault’s Discipline & Punish – Expands the panopticon into a metaphor for modern social control, where individuals regulate themselves under constant surveillance.
Architectural Visibility & Power – Totalitarian spaces use architecture to enforce discipline through open yet controlled environments.
Brutalism
Characterized by exposed concrete, geometric massing, and functional minimalism, often used in government institutions, military complexes, and social housing.
NASA Punk
Cassette Futurism
Ironic Classissm and Post-Modern Architecture
Space opera
1984
Artist Research
Red_Null, Dreamland Series
Yuyun/Jessie Jiang
Thumbnails,and Some Concept & Inspiration replenishmen
I made 6 sketches in total, 4 for the panopticon, and 2 for the bar. I browsed lots of artists’ work and architectures.
This one is inspired by a building in Paris called Les Espaces d’Abraxas. It is a housing complex designed by Richardo Bofill. The high density of housing and large amount of coated glass windows gives me a complexed feeling of be watched and refuse to be watched. Its special half tube shape also allow me to make it connects to the theme of panopticon.
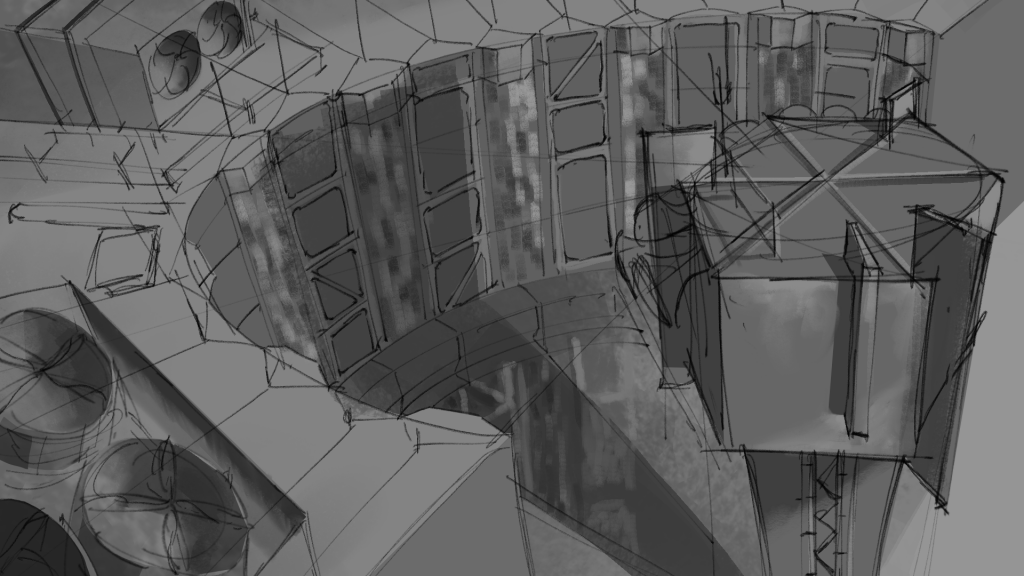
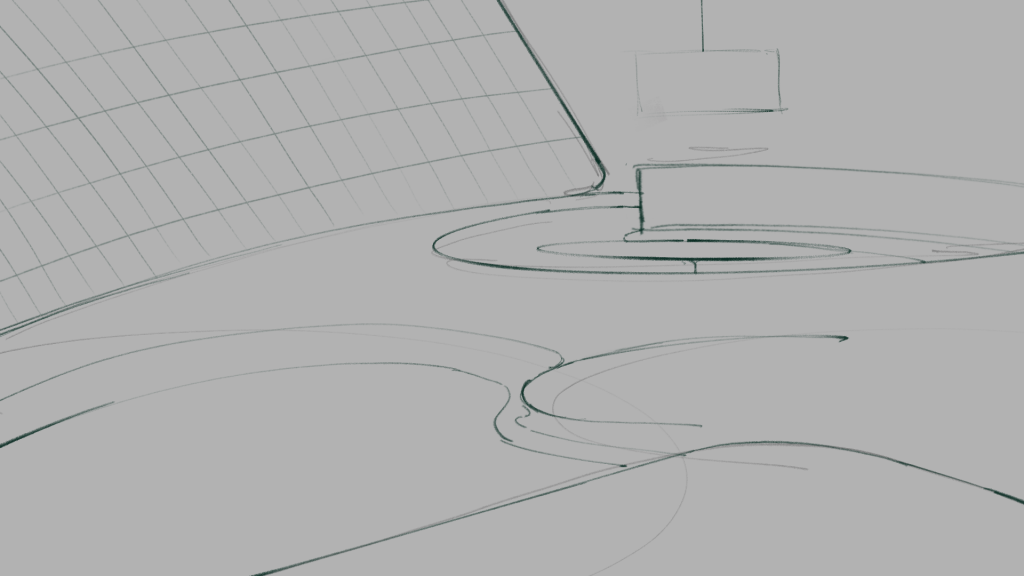
This thumbnail is inspired by the cooling tower I found when I was doing mood board. The large construction of concrete is really stunning to me. I decided to make a perspective of looking from bottom to the top to create a sense of “it is a colossal building”. I think this would bring more sense of oppressing to the audience. And I found it is very suitable to put a pole like baobab in the middle so the pole could even amplify the sense of perspective, so I make the bottom of the watching tower very fat. I put some drones in the sky to keep the rhythm of the whole thumbnail, so the building and the empty parts would be balanced.
And the third one, I got the inspiration from the panopticon in the game Control. I was first be attracted by the art style of this game. It is really a suprise that this game also has a panopticon in it. But it is sci-fi and full of technology stuff. My theme is more on the side of retro-futurism, so I “degraded” the technology used in this prison a bit, and the overall style is more on the side of primitive concrete, like the one used by Tadao Ando. Less details, and hopefully the texture of brutalism will be rendered in time with light and shadow and material details. I really like the speakers on the top of the watching tower, so I keep them in the last draft as well.
The last sketch for the panopticon theme is inspired by the concept art from Hayao Miyazaki’s Crimson Pig.
The technological aesthetics of the 1920s wartime era can be seen in the artistic setting of this animation. As well as the setup image of the red fighter jet passing through the sky made me impressed. so I wanted to do a bolder setup and make the structure of this one bigger and closer to the sky. Reducing the level of technology in the architectural design to achieve a Retro Futurism effect, making it look like a product of a past human fantasy of the future. Although having the facility of Atomic Punk and Cassette Futurism, it is intertwined with Sci-Fi, alternating the old with the new.

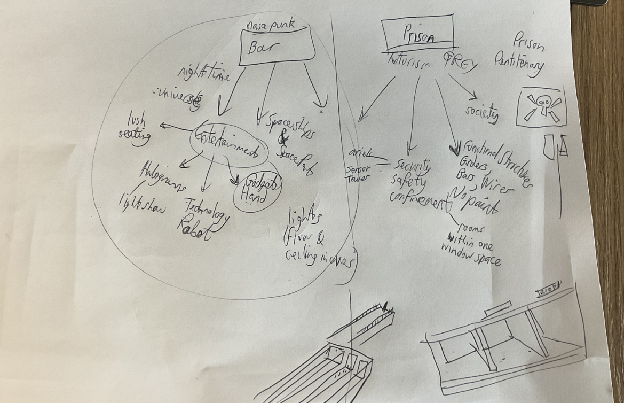
The first design for the bar is inspired by two games, Cyberpunk 2077 and The Red String Club. The Afterlife in Cyberpunk 2077 is always unforgettable. These two games both have bars and their themes are all cyberpunk.
They all have a very important point in their kernel that is oppression from large corporations or institutions in the social system. This is linked to a theory related to the Panopticon – Surveillancve Realism, as in 1984 surveillance becomes dematerialized and internalized as a social state within people. The bar, as a place of entertainment, is supposed to take over and dissipate people’s fatigue and stress. However, under this internalized surveillance, no place is free from surveillance, which means that no place is free from the pressure of this set society. Therefore, the bar carries a sense of playfulness and humor under such a setting. It’s like a sarcasm. So there’s more of a liminal space, a sense that something is about to happen.
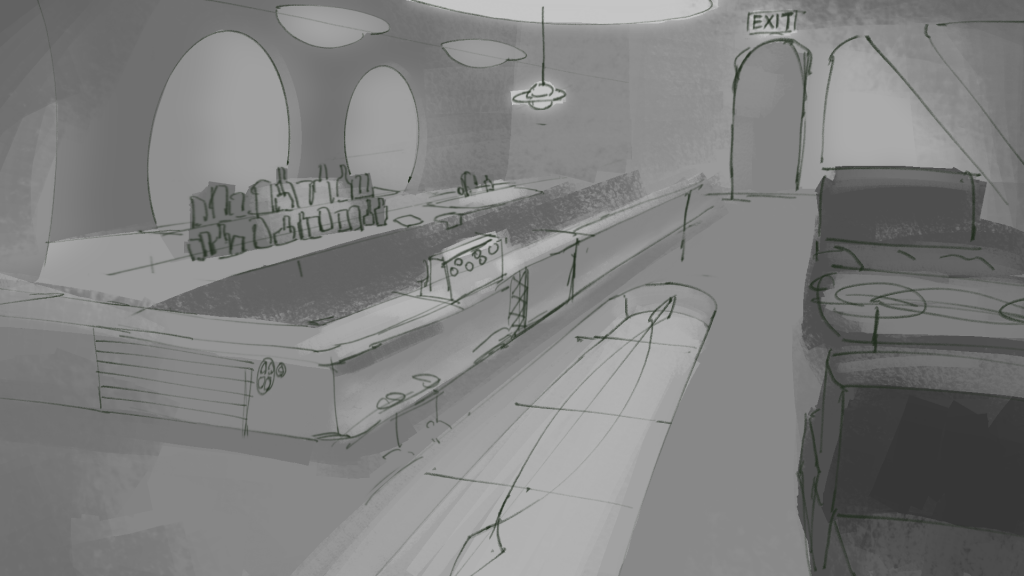
The second thumbnail for the Bar is more like a lounge. I draw some sunken sofas, Bauhaus style furniture combined with brutalism architecture. My vision was to add some space opera elements, such as setting the scene outside the millennial style glass facade in space, using the place as a transport hub for space travel. My research and thumbnail part was done at the same time, and I browsed a lot of works while designing. I didn’t think the sketch fit too well with a few of my previous themes, so I simply drew this thumbnail as an option.
Final choice
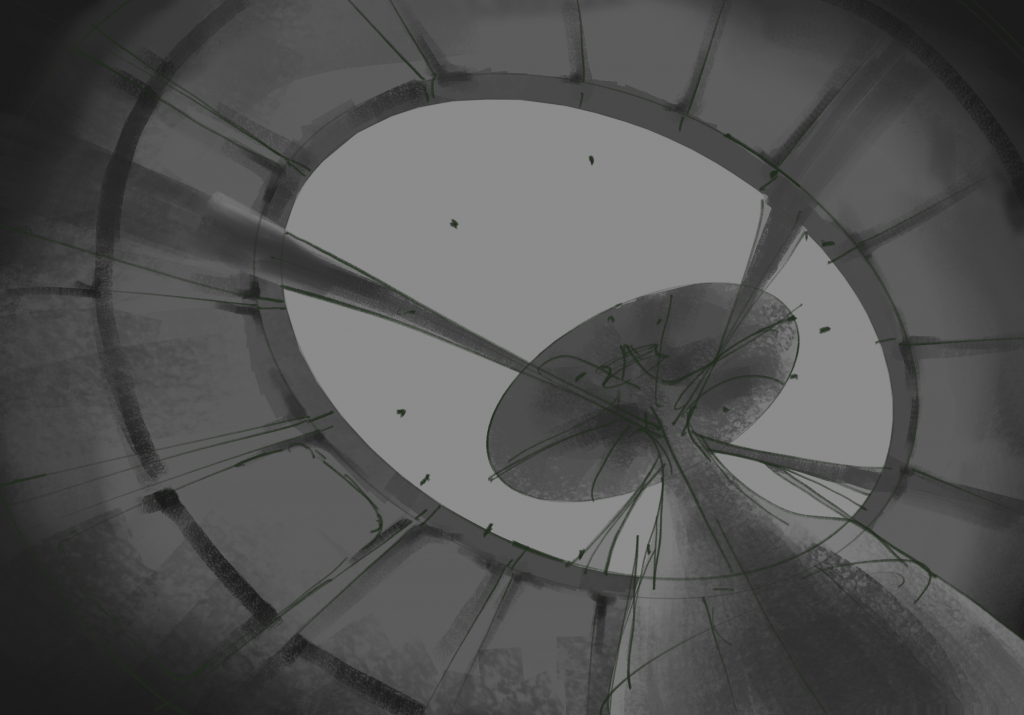
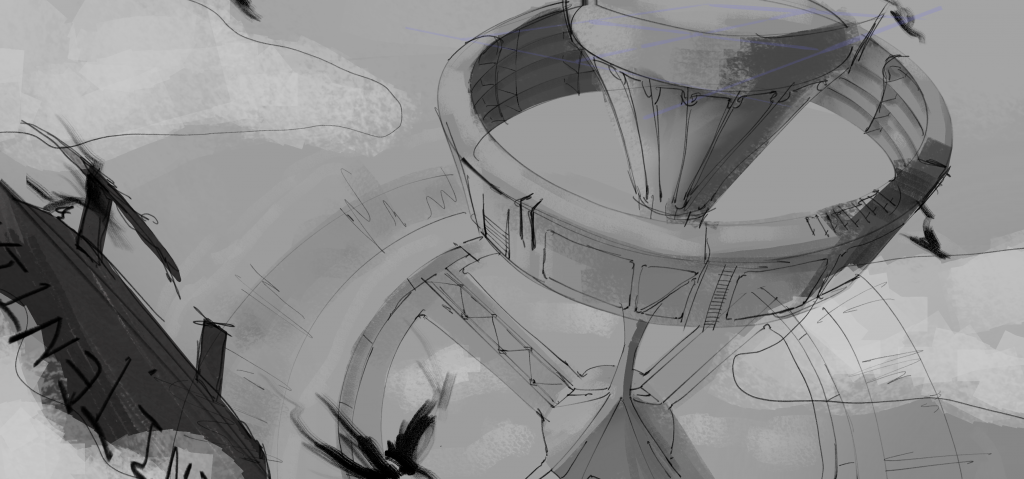
I chose the last thumbnail I made for the panopticon. I was struggling between the one inspired by the Les Espaces d’Abraxas and the last one with a floating penitentiary in the sky. I like the wires and the architechture structure. But the floating prison could create a better sense of space. I talked with several teachers and classmates. Michael made some suggestions to both of them, like I can put some extending structures on the floating loop so it can be interactive with the audience and the close scene would not be too empty.
For reasons of functionality and artistry, I think an isolated prison would be more representative of the feeling of oppression and inescapability. Regarding Michael’s suggestion, I think the inclusion of a transport ship is a very good idea, and he agrees. I didn’t change the structure of the prison circle, and didn’t add more extended circles, because that would have destroyed the panopticon’s surveillance structure. That above-ground option, on the other hand, seems a bit ordinary, and while it’s relatively well developed in terms of graphic richness, I don’t think it’s as innovative as the floating version could have been. And from a narrative point of view, an isolated prison, with its serious tone and humanistic aspects, as well as its integration with the natural terrain, is better able to tell a story for the audience.
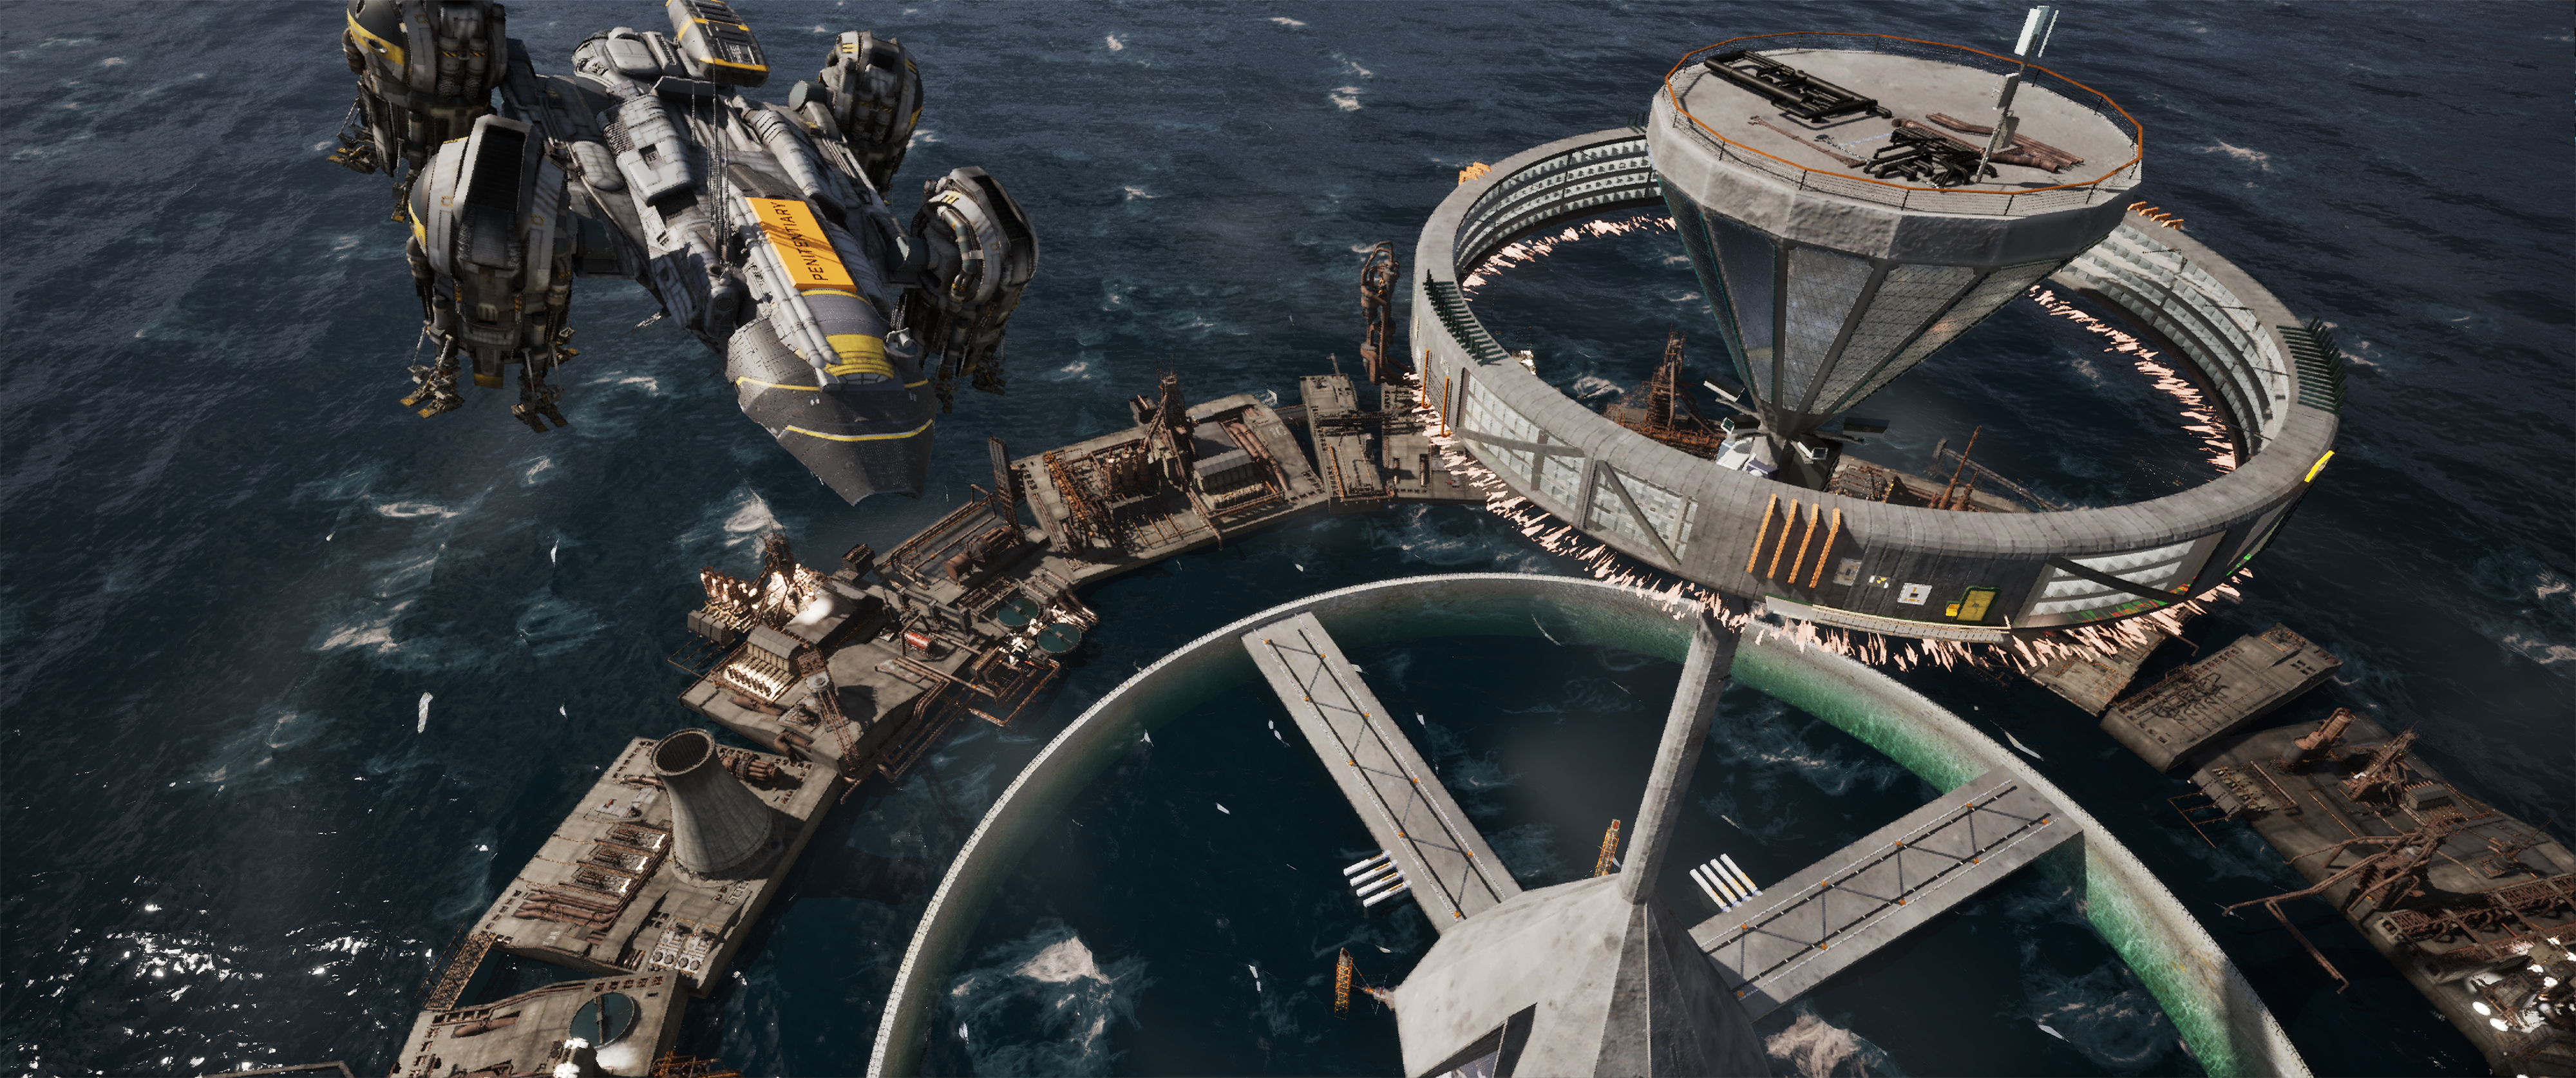
At first I was going to have the prison built on a vast expanse of plains mixed with hills, with the city built on a circle at ground level, and the prison in the middle serving as a kind of warning; Amil proposed replacing the ground with an ocean and the city with an industrial zone, which I liked very much and took up. I really liked it and adopted it, because the sea reinforced the feeling of isolation and made the whole building even more lonely. The replacement of the city with a factory adds to their rationality, as the prisoners above come down to work in the factory during the day and return to the prison at night. The existence of the city in this way is quite irrational, as no one would make a prison the centre of an entire city. The factory as a building attached to the prison adds to its function and narrative.
Concept Proposal
Initially, I chose Retro-futurism and Brutalism as the theme of my project. I’ve been very interested in the Panopticon Theory proposed by Betham. Self-surveillance developed out of uncertainty coincides with the theory of the surveillance society. I think that the relatively cold and serious appearance of brutalist architecture would be more inspiring if it could be combined with it. Speaking of brutalist architecture, it is important to mention the monuments from the Soviet Union, which have become symbols of domination due to their visual impact and the cult of power they contain. Most of them are bold and avant-garde, filled with last century’s human imagination of the future, a perfect blend of futurism and Soviet avant-garde. Futurism has always been inseparable from technology, so after researching, I expanded the scope of my project’s theme to include Cassette futurism, NASA Punk, and futurism.
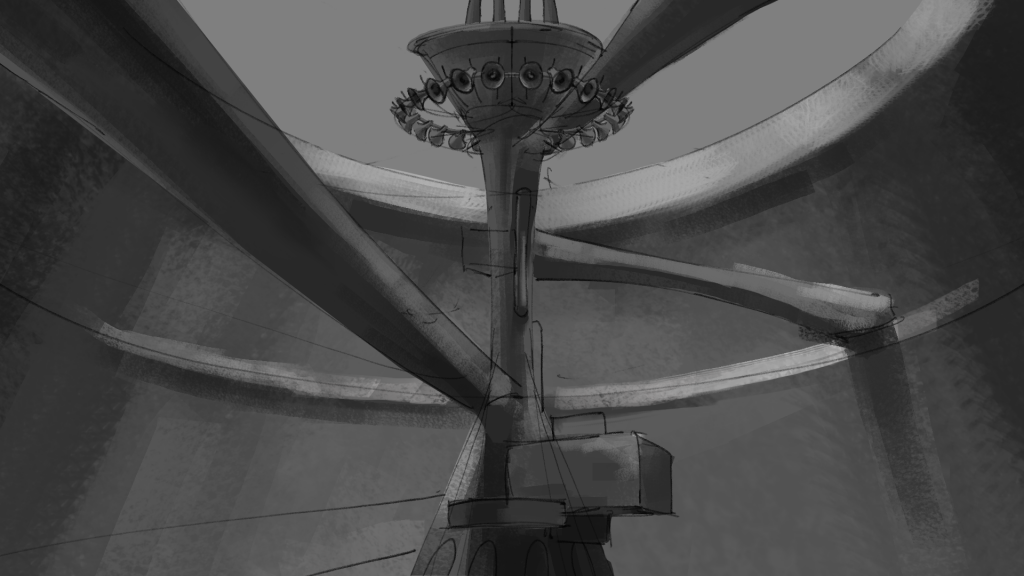
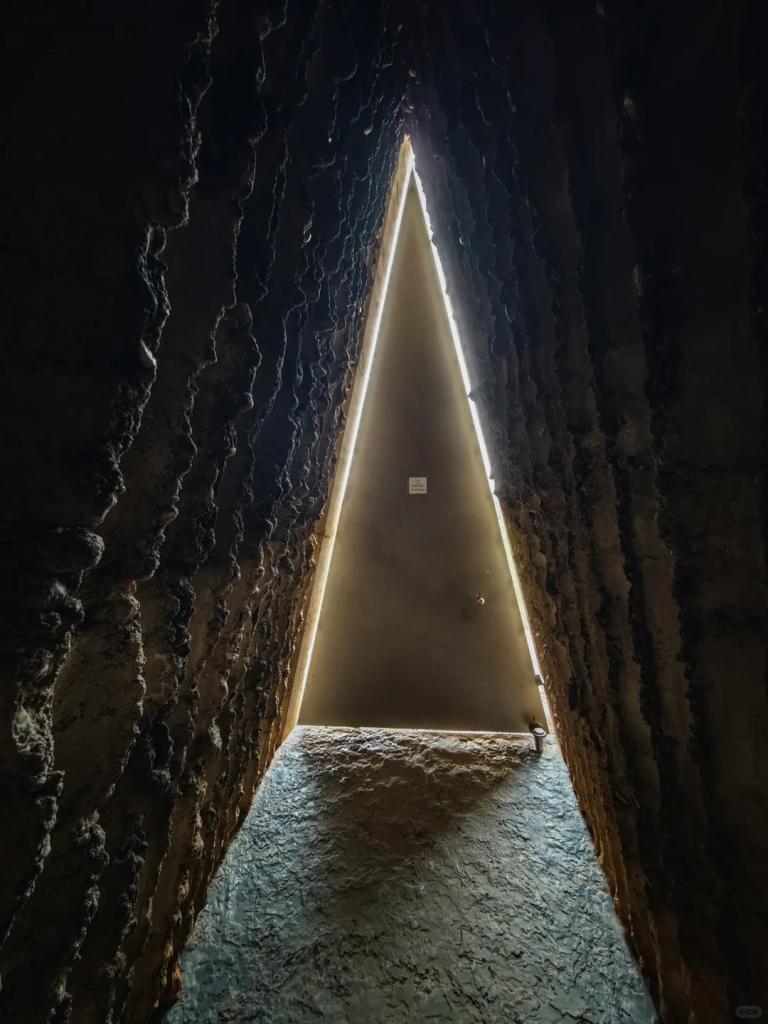
Panopticon Theory already has some widely circulated designs. As a prison, Panopticon is a building that already has a serious tone to it, and my vision for the design was to have a retro-technological feel to it, while enhancing its inescapable, pressure-following effect. Being inspired by those Soviet Union monuments and other artworks, I envisioned a vast uninhabited terrain, a watchtower rising into the sky, and a suspended circular prison. Cement is used as the building material for the largest area, emphasising the absence of human warmth here. As for the narrative aspect, the birds in the foreground and the deserted landscape of the ground emphasise the absolute loneliness and isolation of human beings here. It is this desolate, depressing, isolated and cold scene that I want to render, mixed with the eerie imagery of the future that people had during the war years of the last century.
Blocking
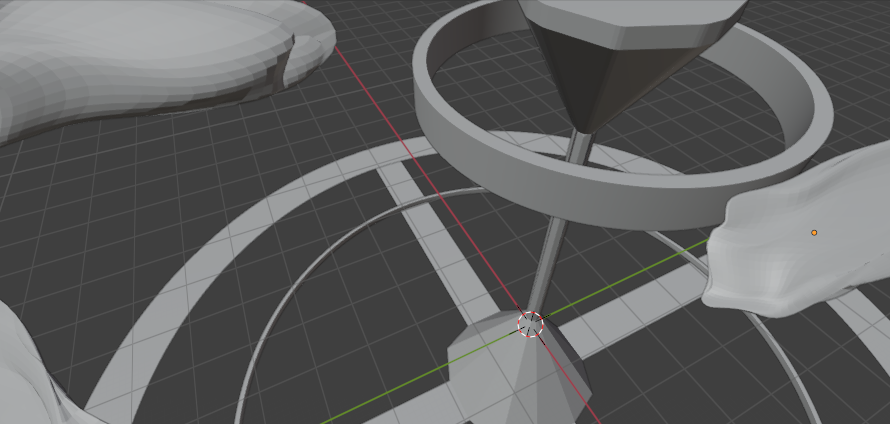
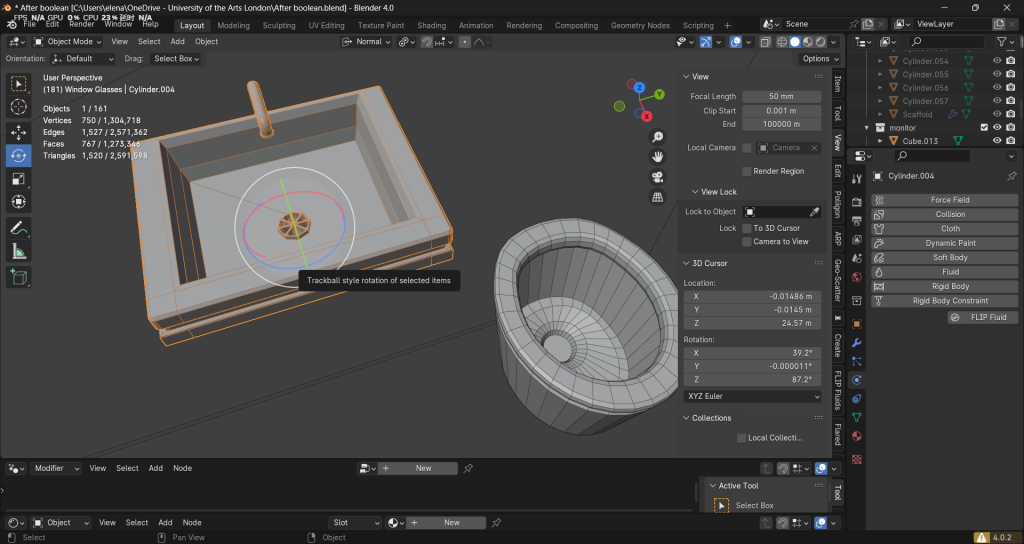
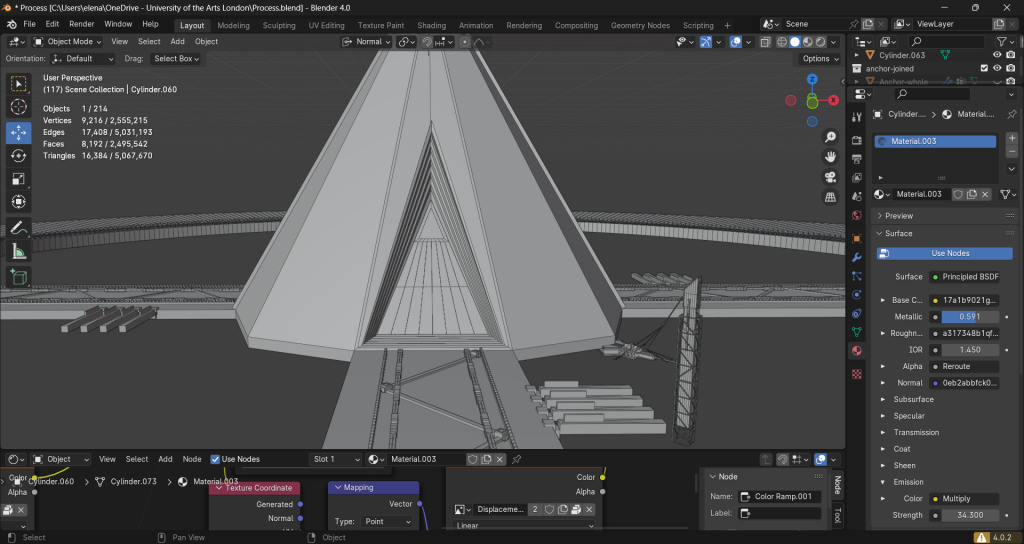
In this part I used some basic meshes to do the block out. I decided to put a cone shaped watchtower in the middle to create the sense of be watched from a higher place, by superiors. I made a mistake here. I made the cone by starting with a cube. I use the bevel to increase the number of edges and extrude the pole out. This decision caused a small problem after. It makes my wiring a mess. I should have done the cylinder first. So I remake this main part in the later process.

Modelling development process
Overall Process
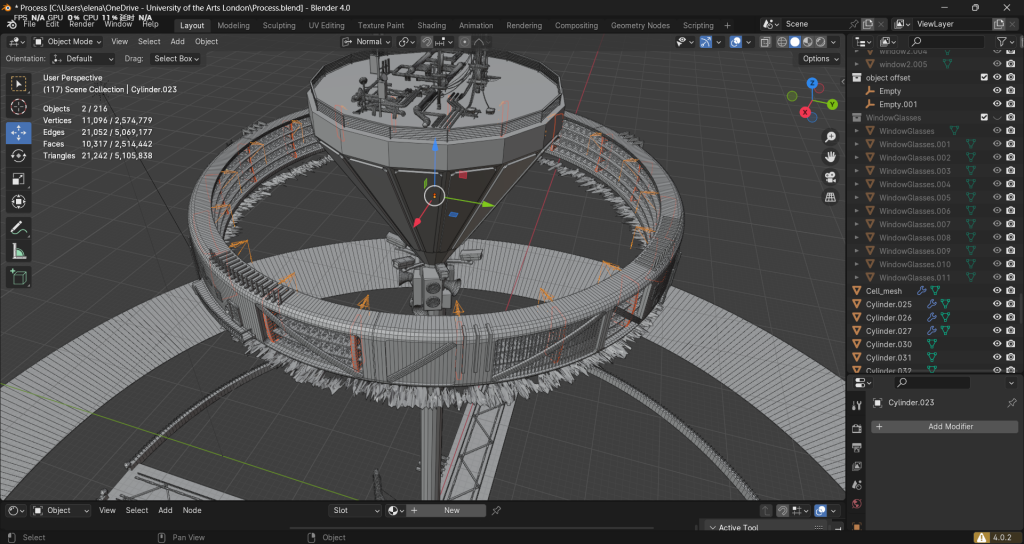
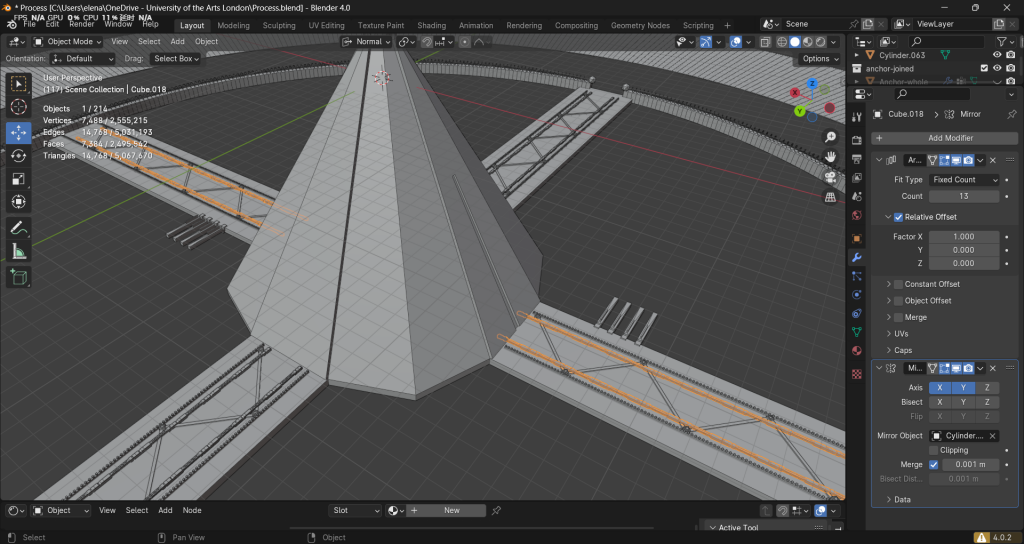
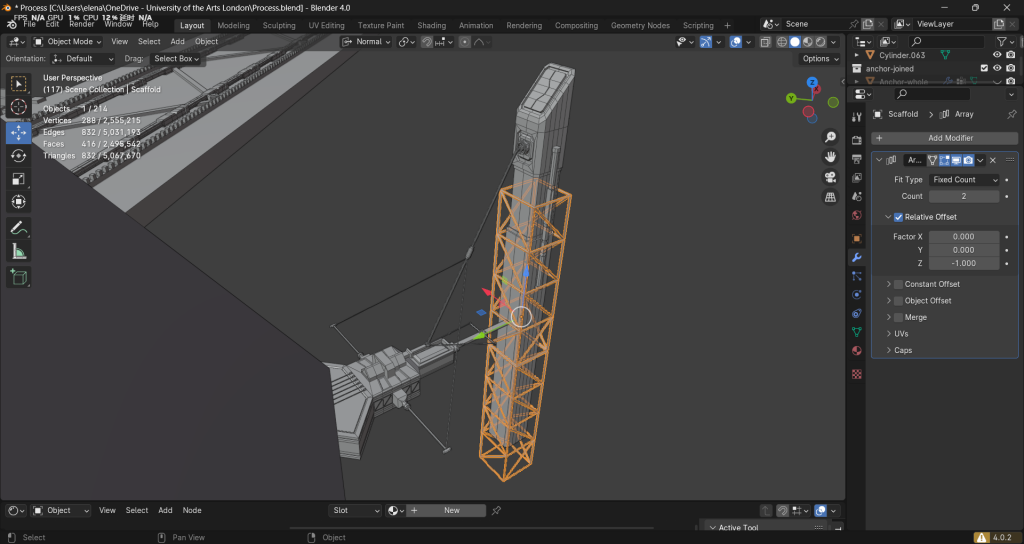
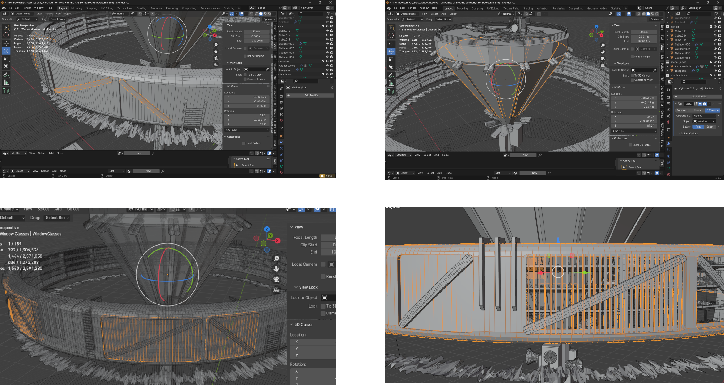
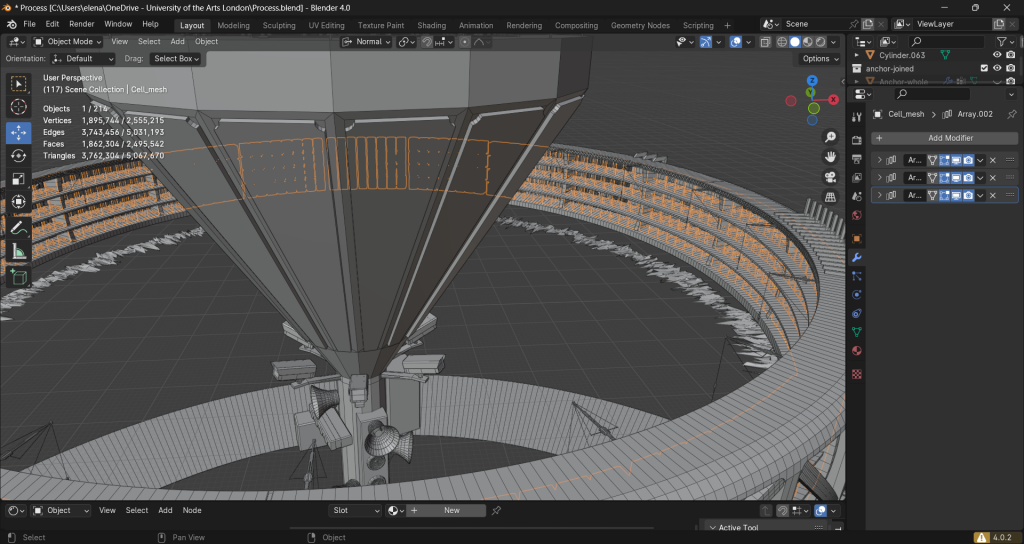
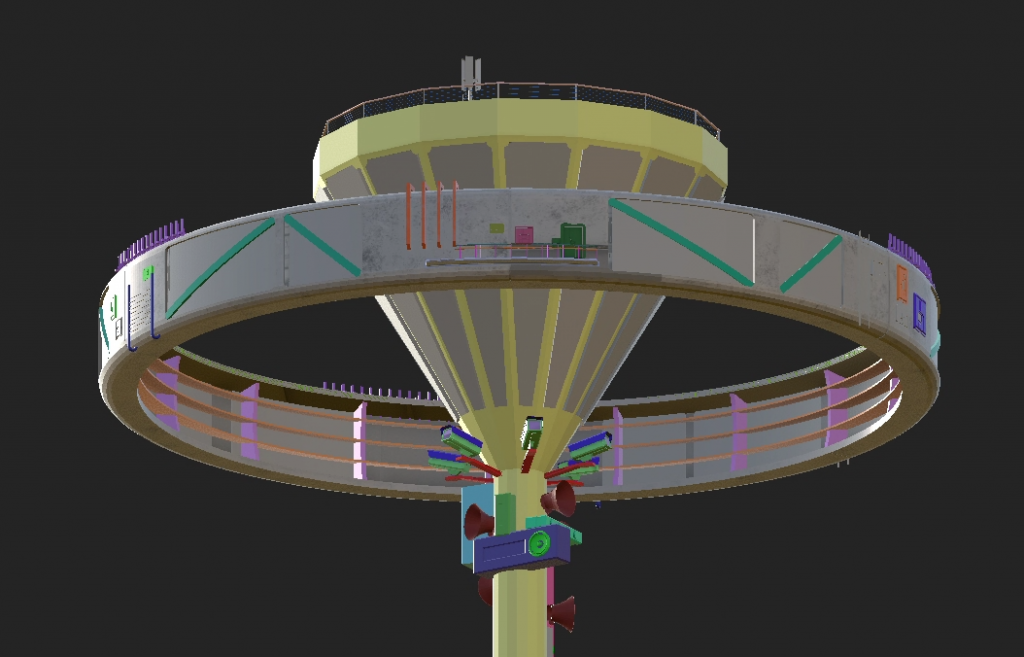
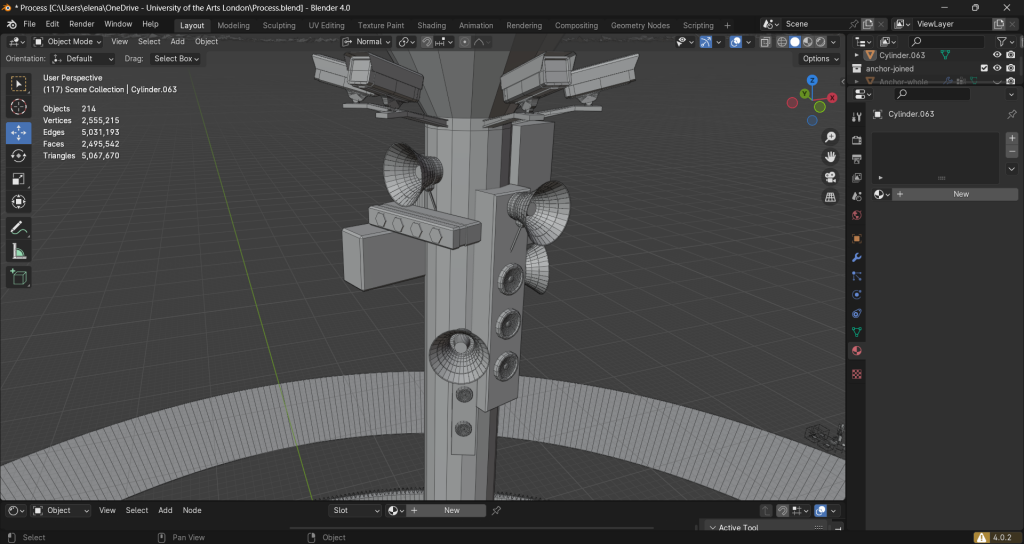
Watchtower: Gate, decorations on bridges(*n), speakers, monitors, cables, windows, antennae, pipes, guardrails, anchors
Prison Ring: concrete shell, cells, separating pillars, prison levels, windows, window pillars, ladders, panels, piers, airlocks, edge decorations, magnetic rings, magnetic calibrators
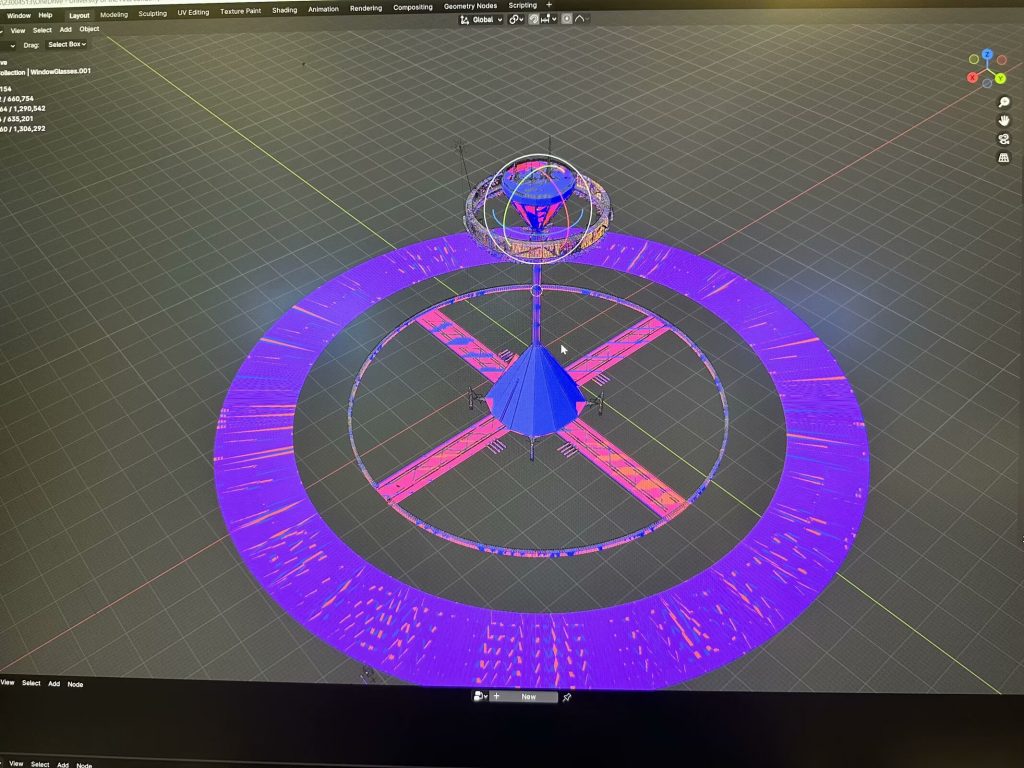
Outer rings: Enclosure, wire fence, sentry, factory loop base, factories(asset building), airship, ocean
As the theme I chose is Brutalism and Retro-Futurism, I try to find a balance between the concrete and those retro feeling technologies.
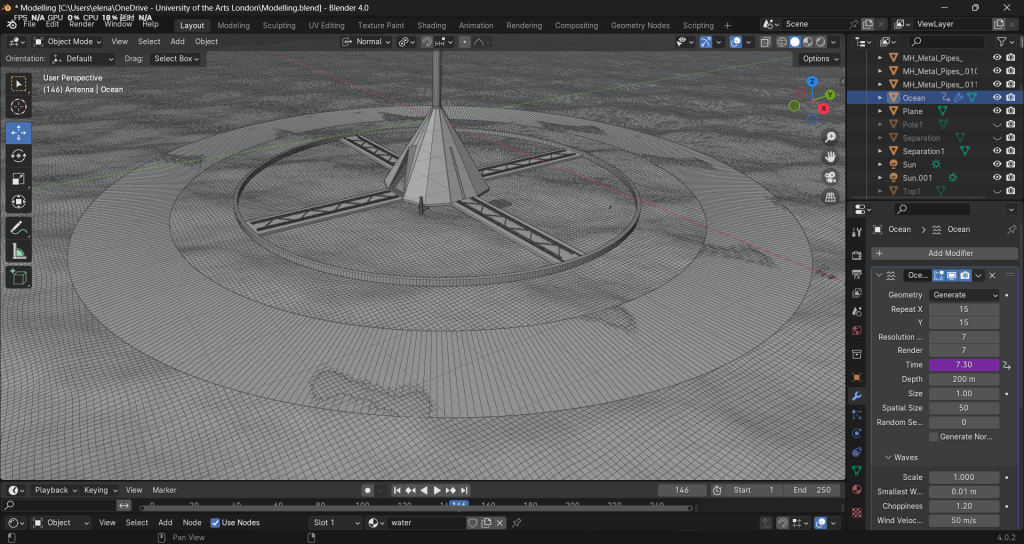
For the modelling, I choose to use Blender for modelling. The biggest reason is that I know there would be lots of replication in this project. And the Array modifier would make things much more efficient. Meanwhile, I know last year I didn’t try lots of interesting functions in Blender. I am interested in its programmatic nodes like the shader nodes and geometry nodes. I want to witness its power in this project.
Most of the modelling was no problem, but coming to the ring stage was a bit strange for me. This is because a toroidal array is not quite the same as a normal linear array. I tried a few things on my own, such as adding an empty object as a parent after converting the object to an instance, and then the array rotates that parent. But this method is more troublesome. I then looked for some tutorials and asked my classmates, Andy said you can use the object offset inside the Array modifier to replace the original attribute, so that after creating a new empty object and then rotating it by a certain angle, all the objects in the array will rotate with the same angle difference, this suggestion really helped me a lot.
The tube structure also makes my object pivot a mess. Sometimes I tried the global or local position but they are all not what I want.
Pivot Solution
But finally I found that I can customise my object gizmo in the transform orientations panel, so that all of the objects that aligned to the normal of the tube will not be in wrong position.

Visual Development
I decided to change land into ocean. This makes the prison more isolated from human society. And also I choose to change the city below into factories, which makes the setting more reasonable. Prisoners are not just be caged. Now they are also forced to make some contribution to the society.
I used the frame driver to create the animation for the ocean. The time driver property is #frame/7, so the speed is not very fast.
Building assets
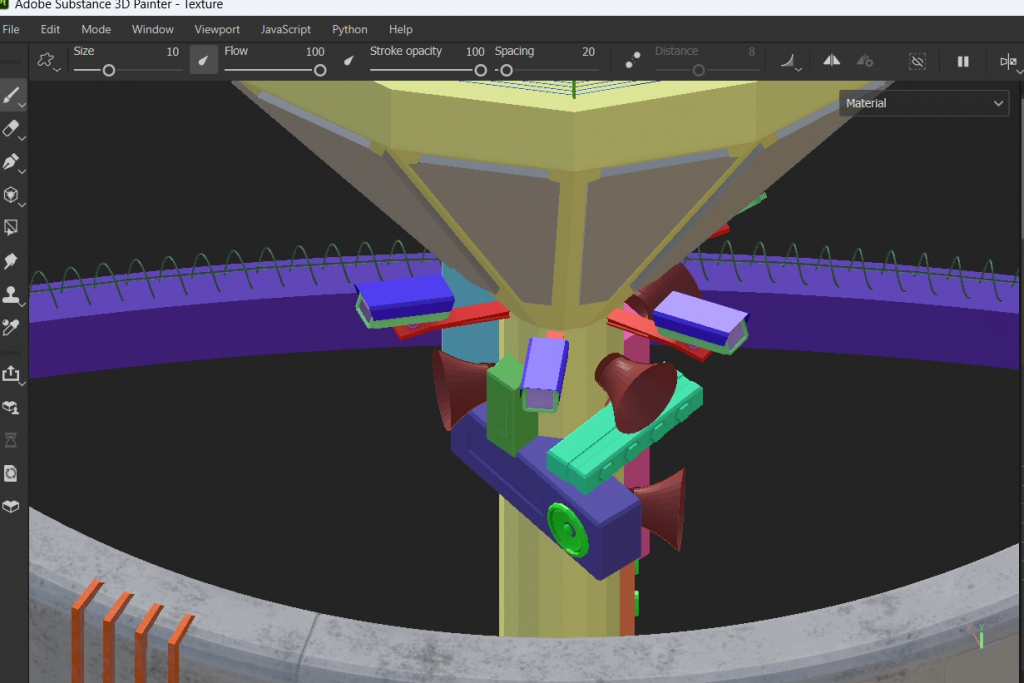
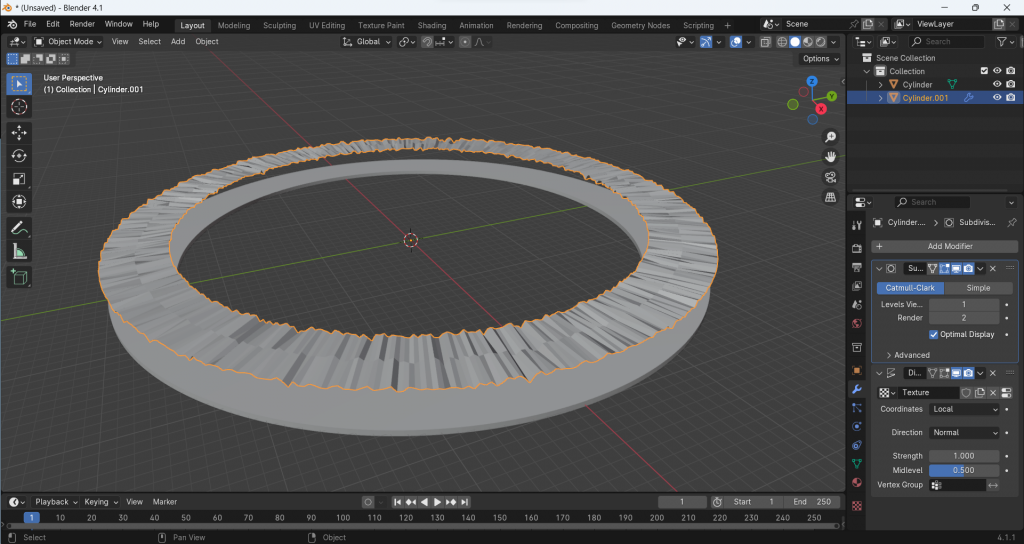
I started with building some small assets. For example the cell, the monitor, and the antennae. I use the cloth in physic simulation to create the pillow.
First build a cube. Then give it subdivision. Add cloth simulation. set the pressure to 4, vertex mass is 0.3kg, tension 15, gravity 0.02. press space to bake. Finally convert it into static mesh.

These objects in the cells are basic meshes. I used the Bevel and Extrude to make t

As I need to array the cells into the loop, I started to test different ways of doing that.
- I turned the whole cell into instance. And create an empty object as its parent. Then use the Array modifier to array the empty. But I found it is hard to use its original relative offset to make it into a circle.
- I learned this from my classmate. First create an empty object. Then turn it into the angle you want. Click on the object you want to array and add an array modifier, choose the object offset and make the target “empty”. So this object will array in the angle you turned for the empty object. I used this hack on the separation pillars and the magnetic calibrators as well.
Before learning that, I do some of the decorations manually. I selected the faces on the ring and then duplicate, separate them. Then use the extrude and Normal transform orientation to make them. It takes much more time.
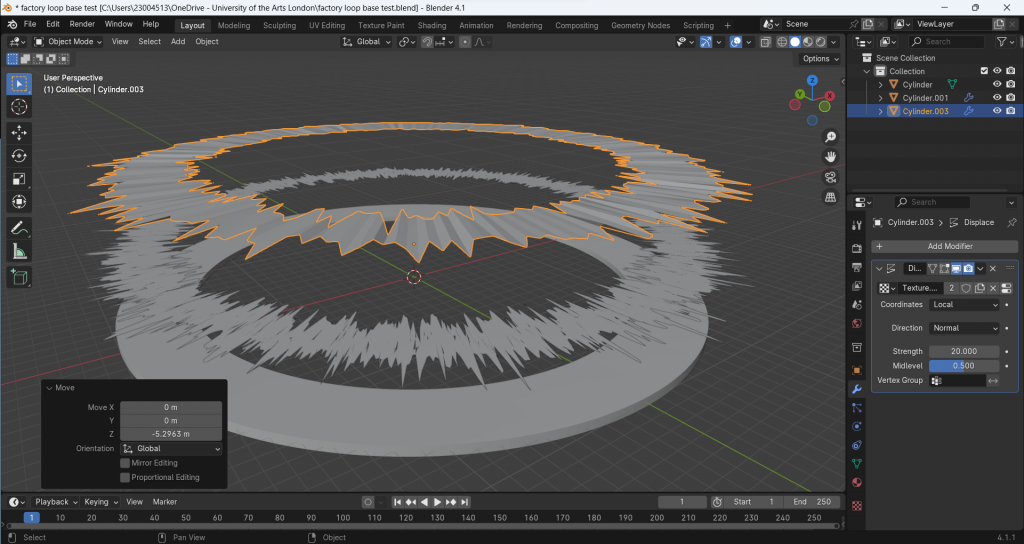
Magnetic Loop/Factory base
I made these different effect rings in the practice I did before. So I make some changes to it and put it into this project as a magnetic loop. I want it to look like a halo.
I
Ground Details
I build some details on the ground. I used the Array and Mirror modifier to increase the detail and make symmetric distribution
Anchor
Regard of this prison is offshore, I get inspired from offshore drilling platform. I wanted to make anchor for this building.
This shell is made from a cube. First I create the cube and array it to the number I want. Then go to edit mode and use triangulate face. Then Ctrl+F and use the wireframe. Then use alt+s to adjust the size of each edge.
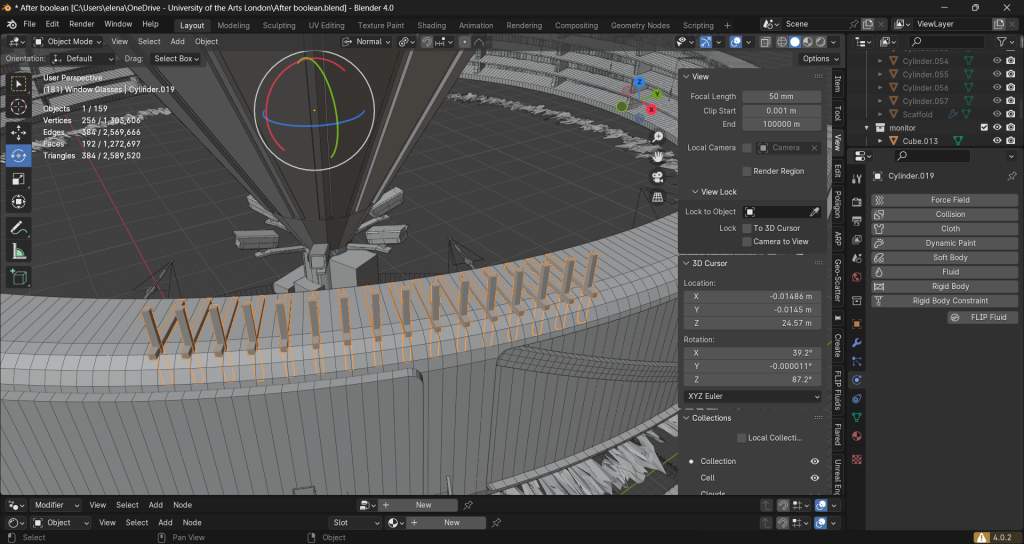
Windows and Pillars
I start this process by duplicating the faces. I choose the face I want the windows or pillars should be snapped on and duplicate them in the edit mode and separate them. Now I will use the extrude tool on the separated faces to give it thickness. They will have the exact normal as the original object.
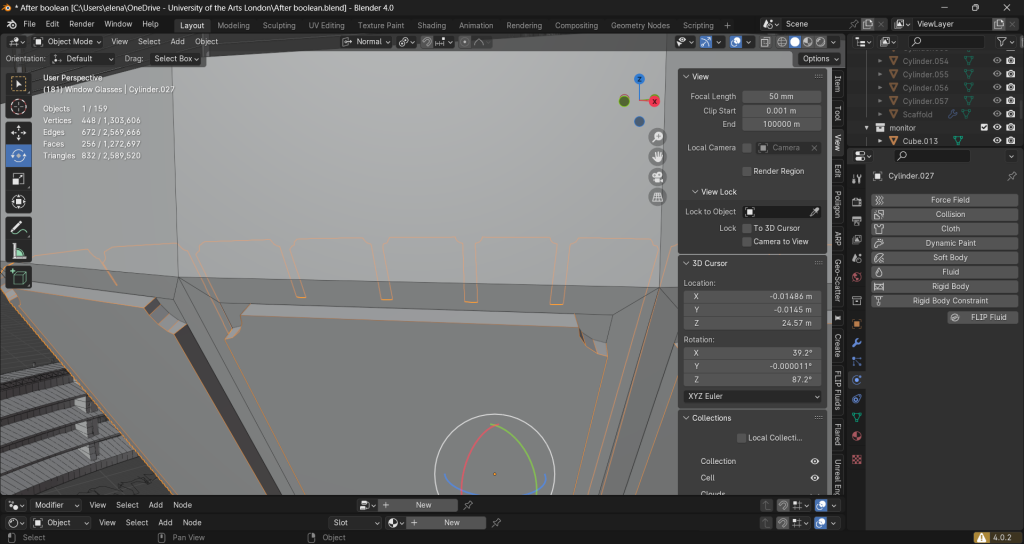
These curved surface indeed brought me lots of challenges. In my expectations, I would like the windows and the poles fit the surface curves. Since I duplicated the faces directely from the cylinder, they always have different normals. So it’s hard to do transforms while not messing them up. The biggest challenge is the pole. I tried to use the cut tool to add new lines on the surface and extrude them. But they are always not quite straight, or the lines I cut would not be on the exact surface I want. As I want them to have same curves, it reminds me of the shrinkwrap modifier. I added a plane and use the shrinkwrap but it faied. Then I added 1 level of subdivision and put shrinkwrap under that, and it successfully wrapped onto the cylinder and allowed me to extrude the thickness of pillars.
For the windows on the watchtower, I want to make a quarter circle cut corner. So I create one cylinder and use the cursor to make them snap into the same normal as the edge of each glass. Then I use the boolean modifier to cut these corners.
Another problem i met is that Boolean caused some holes on the wall. It leads to my window can’t work normally and the glasses cannot do a perfect hole in the next boolean. So I filled the holes by using the Bridge edge loops tool. After that I made the window glasses thicker and the boolean could work normally.
I set the windows’ center into the center of the loop, which has the same Z axis position as the world normal. Then use the duplicate to make all the windows, so that they will have the same depth on the wall and have the same origin. This makes it easier to edit everyone later.
Ladder
This wider ladder have a hook design at the bottom. I used the spin tool to build one side and use the mirror (target is the cross bar) to make the other side.
Cells
I used 3 array modifiers to do the distribution.
- array them into the length between each pillars
- Use the object offset to array them into a ring and gap between them is one pillar’s width
- array them into four levels
Door
The base of the bottom is similar to a cone. So I struggled about its shape. I want to make the gate big to show its grand. I get inspiration from the Bruder-Klaus-Feldkapelle and the classical gothic perspective door.
Fix Normal Orientations
Most of them are good. Those seem to have big problems are caused by the thickness is too thin. One day one of my classmates asked me to check the normal. Once I increase its height, the problems are solved. So next time I won’t make too thin objects because this may cause errors. I should thank him for making me develop this habit of checking normals.
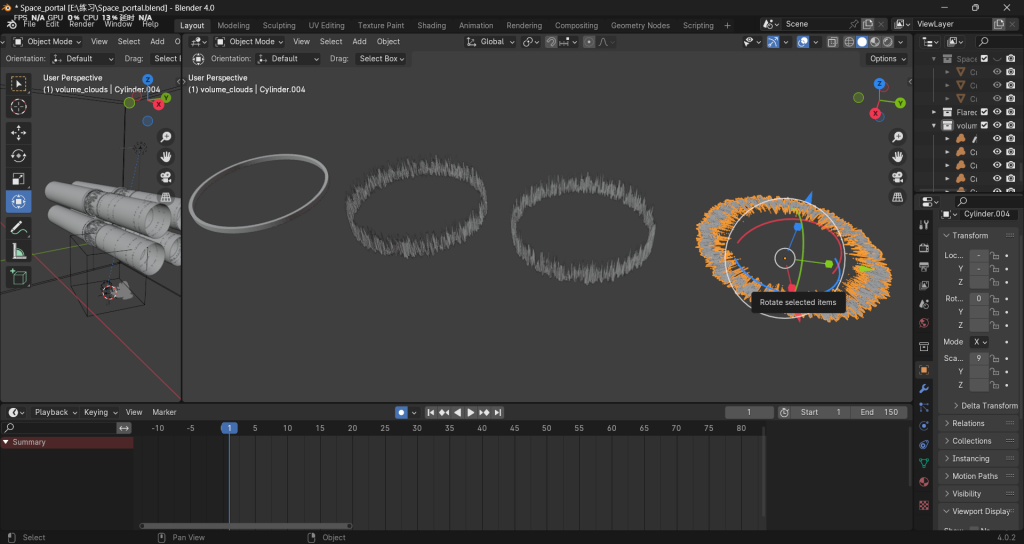
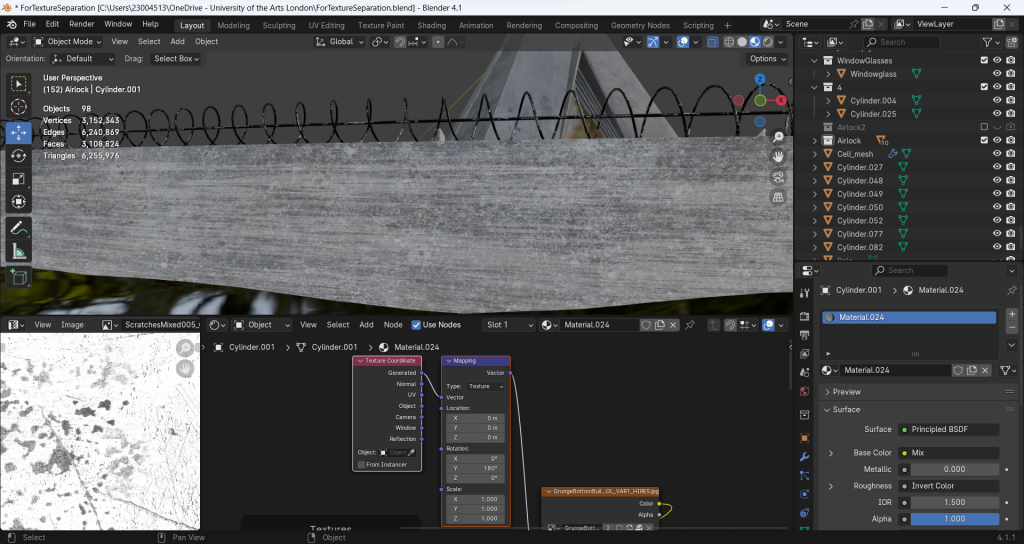
Wire fence
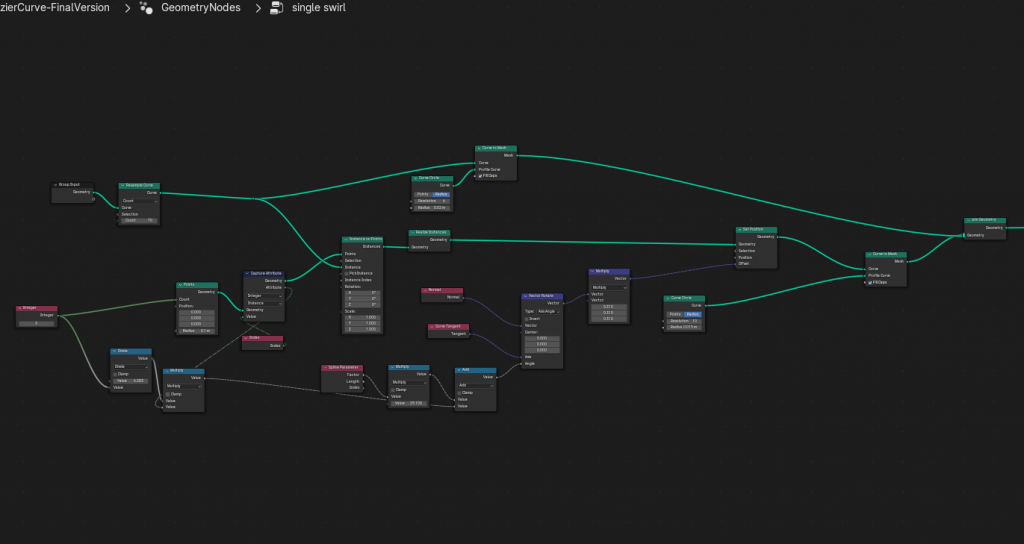
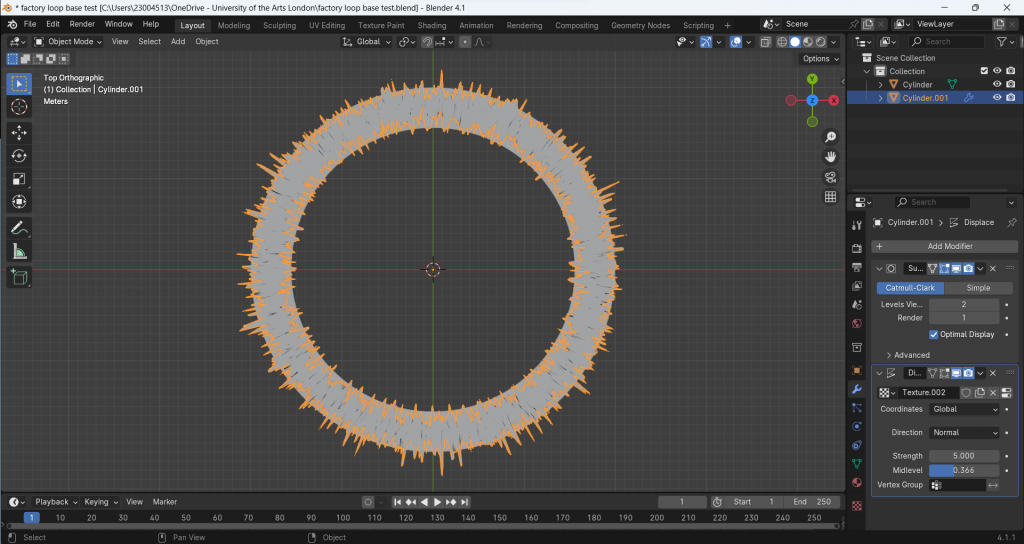
As it is a prison, it should have wire fence and enclosures. First I tried to make one section of the fence and array them into a circle. But I found it is hard to make them all link together. Regard of its connecting swirl structure, I started to think of using geometry nods as its powerful in making these programmatic things. I followed a tutorial for spiral growth effect and changed some of the nodes to make it looks more like a wire fence. All parts of it are adjustable so it can fit lots of situations. It’s so flexible and can have thousands of different use. I think this is why geometry nodes are charming to me. It is a new experience of explorating the use of geometry nodes. I learned from tutorial and try to make it innovative. Although it might not be a very complexed work, it makes me learn the basic logic of geometry nodes which I’ve benefited from it.
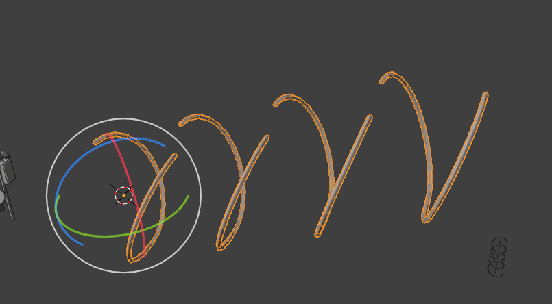

Geometry nodes
I only make one section and use the array to make it into a ring.
All attributes are adjustable. It could be further developed into those swirl, growing cool effects.
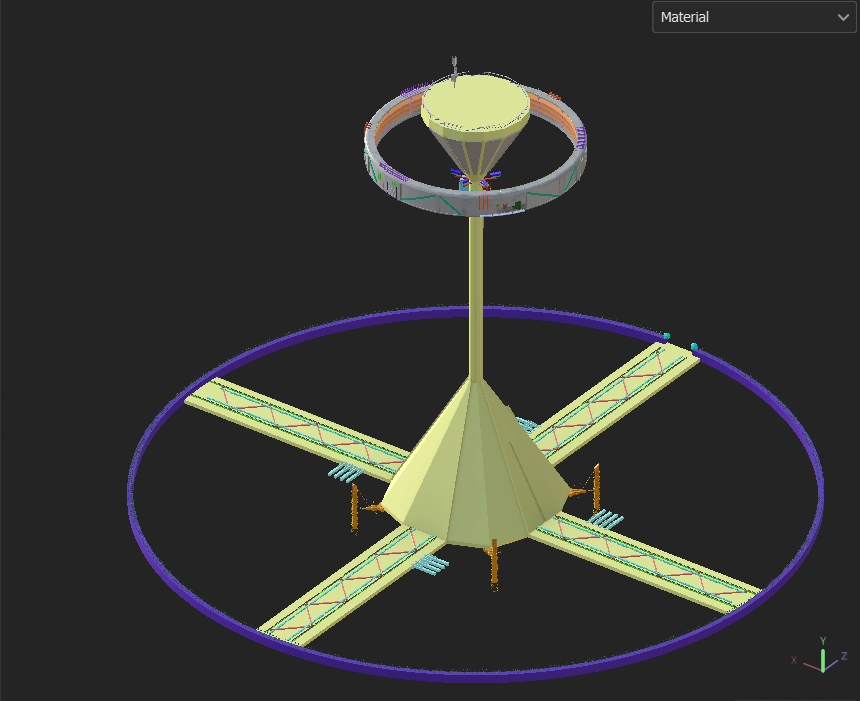
Modelling outcome
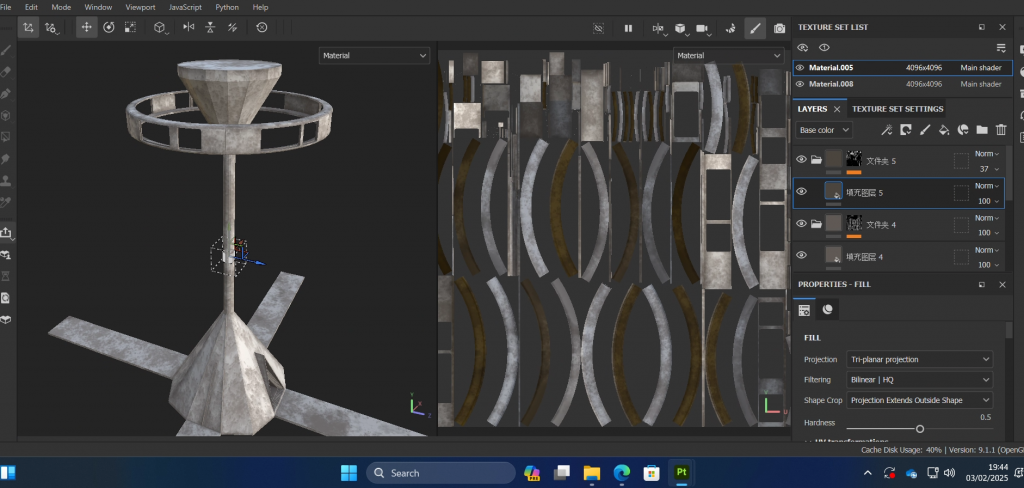
UV
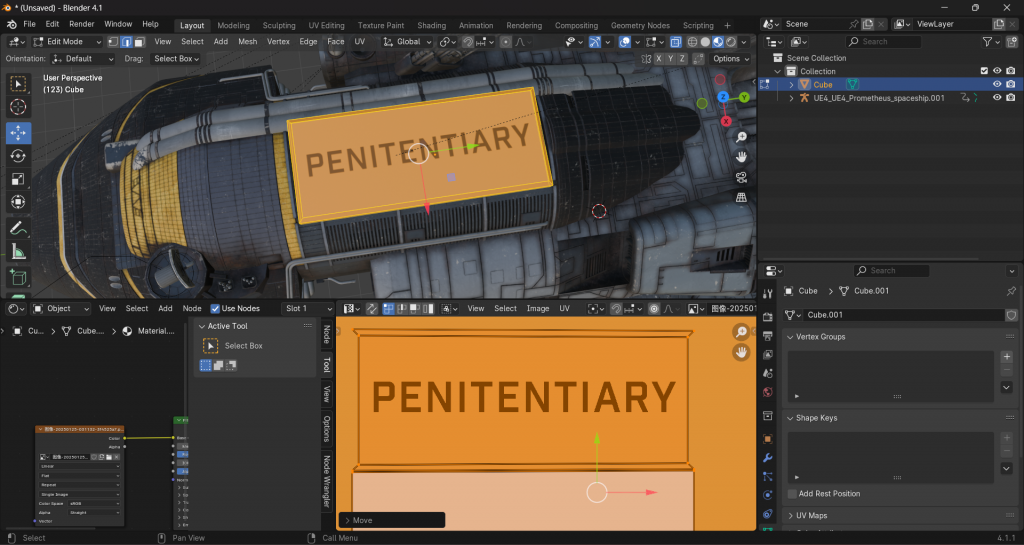
First, I automatically unwrap the UV for all of them. Then give every mesh different texture as a ID material. Then export all of them except for the ocean into Substance painter and change their color in order to let myself be able to recognise them. But I found this process is useless, because I am not familiar to SP material making work flow and I might only use it to do the material for the main body. Next time I will first decide which part I should do in other softwares so that I won’t waste my time.
In the process of unwrap UV, I learned a lot. Before this project, I think all I need to do is to click the auto unwrap to create a UV for the mesh. I was unwrapping uv map for all of the objects before doing the materials. I unwraped the uv for the prison loop and I put it into Substance painter to try its effect, but I found it is very unclear even when I turned the resolution into 8k.
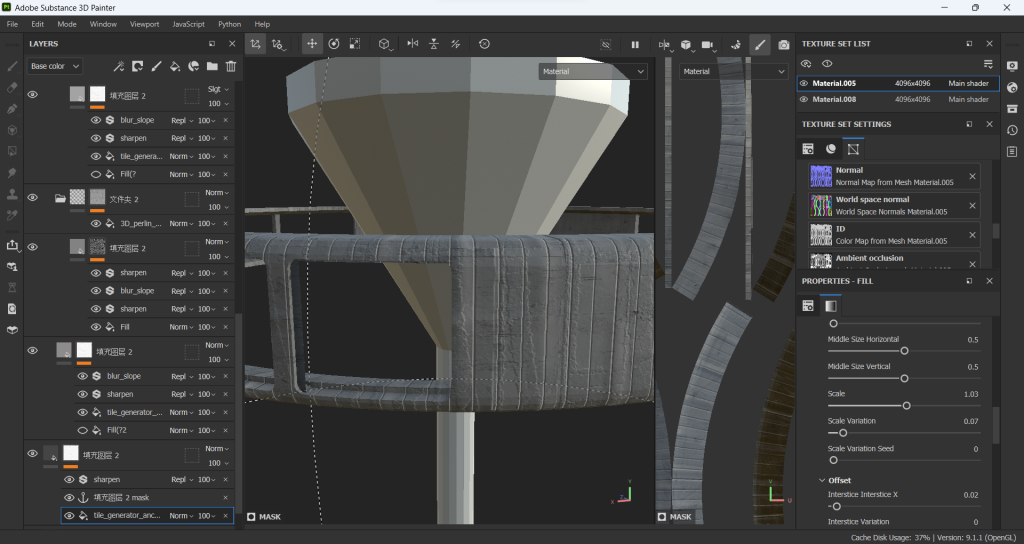
So I went to ask the teacher, and he said the problem was caused by my uv map. This is the time I find out why we need to use the space of the quadrant in a high proportion. Thus I went back to blender and cut those large objects like the tower and the ring by using adding seams. The uv of them will be separated into smaller pieces and take up most of the spaces in the quadrant. And I found sometimes I need to use the uv texture coordinate to reach the effect I want. For example, the windows on the watch tower, I want the rectangle grids on the windows to be perpendicular to the floor, in which case it’s default unwrap will always be skewed.
So I went ahead and manually selected the face it faces outwards and unwrap it again. For these small panels, I want certain parts to use the HUD texture, so I manually adjust its uv to make it bigger in the quadrant.
I tested for four times in this process. I cut and unwrap the uv 4 times to get the resolution I want. First I do the UV unawrap in blender, then export them as fbx file, then import into SP to try if they match my expectation.
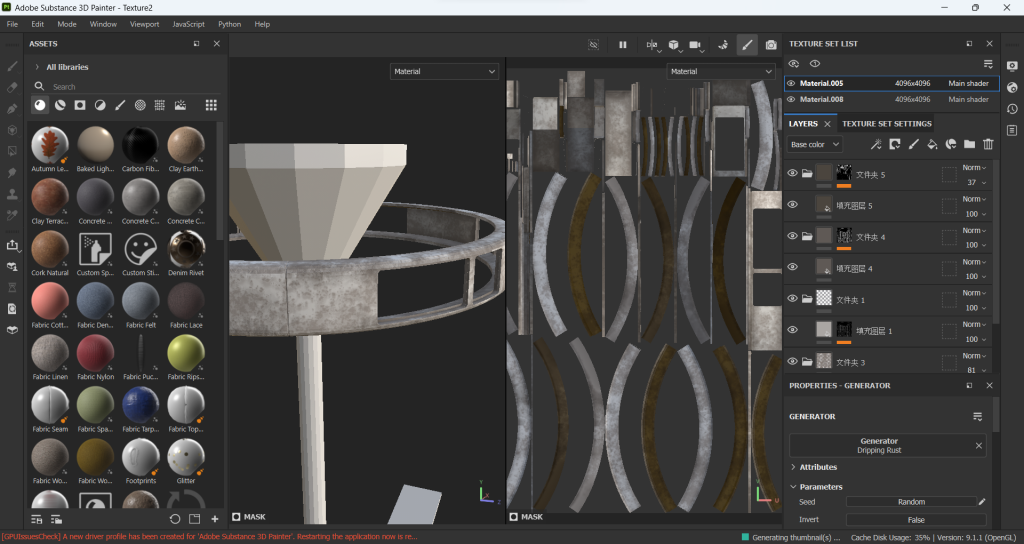
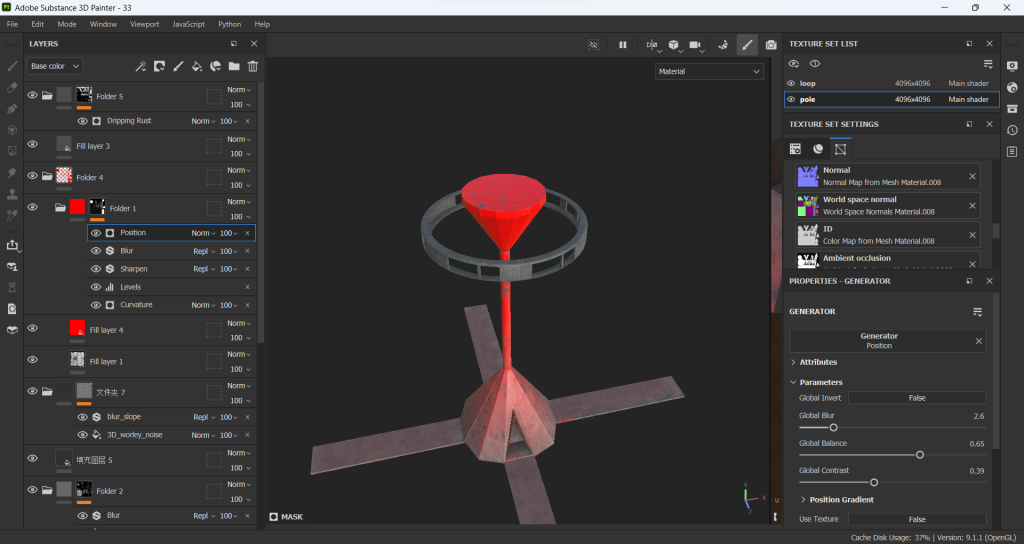
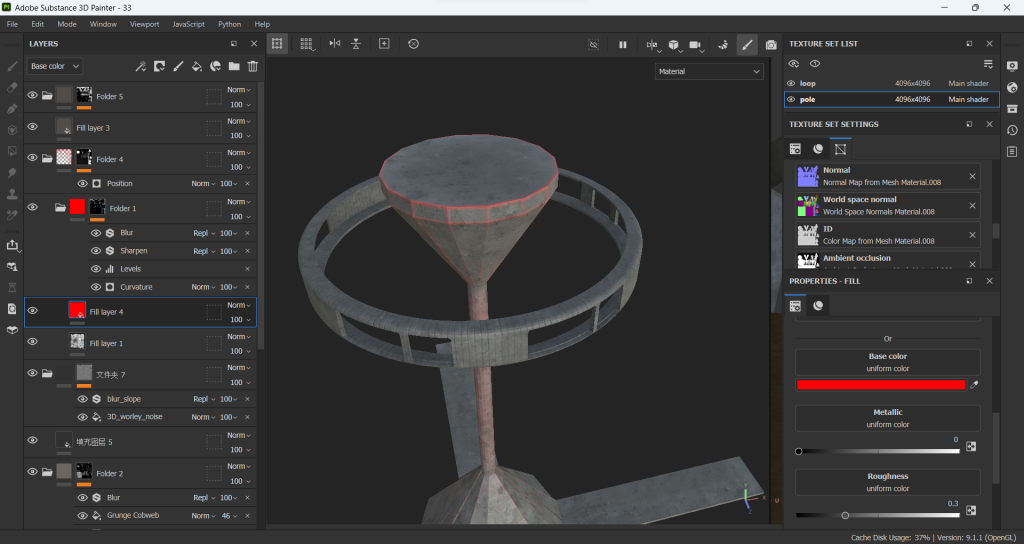
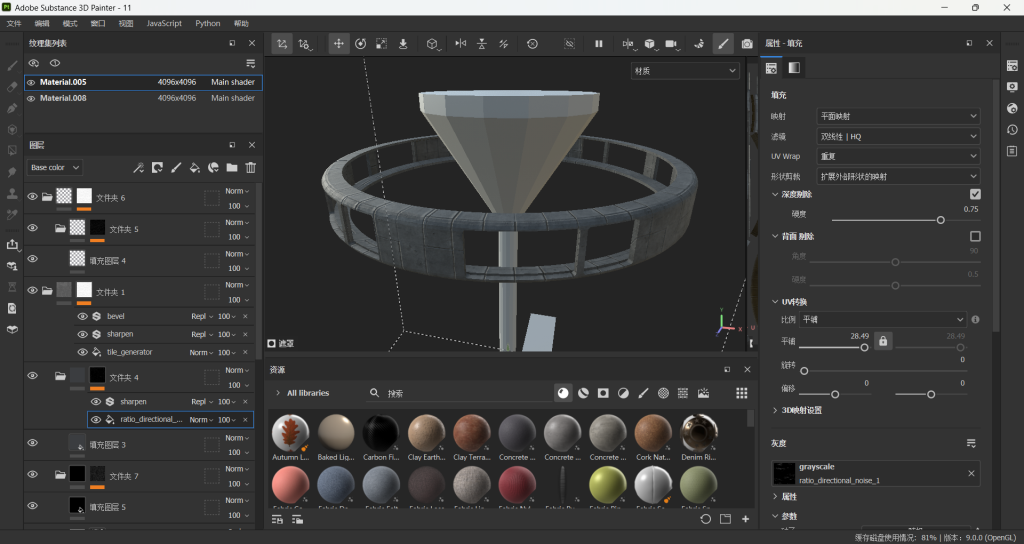
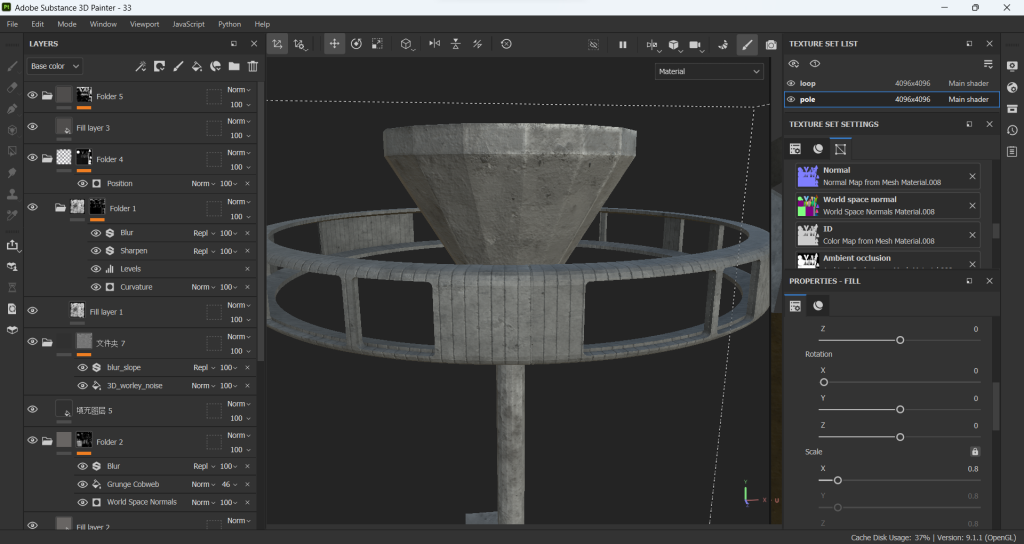
Substance Painter
I am not quite familiar with Substance Painter, I could say this is the first time I use the SP.
I tried things I learned in class first. But I think what I’ve done didn’t meet my expectations. So I went to ask my teacher. And learn more about its base logic and functions. I tried lots of generators. I turned the color of filled layers into a bright color to test each generator’s effect.
The most common workflow in this project is create a folder, put a filled layer in it, then add a black mask to the folder. The generators will be placed on this mask.
One thing confused me a lot is the fill layer. Because there is a fill layer in the normal layer, meanwhile you can also add a fill layer to the mask. So im always confused which one is my teacher talking about.
Before I cut the UV to change its proportion in blender, I told my teacher that my texture is not clear. He also taught me to try different mapping. Use the tri-planar mapping to replace the default flat one, so that you can change the size of mapping in the properties. This allows me to increase the details on the texture, but also would lead to obvious replications on it if don’t tweak carefully.
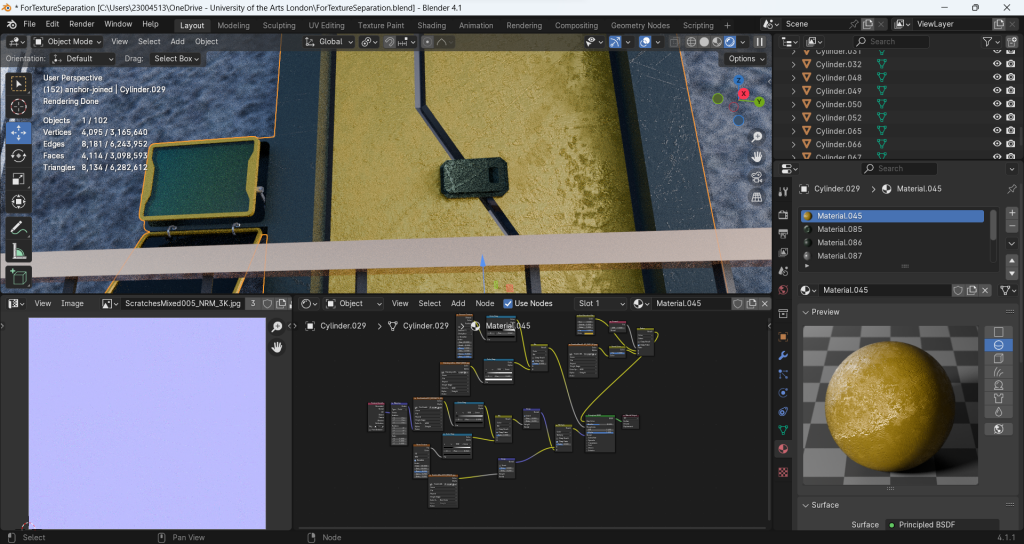
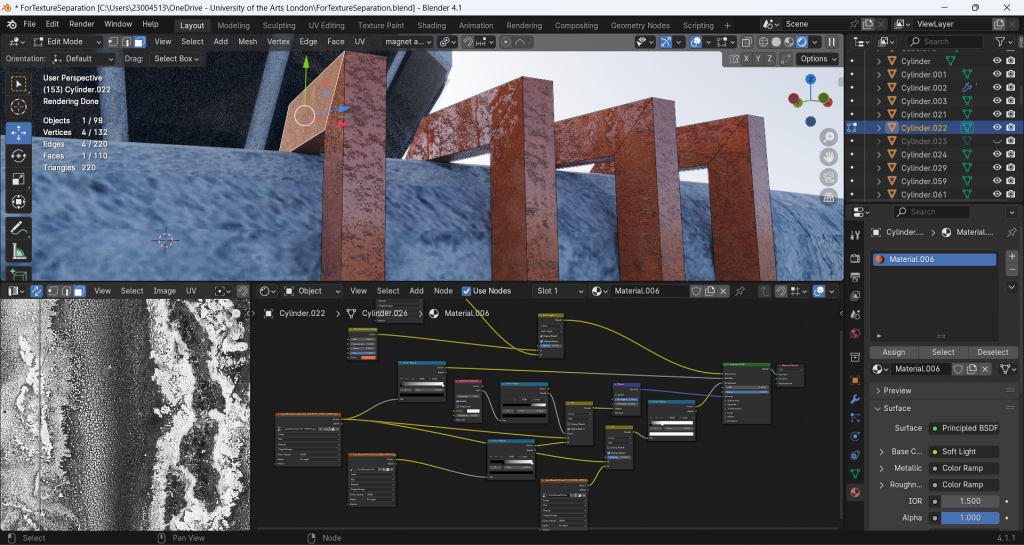
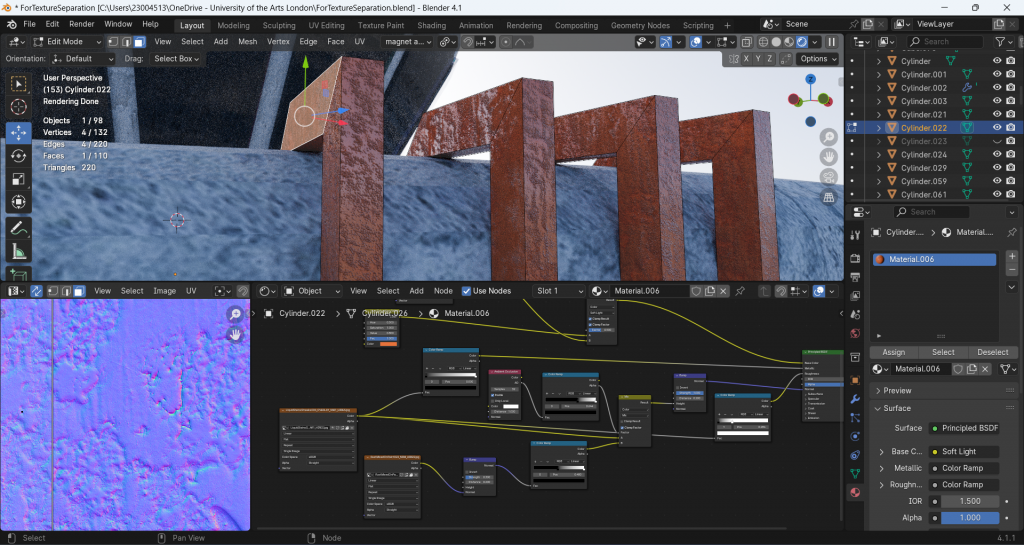
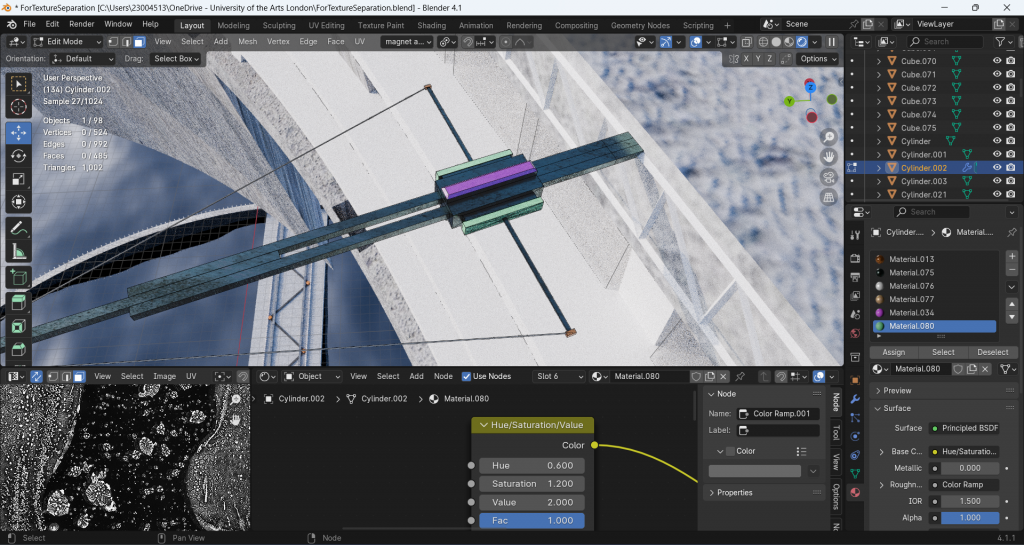
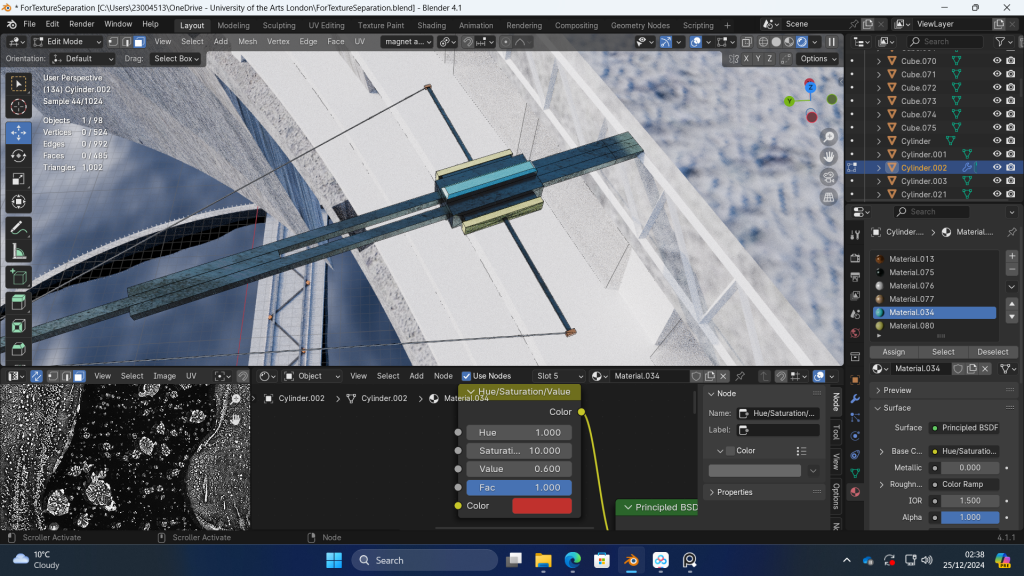
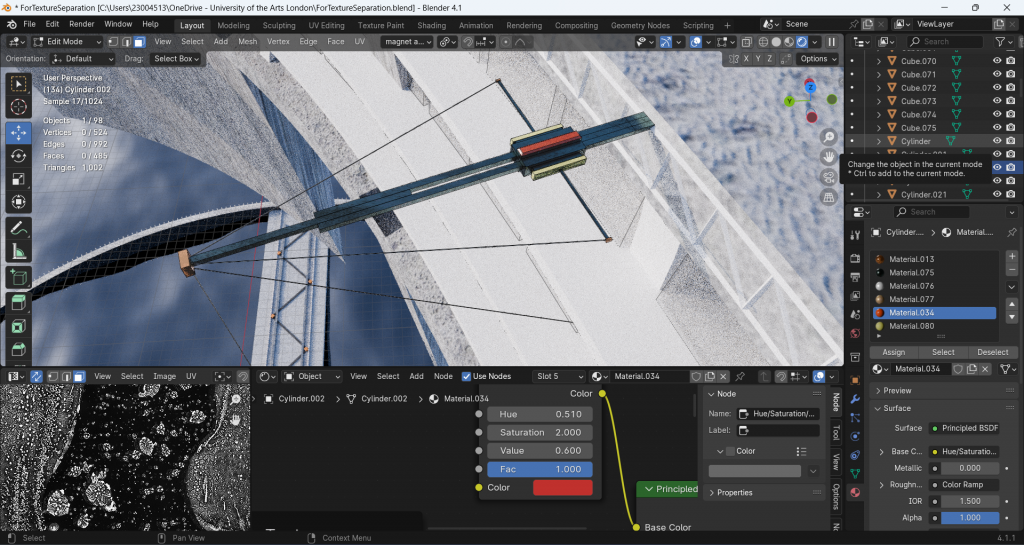
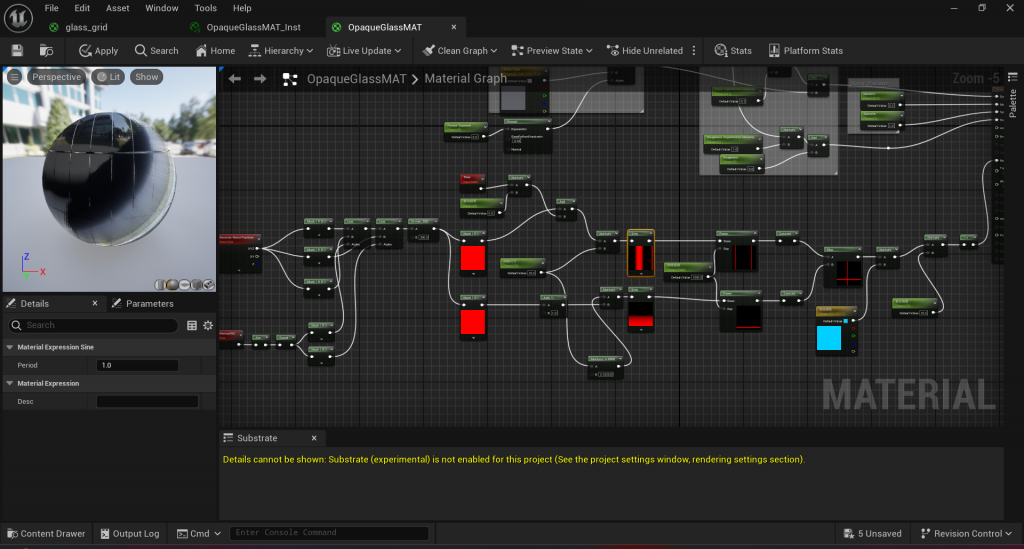
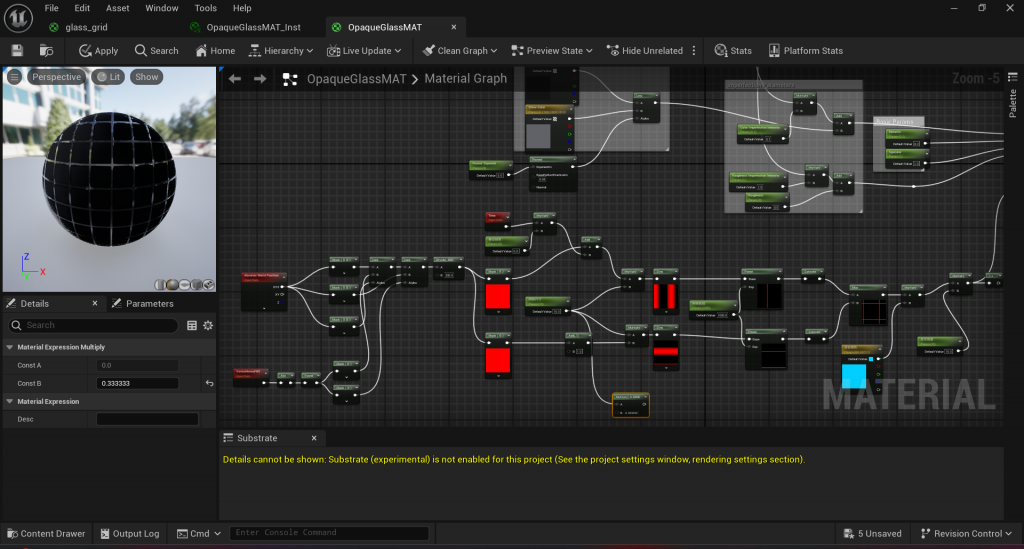
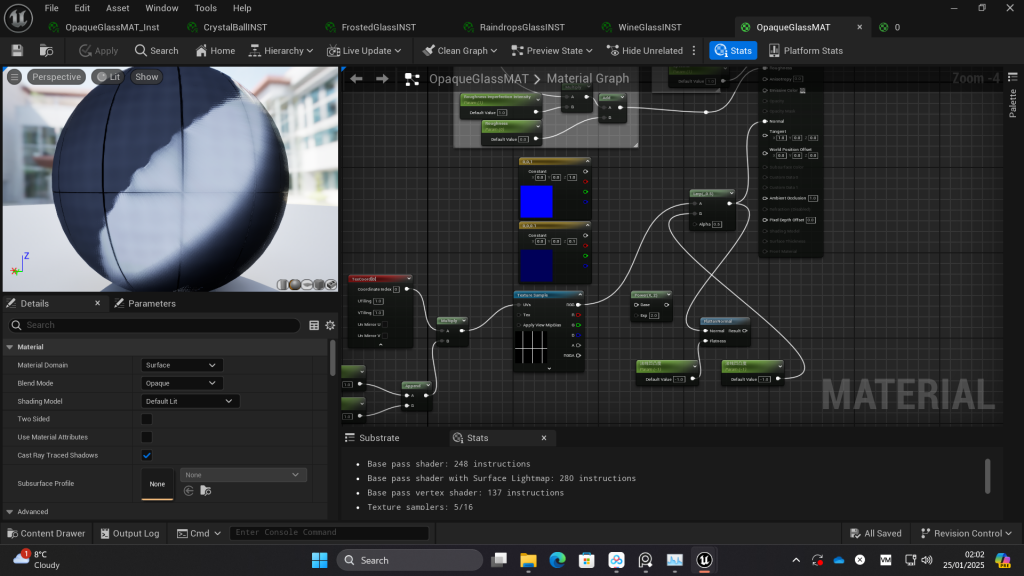
Blender Shader node
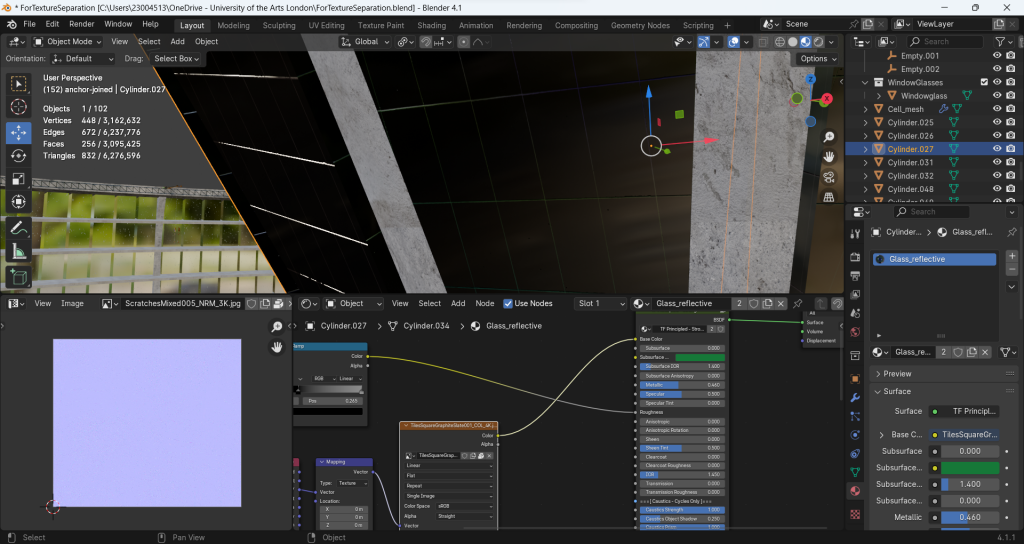
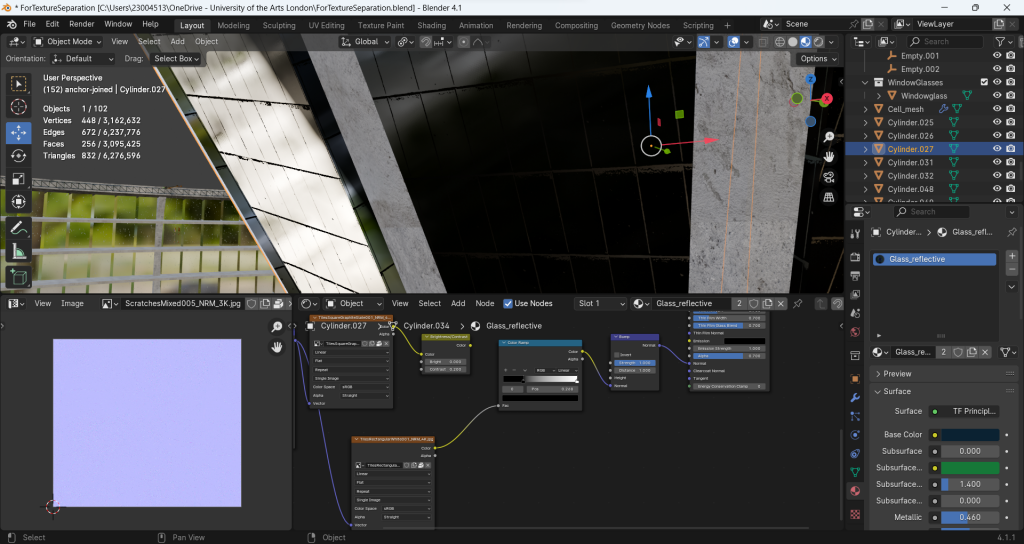
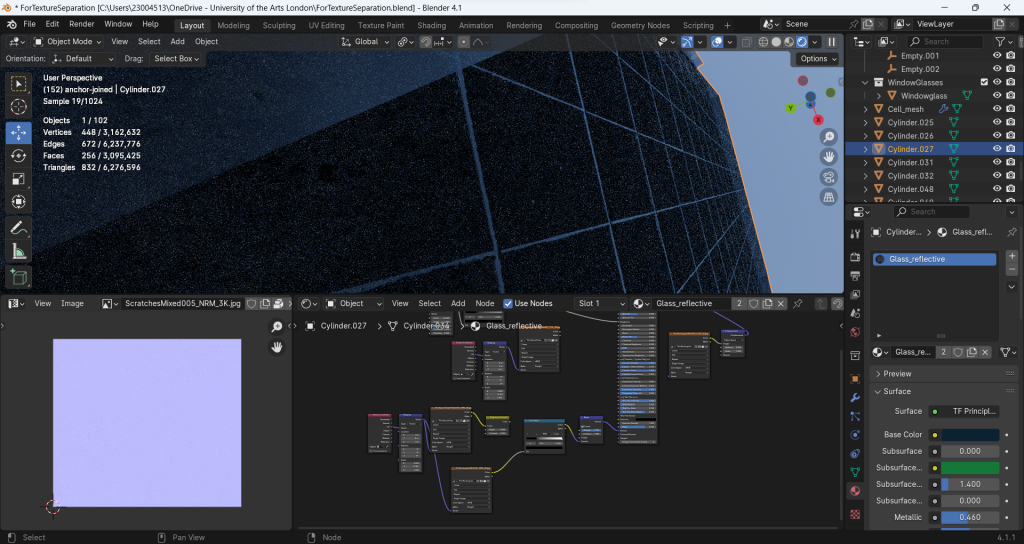
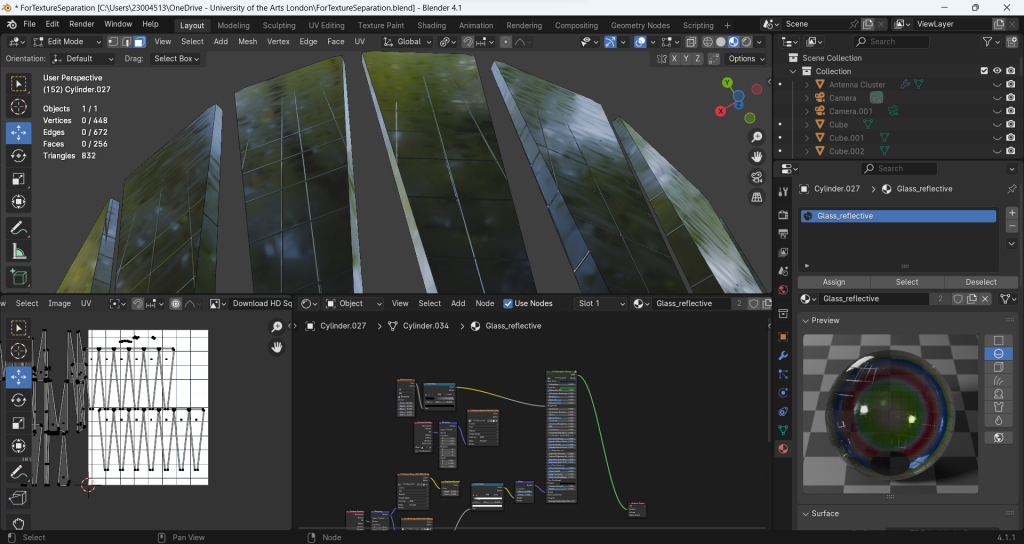
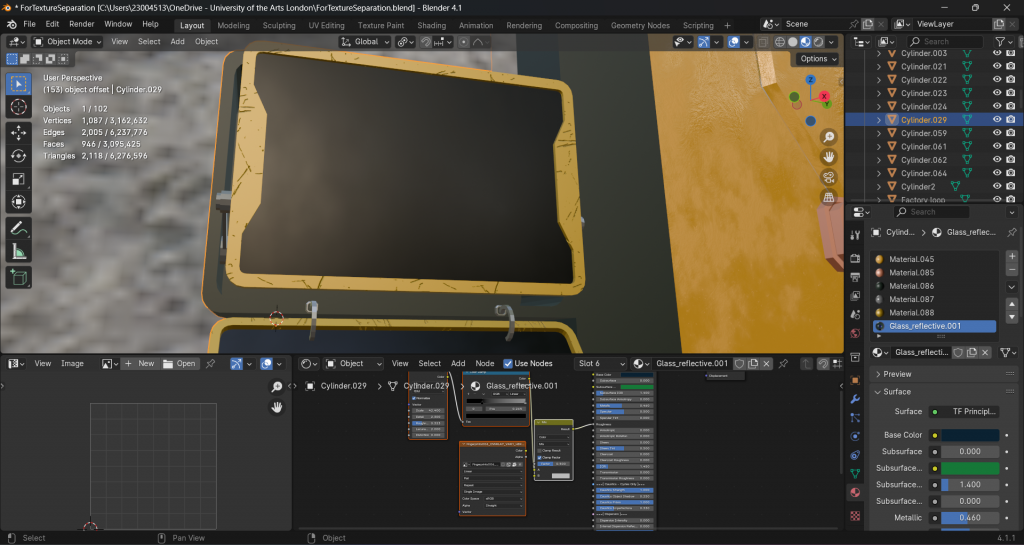
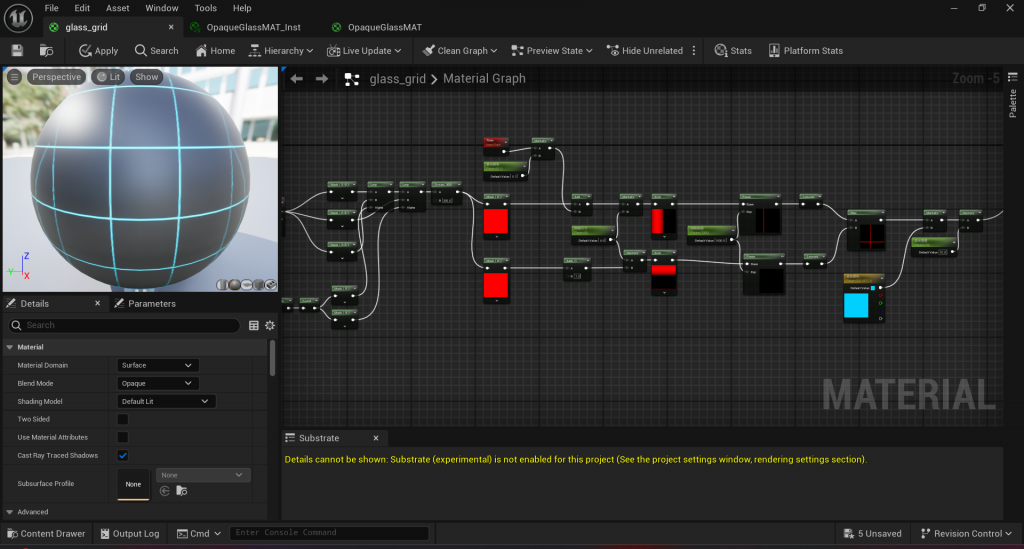
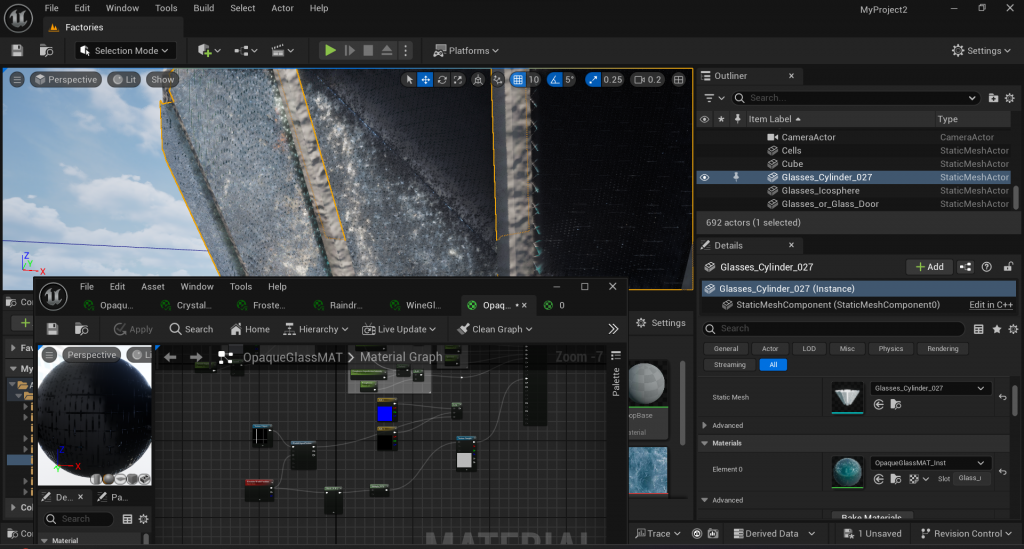
glass
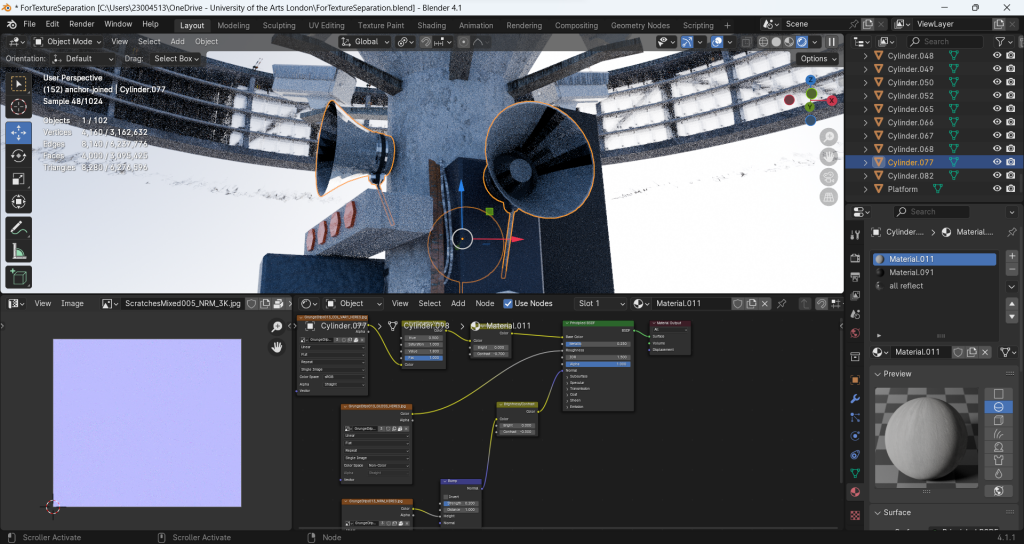
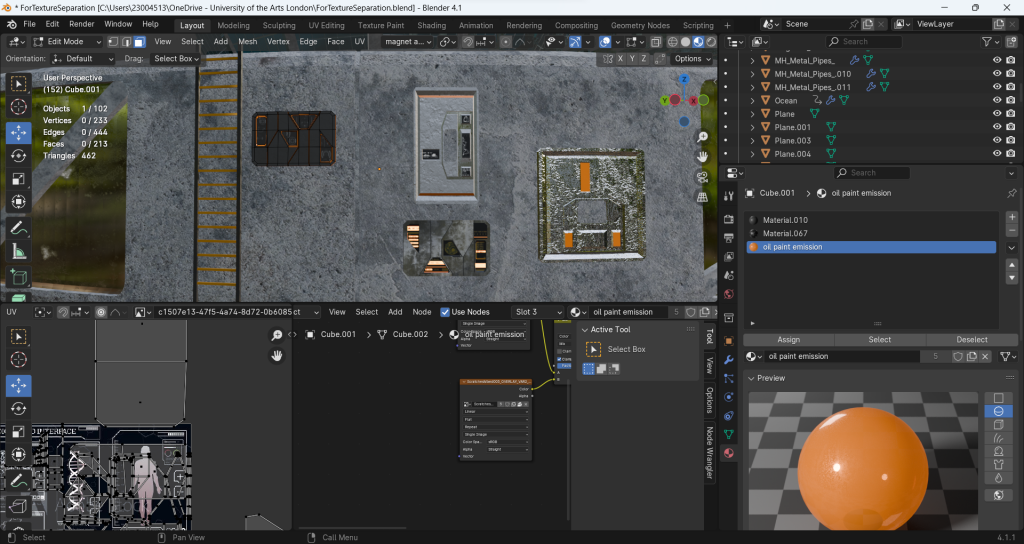
I need to make two different kinds of glass in this project. one is the normal transparent glass for the cells and the windows, and the other one is the Reflective Glass, or coated glass, for the watchtower. I want them to be single sided so the prisoners will not know if there are people watching them inside the watchtower, which enhances the concept of Panopticon.
I used the shader plus blend with other nodes to do the glass.
This is the normal glass. I added caustic, dispersion in the shader. It gives perfect effect of layers of glass blend together.
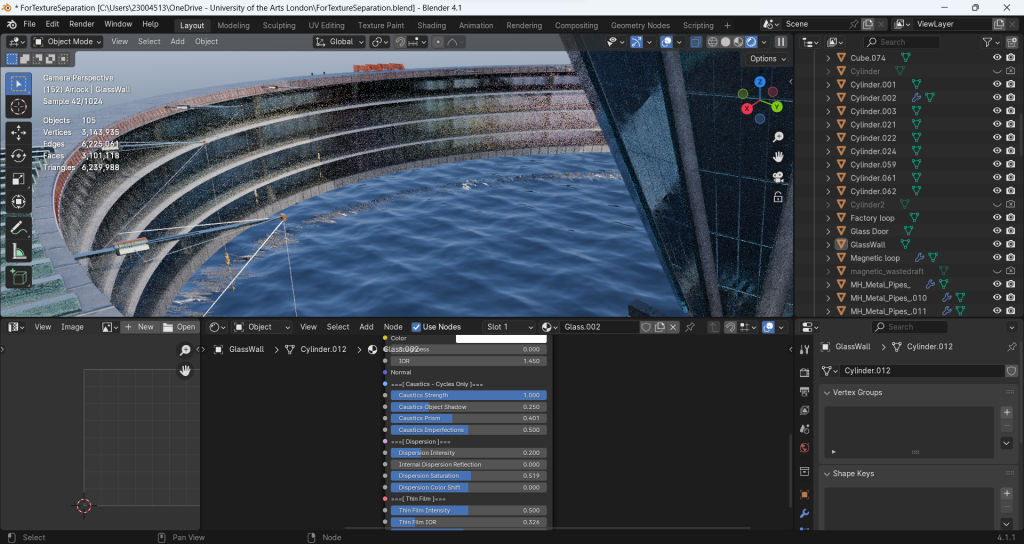
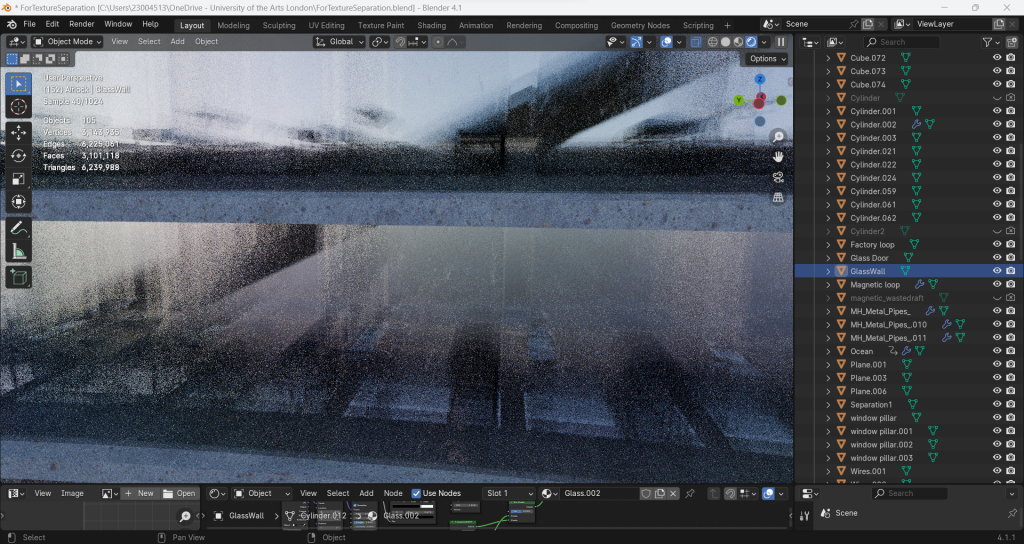

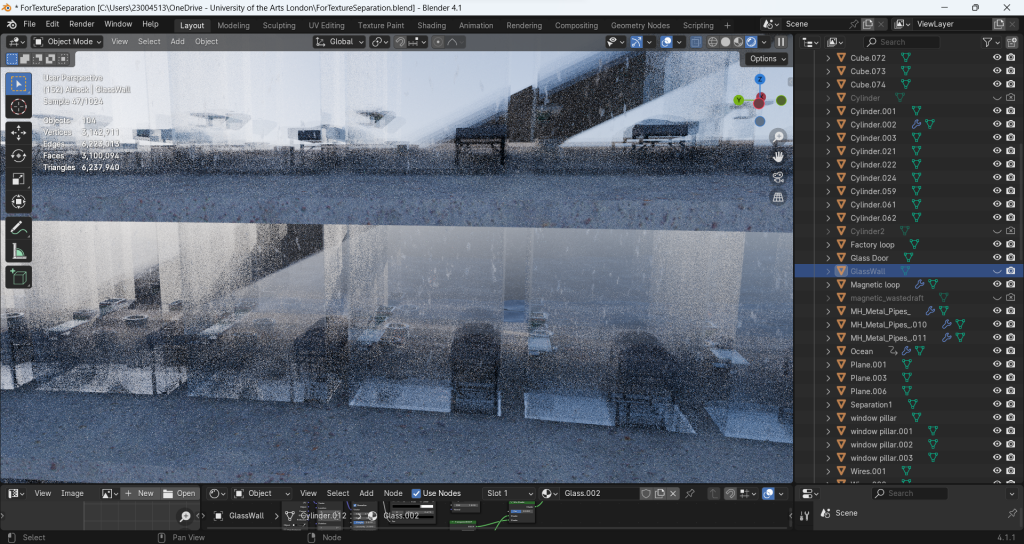

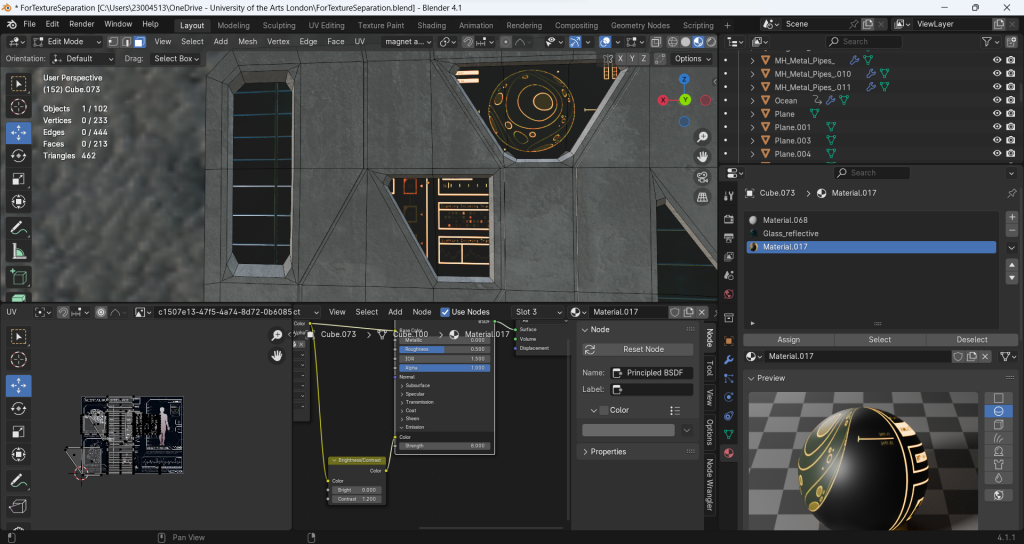
And here are the coated glass.
I add the thin film property and turn the IOR higher than usual, so that the glass will become reflective and looks like there is a layer of dark-turqoise film.
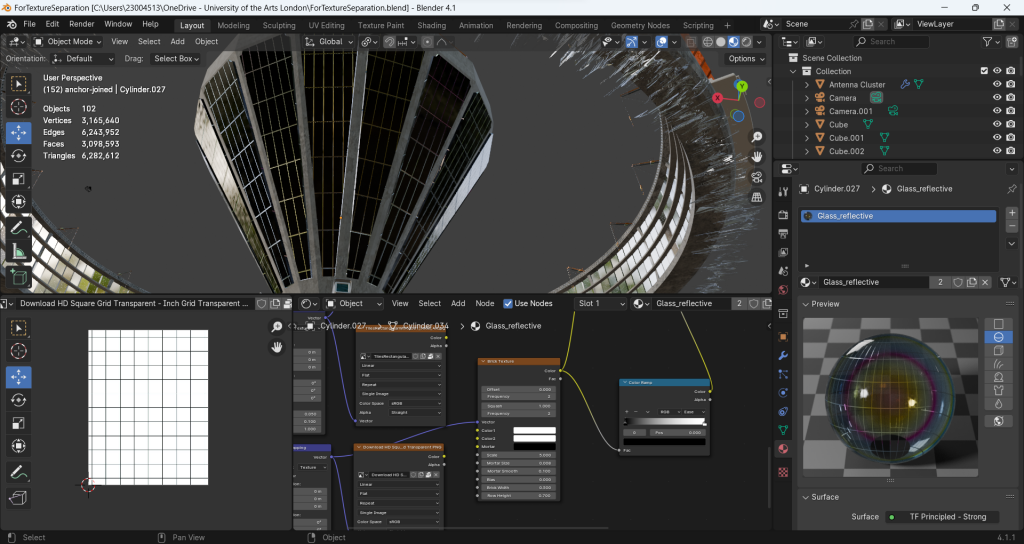
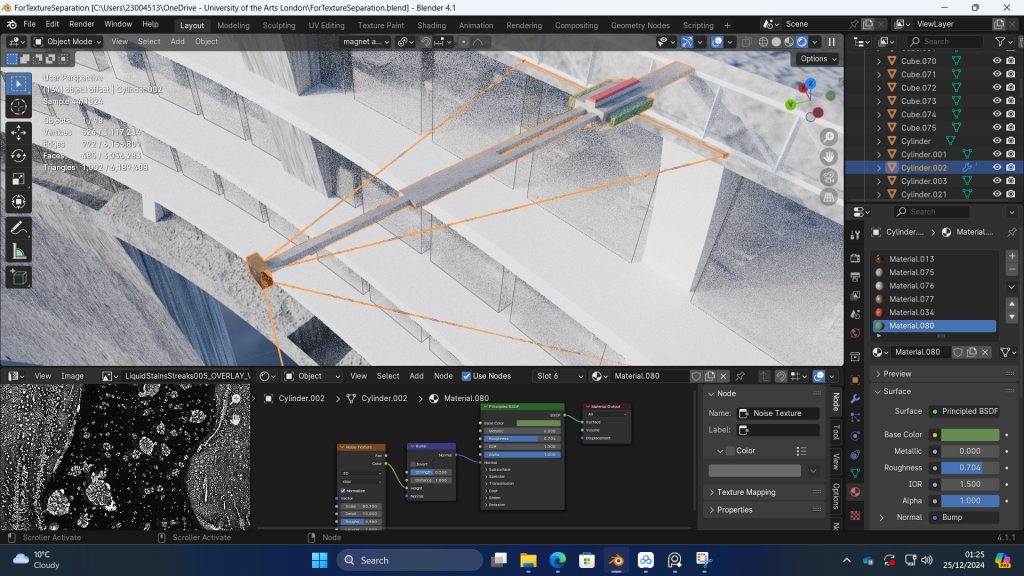
Post-modern buildings are also a category that fits the theme of retro-futurism. people in around 2000 would like to make the buildings have the feeling of future. So they would put rotating restaurants, white walls, large glass walls on the buildings. I also want to make that kind of feeling. To reach that effect, grids is a good decoration. So I made a grid picture and put it into blender. But after a series of tweaking, I found its effect not very good. And meanwhile, I found the brick texture inside blender node list. I tried to use it to create grids and the outcome is very nice. I turn the brick color into all white and mortar into black. Then use the color ramp to mix with other nodes to do this material.
I also put the noise texture and color ramp set to all of the glasses to make some imperfections, looks like water stains or some wear.
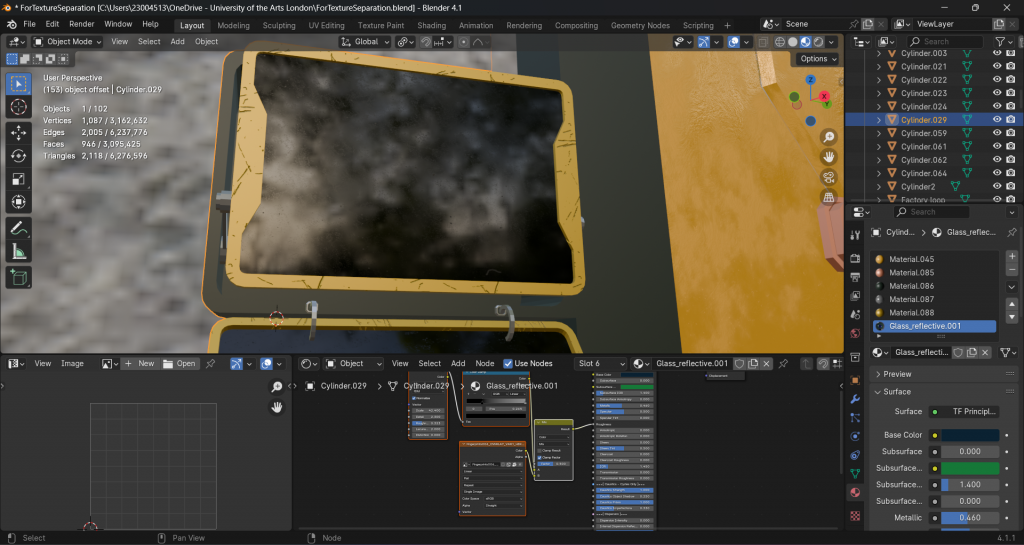
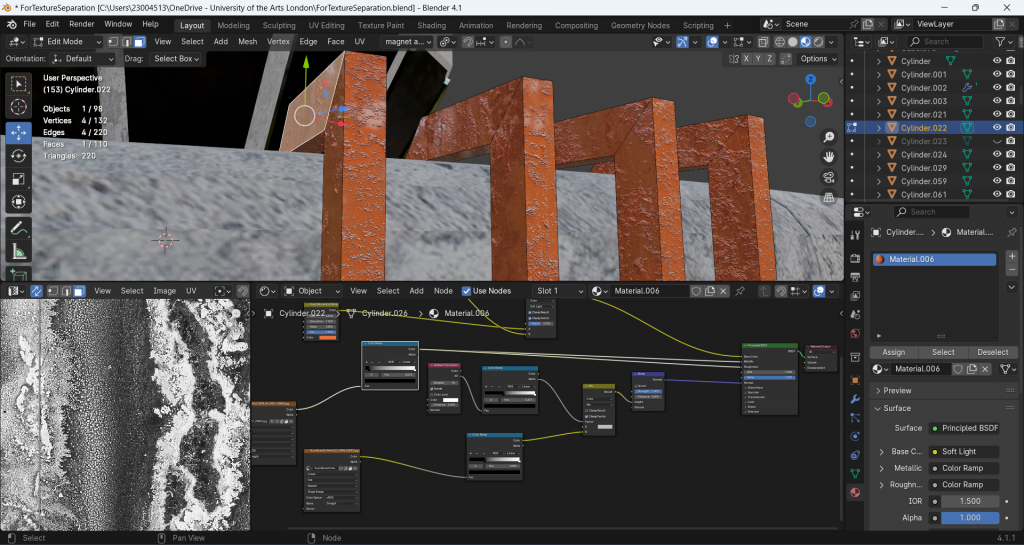
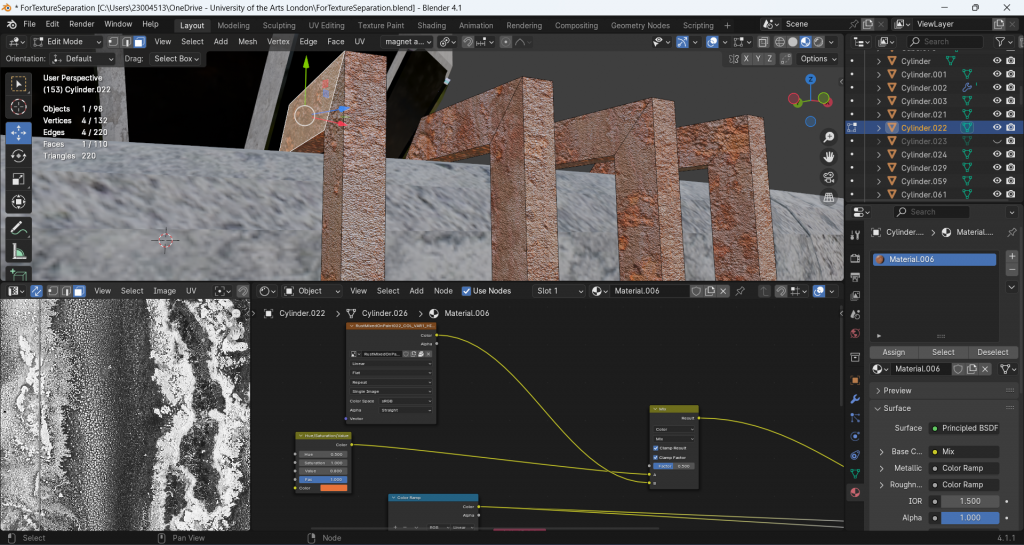
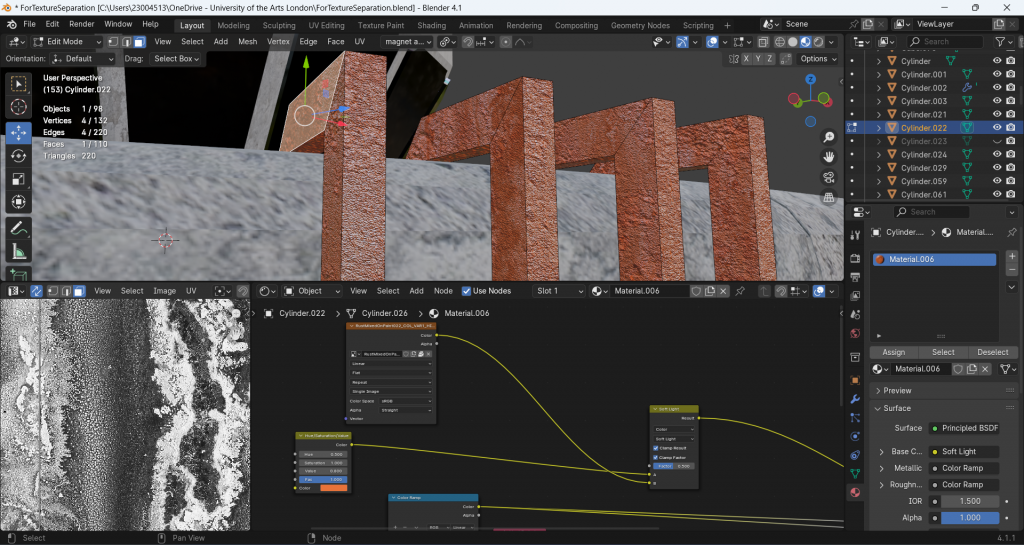
airlock
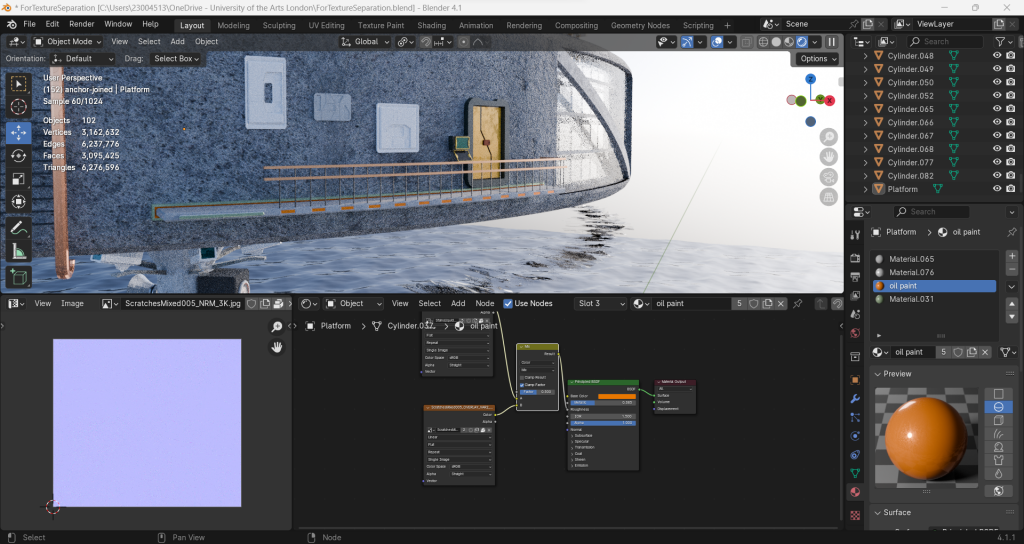
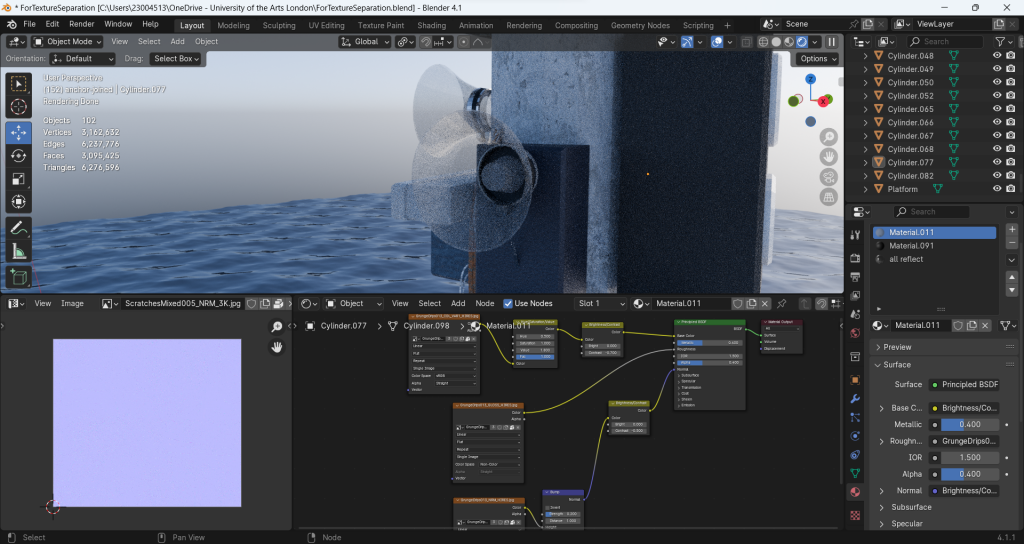
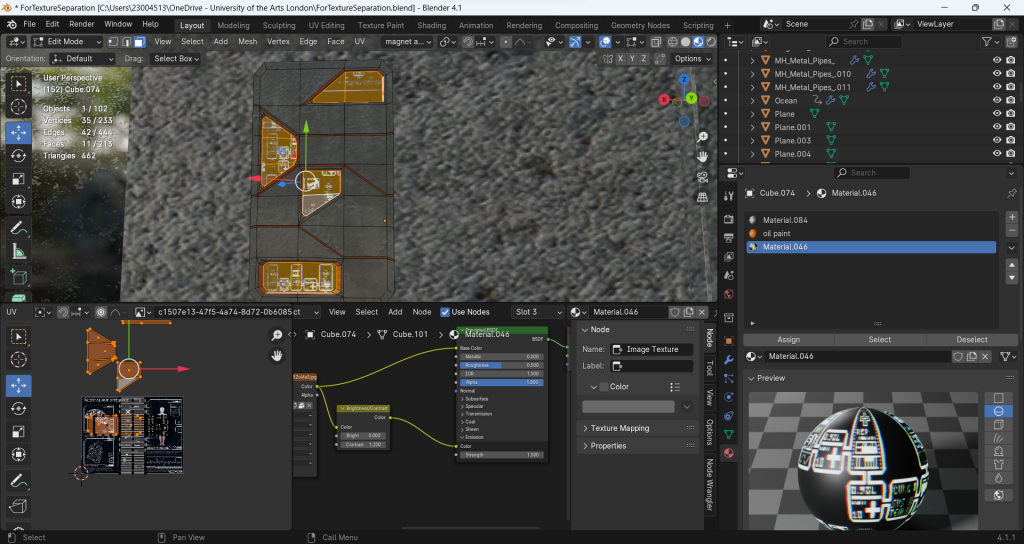
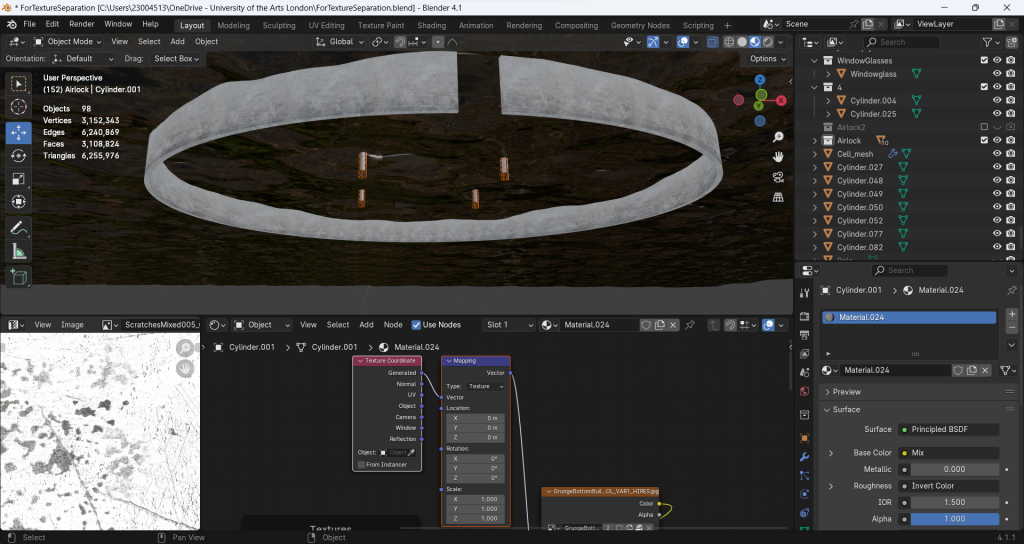
I wanted to make an oil paint texture with scratches and imperfections. I tried using lots of different texture nodes in blender to create the rough texture. I tried the noise, white noise, musgrave texture, wave. I multiply the noise, scratches picture and grunge together. I connect them to normal and roughness chanel to make multi-dimensional feeling of a ainted material that has been exposed to the elements for years.

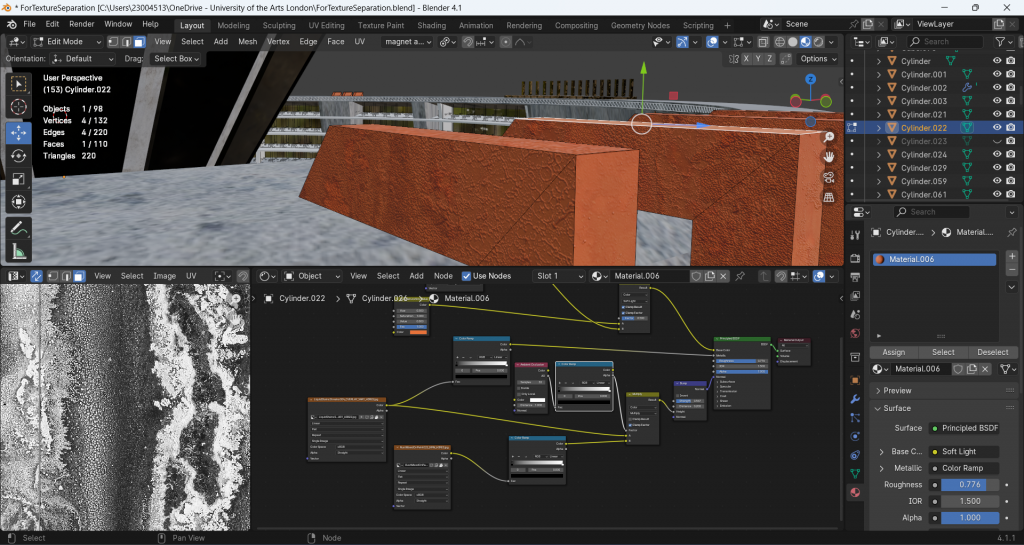
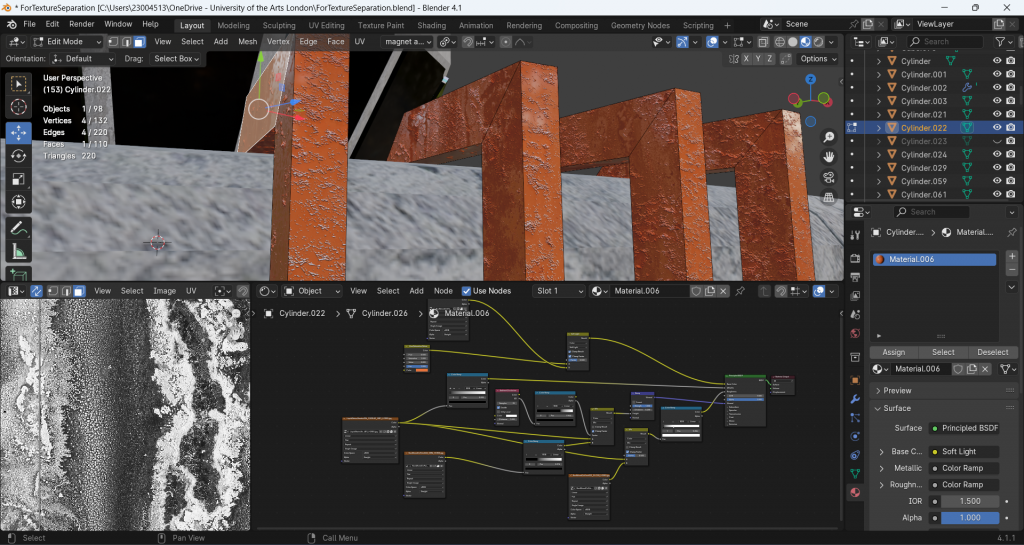
edge decorations
I try to make it a rusted one. Also mixed with water stains and noise. Connected with bump then into the normal channel make it has those rough surfaces.

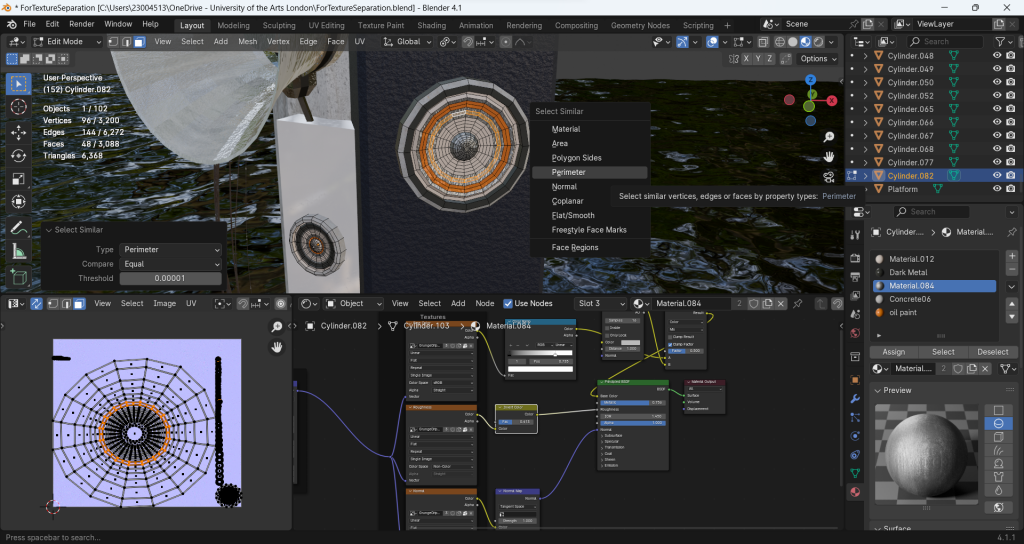
magnetic calibrator
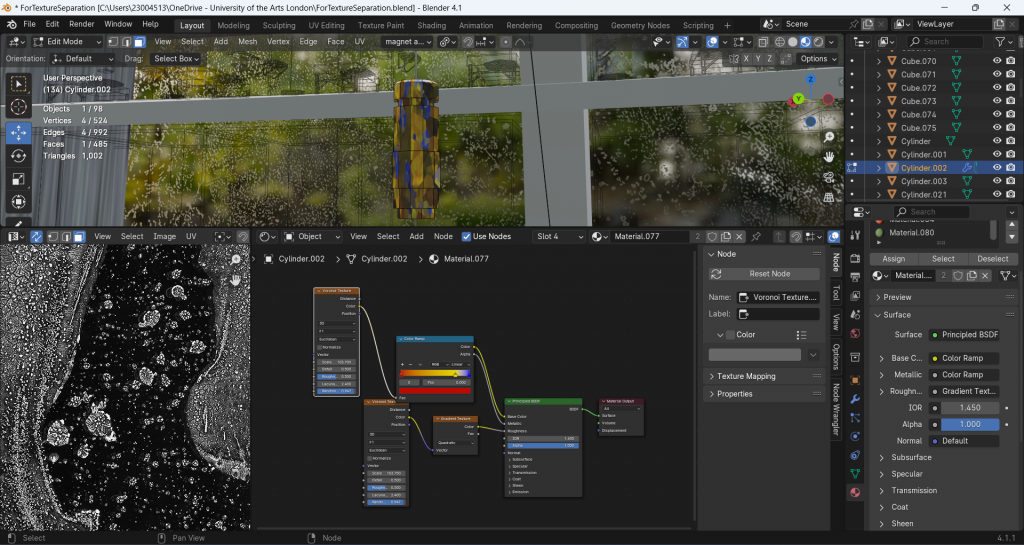
I tried lots of color plans on this calibrator. And I also tweak the materials’ roughness and metallic to make it looks cool and balanced to the whole scene.
Making material for this hanging object is the first time I explore the Voronoi texture. I found it very interesting. It can make polygon shapes on the material and highly adjustable. I can use it to create stylised materials, maybe low poly. And I found out It can be coloured using the color ramp node, just like the gradient mapping. You can give different grayscale different color so the whole object will become your canvas.
Pier

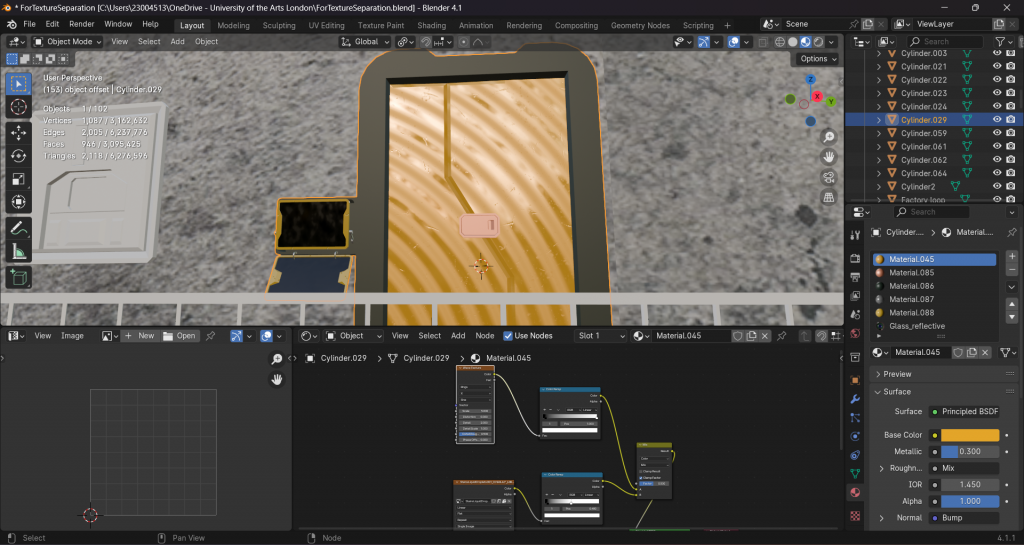
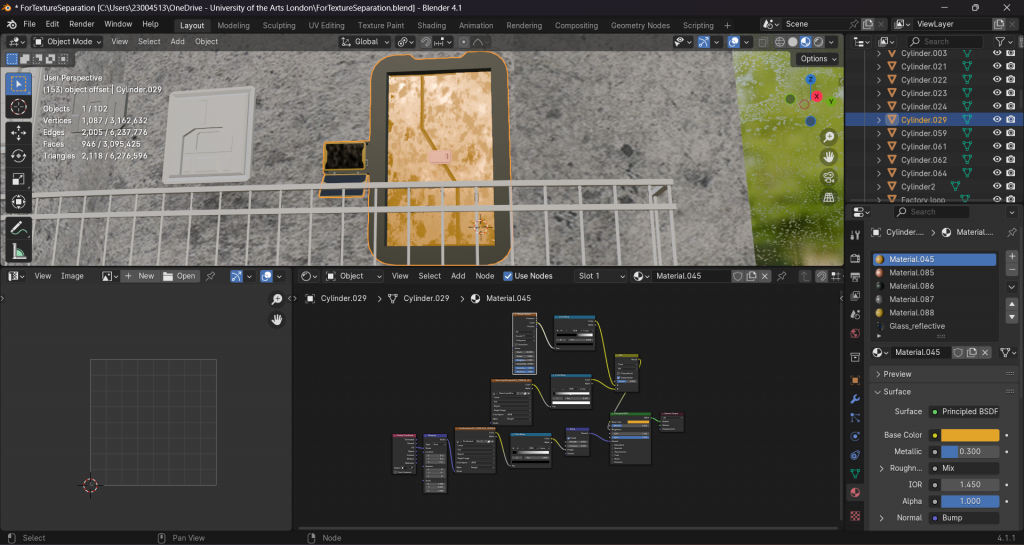
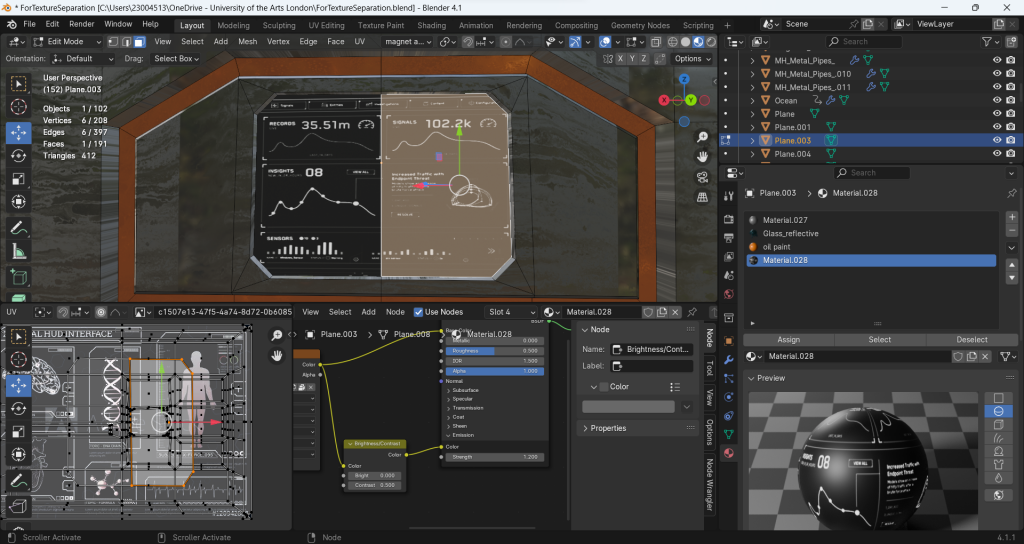
Monitor
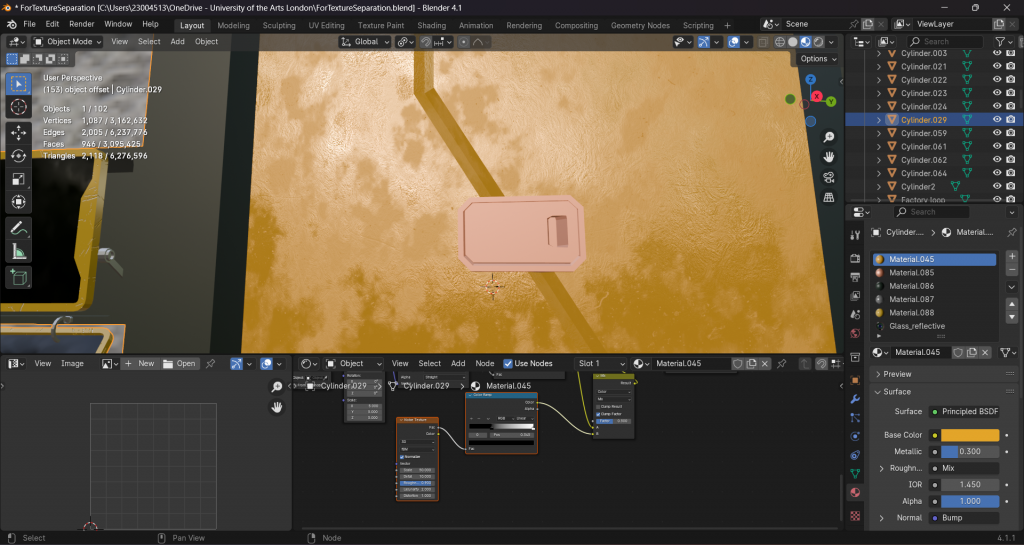
First I separate them into different colors my assign different materials to their areas. Then I make different textures on it.

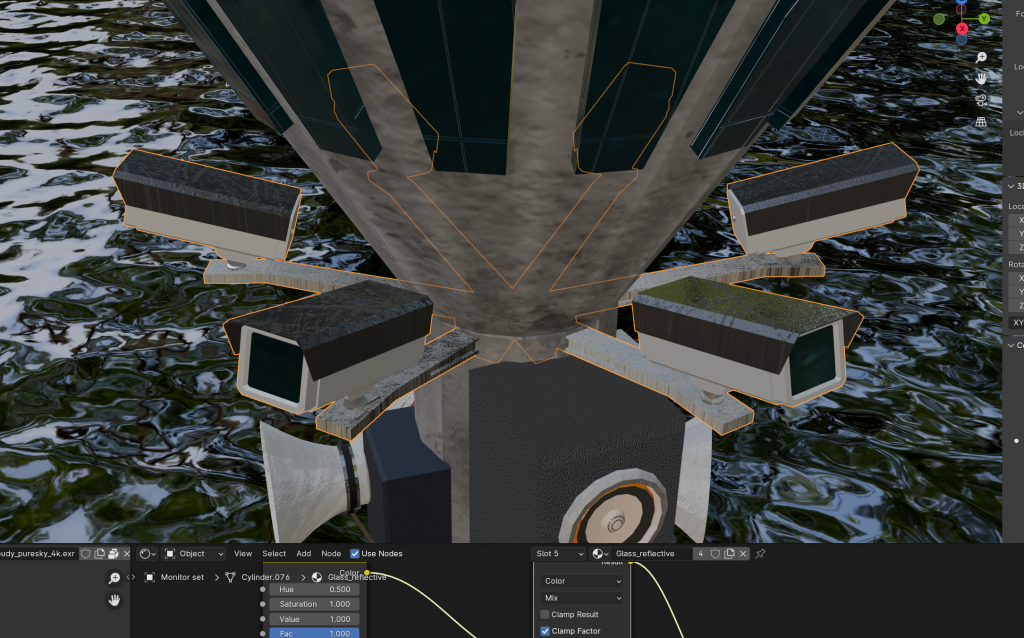
speakers
I wanted to make some worn texture for these speakers. I tested texture Alpha.
I use different materials so I manually do the assign for different material areas.
panels
for adding more details, I make different texture for all of the panels. This decision makes it look good first but brings me lots of trouble later in the baking process.
I want to make some feeling of tech. So I assign HUD texture to some of the areas. Then add a contrast node between HUD and emission channel to make the black part dim and bright part emissive.

enclosure
I wanted to create the texture that looks like be salt eroded at the bottom. I made the material but found it stretched on the object. So I learned to use the texture coordinate and mapping to make the texture mapping correctly as I want. Or use the projection and interpolation to change the way it works. These are very useful ways to fix UV problems when texturing.
render check
press f12 to do a test render. I use this method to check if there are some problems that realtime render can’t find. Because if you hide it in the outline, it is still visible and will be rendered in this render. It seems that there is something wrong with the concrete shell. And finally I found it is because two layers of same objects are overlayed.
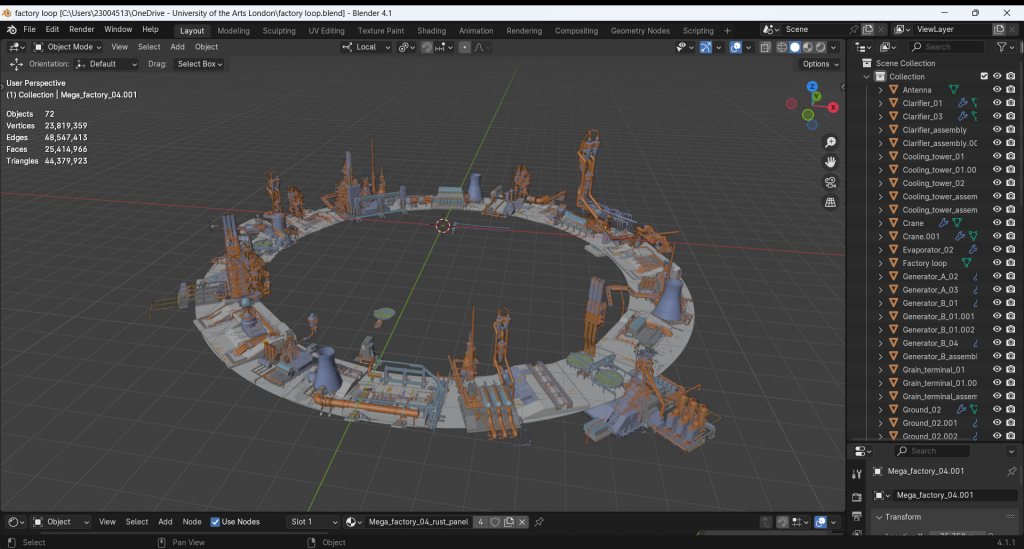
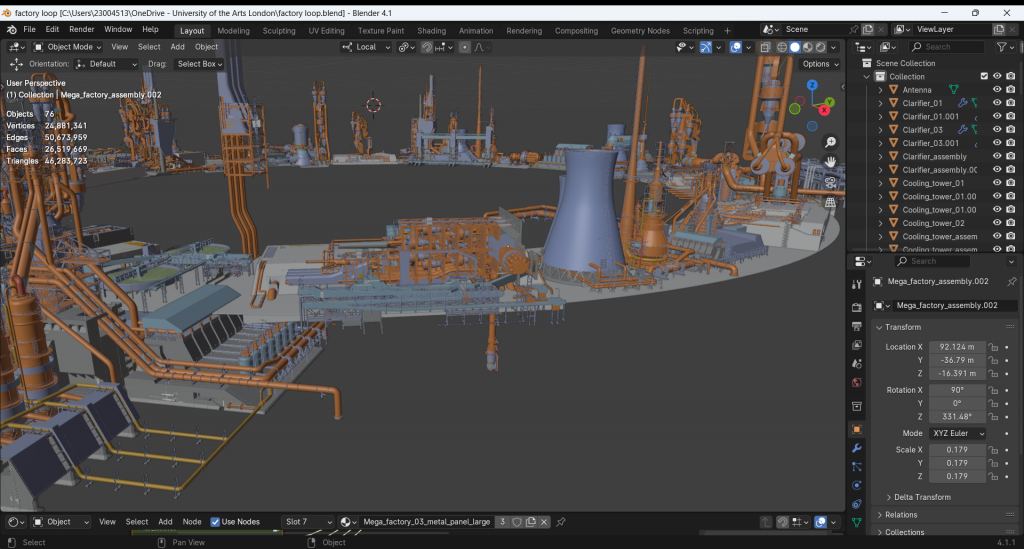
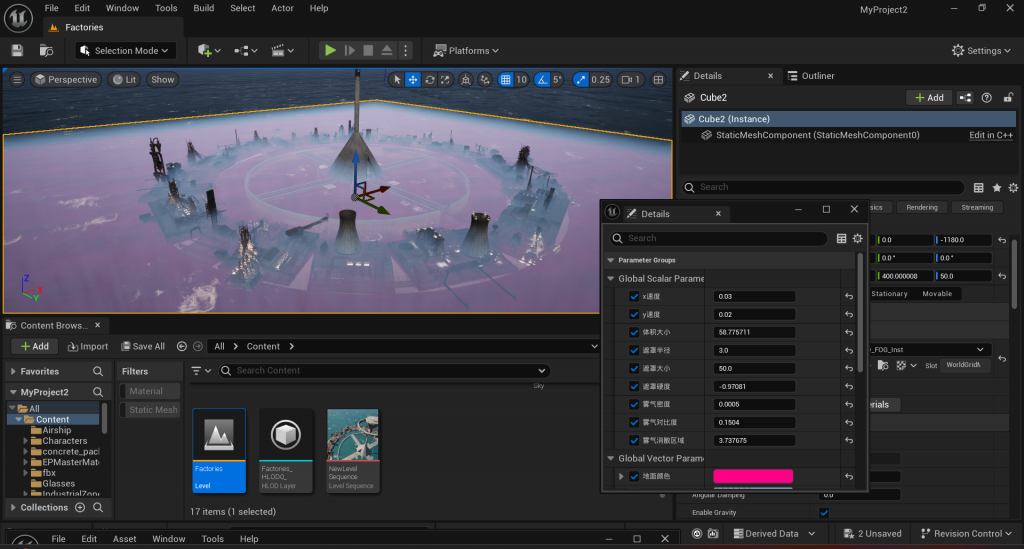
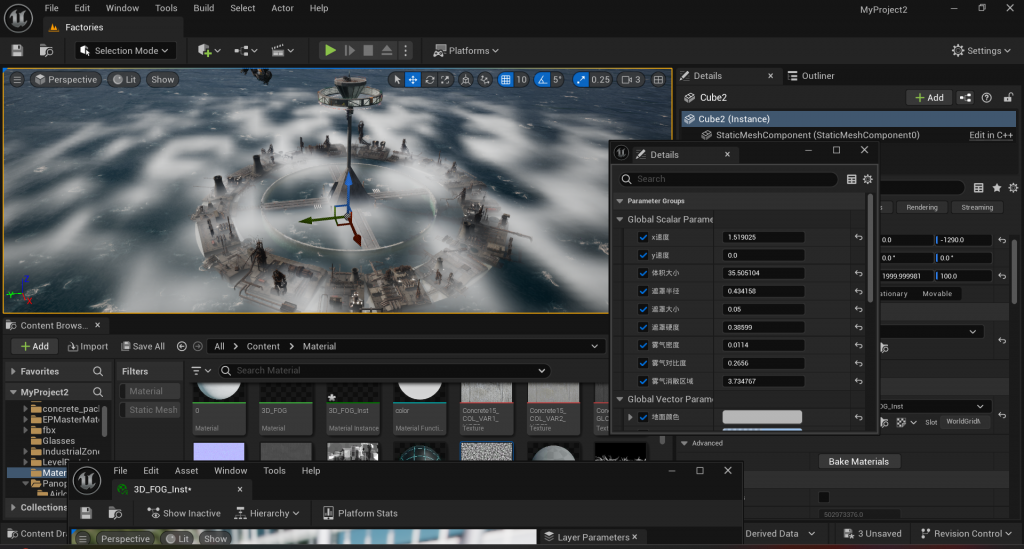
Building Factories
Now all the modelling and texture are done. I’m going to use assets to build the outer ring on the ocean surface. I want to make the whole scene scale looks big, so the factories at the bottom should be very small and have high density. First, I use blender to do this. But I was using shift+D to duplicate meshes. And regard of the size of the asset, it is quite hard for computers to deal with the file. I finished the first version of it hard. But after I showed it to my classmate, he said shouldn’t the factories be more high densed? I’ve revisited the asset I’ve hitched up, and I also think it’s now too big to reflect the grandeur of the theme building.
I also use the same way as I do the magnetic effect loop to create the base for the factories. Add levels of subdivision, Then use the displacement texture can reach this effect. And I always like to use JS placement to generate tech textures.

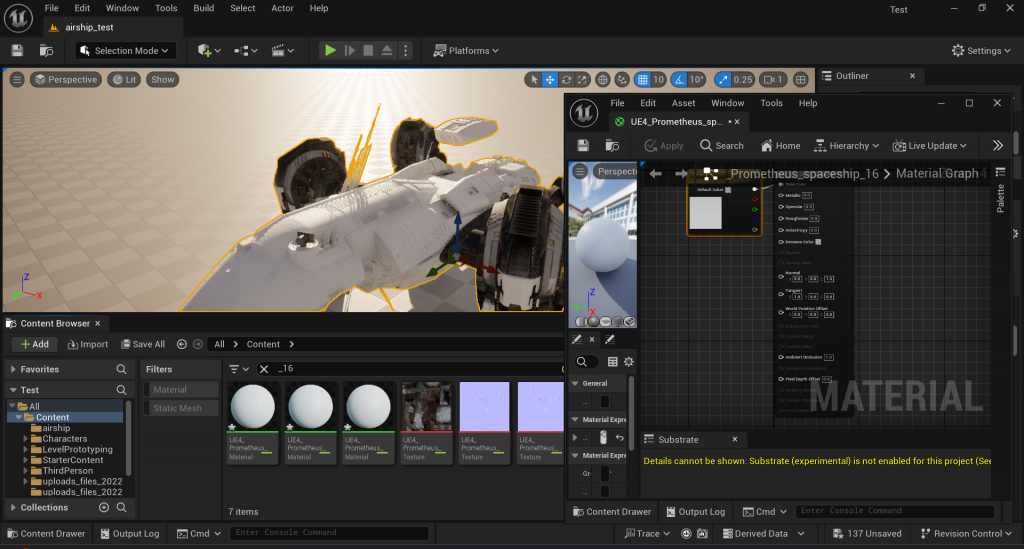
So I asked my classmates and teachers again for solutions. They said that it would be better to leave such a problem to UE as it can instantiate assets automatically, it can handle duplicate assets well, and it is definitely more visually appealing than modelling software. So I am going to import the built stuff into UE. At this point is where the problems begin. Because I had previously used shader nodes for materials, and such material files are hardly compatible with other software. So I’m now either baking all the materials into PBR texture or recreating them inside Unreal 5. I would have used blender’s own function to bake before, but one sheet can only bake one material and I have many different objects and special materials like emission or glass. So I got the plugin SimpleBake, which is able to bake all the materials of several objects at once, but materials like glass can’t be imported into the UE from the outside, so I only baked the rest. I spent the night baking all the object materials and then imported them into Unreal. During this time, I also learnt from my classmates how to set up a way to export fbx into UE from inside Blender, so that the file can contain positional information, material information, and import into UE without errors. But after I finished, I found that the fbx file can’t recognise all the baked maps when importing into UE, it can only connect Diffuse Color and Metallic automatically, so I connected those maps manually again. But actually the effect is not as good as the material inside Blender.

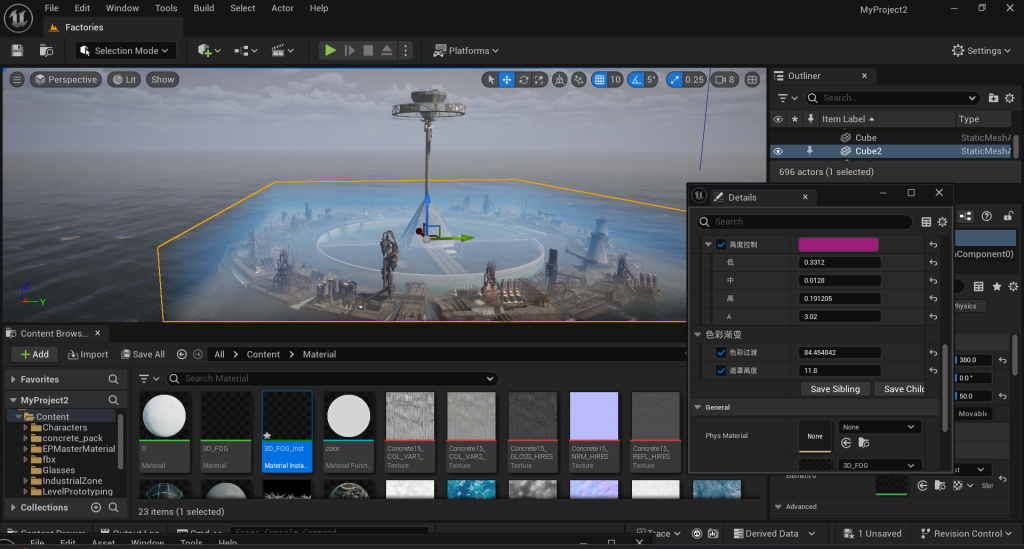
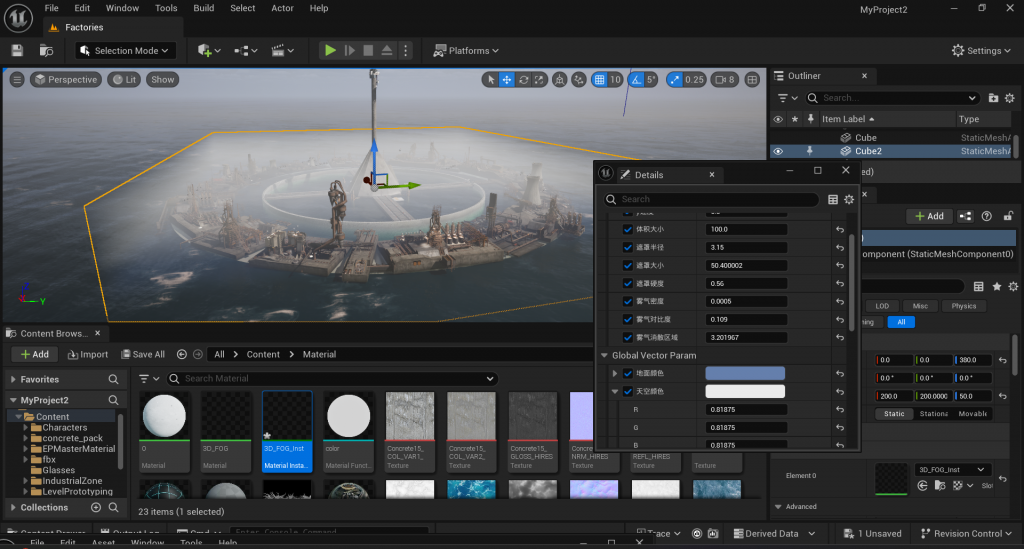
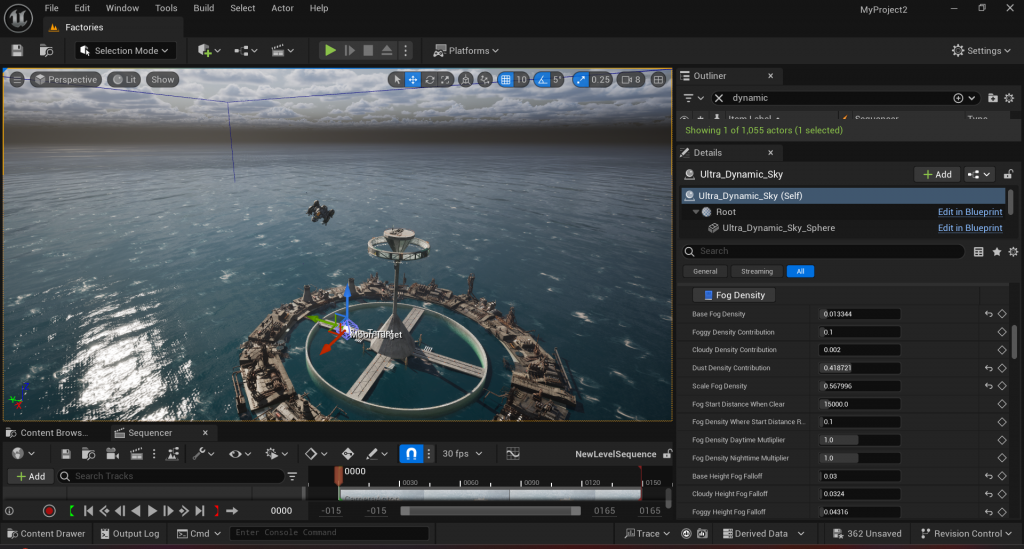
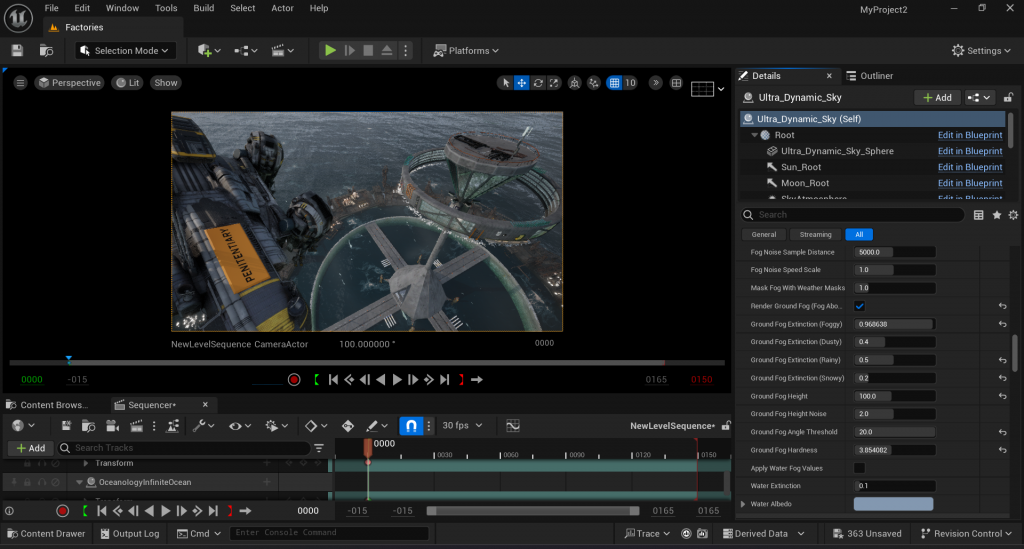
I wrote some materials like the ground fog. It has adjustable mask size, contrast, and more attributes. I adjusted the sky and ocean, and tried different effects with them, such as time, fog, clouds and aurora borealis.
fog
I asked my teacher to cooperate and help me with this material.
It’s only visible when the volumetric fog is enabled in the UltraDynamicSky or setting. It has many adjustable attributes. From top to bottom are:
-x speed
-y speed
-volume size
-mask radius
-mask size
-mask hardness
-fog density
-fog contrast
-fog dissipation zone
I create two instances for this material and tweak them into two different effects.
Big: Big ground fog, clear areas, large particles, better effect in creating the feeling of fog running on the ocean surface
Small: densed fog, small particles, better in creat the ground fog that looks like vapouring up from the sea, also more fit the night scene

Embergen Fog
This software is quite good in doing smoke or fire particle simulation. You can change the attributes of swirls and amount of smoke and all those nodes. It’s also programmatic. I love this kind of system, they always make me feel there’s endless possibilities.
Unfortunately, There was no time left for me to deal with the import and export from embergen to unreal 5. I should turn it into VDB file and do lots of settings.
animated texture
The purpose I wrote this texture was for the coated glass on the watchtower. But I found it interesting to use the panner node to drive sine node to make animation. I use the world coordination for mapping, because I want it perpendicular to the ground. The size of tiles are adjustable, just add an multiply to one side so the proportion will change.
And I found the color was inverted.
-use 1-x to solve this problem
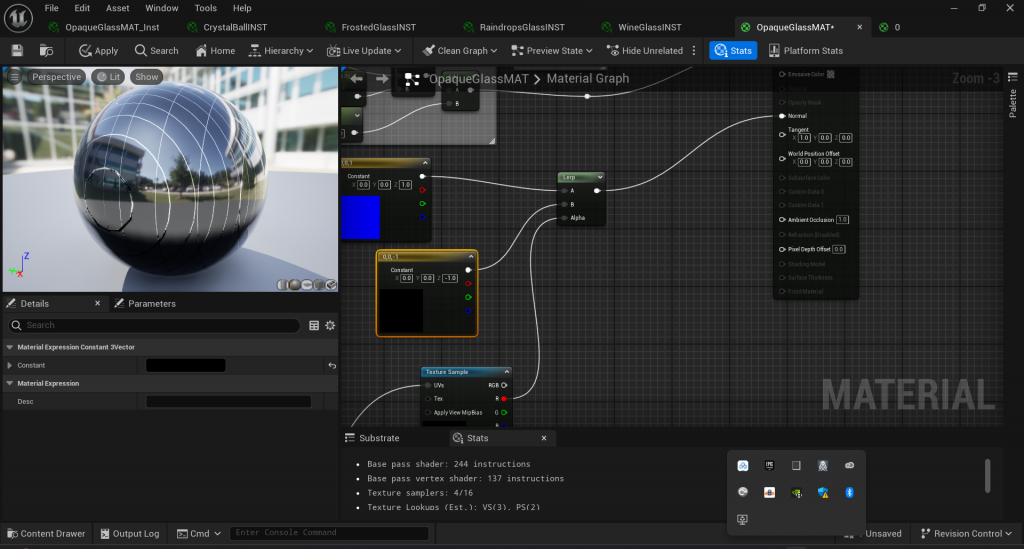
Reflective window

Other Materials
glass


Bake and Export into Unreal Engine
The original way I bake is use the own functions from blender.
- create an empty image texture in the size you want the texture to be
- Add another UV map to the object you need to bake
- hide the new UV map
- keep the original uv map visible
- click the empty image texture
- set what texture you want to bake onto this image texture
- bake in the render settings
- save the picture it baked
Problems with this method:
One baked map at one time, it’s too slow
It’s different with PBR texture
You need to bake several maps for one object and they all have different channels used
Solution:
I found an addon – SimpleBake.
Although it still can’t bake all things in one time, at least it increace my efficiency. It allows me to bake several objects one time with all the channels, and it can automatically pack the fbx with the texture and put them into their own folders. This makes the process less painful.
Problems:
After test in UE, I found it can’t automatically connect all the textures to the shader
-so I manually linked all of them
The emeissive texture requires to multiply the emissive with emissive strength.
-so I went back to blender and baked all of their emissive strenghth. And I multiply it with emissive in UE manually
The material quality is not as good as it was in the Blender
-so I made some of the materials again in the UE. Some of them are assets, some of them I wrote them myself
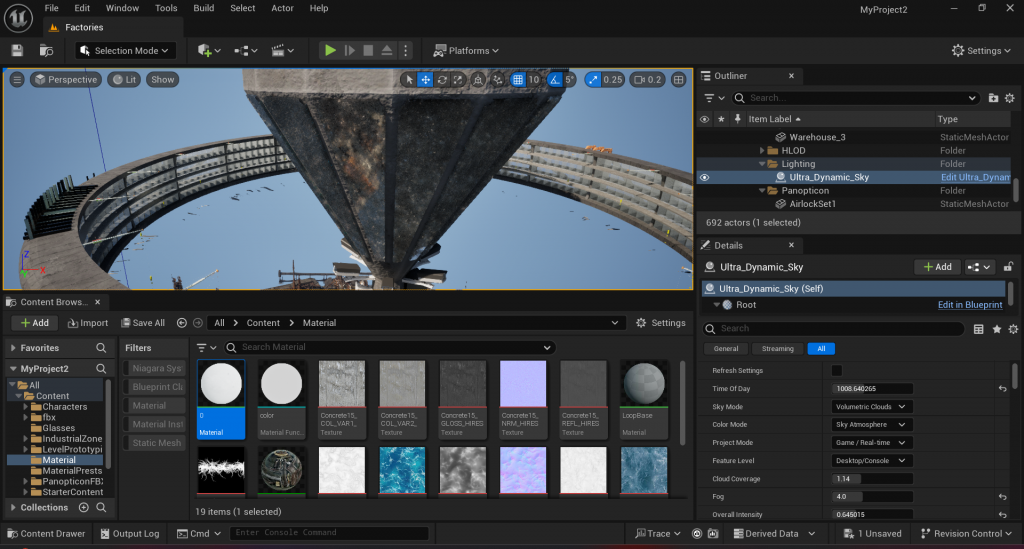
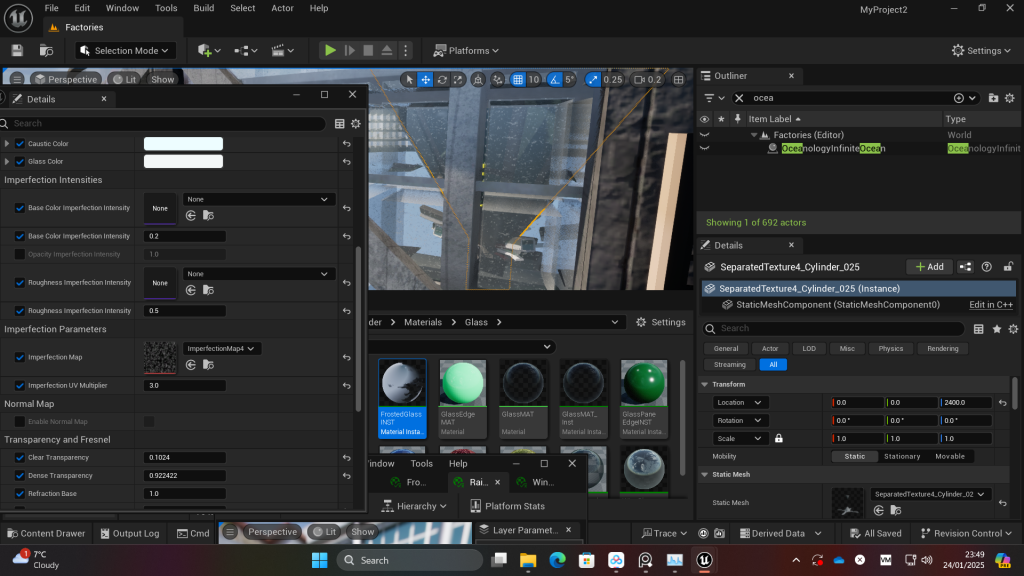
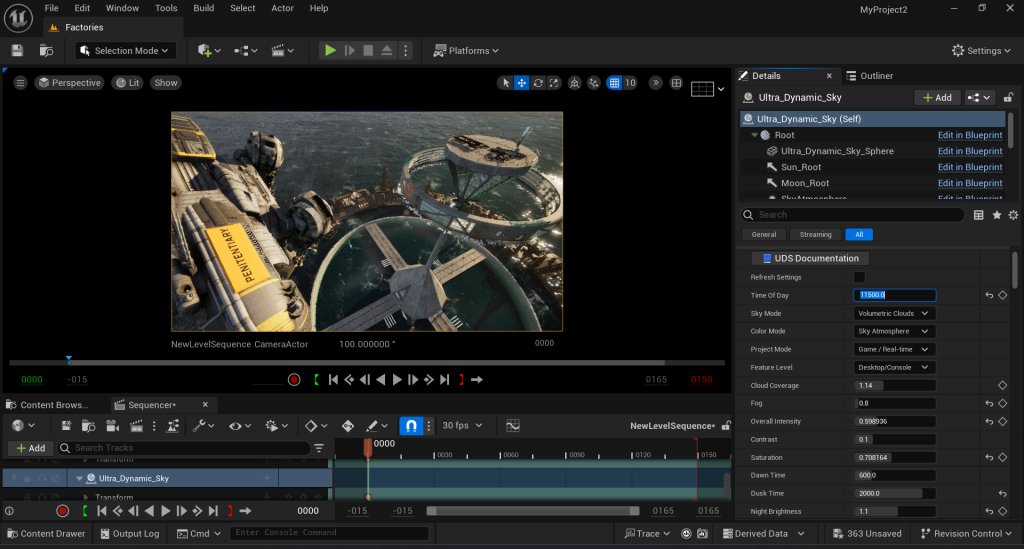
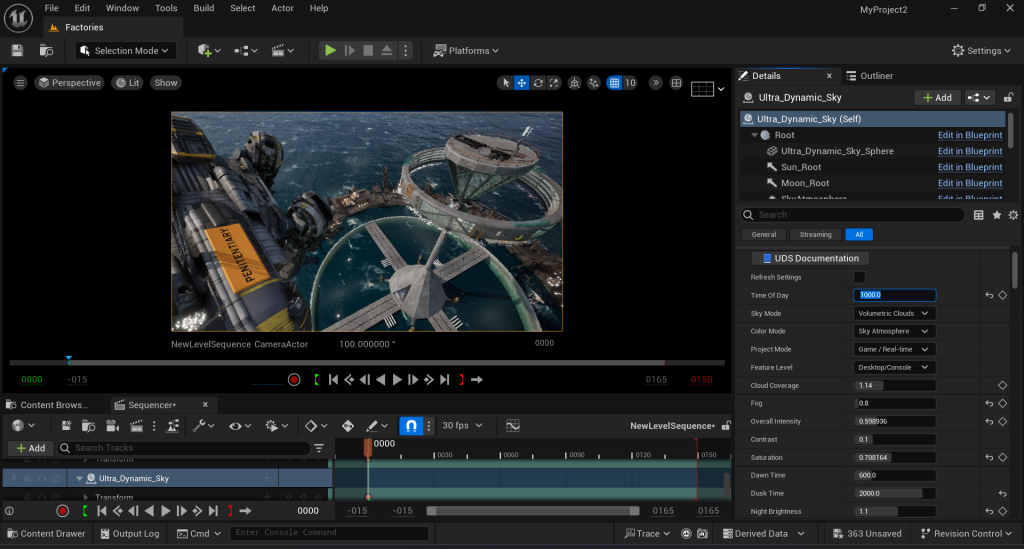
Lighting and Weather-UltraDynamic Sky
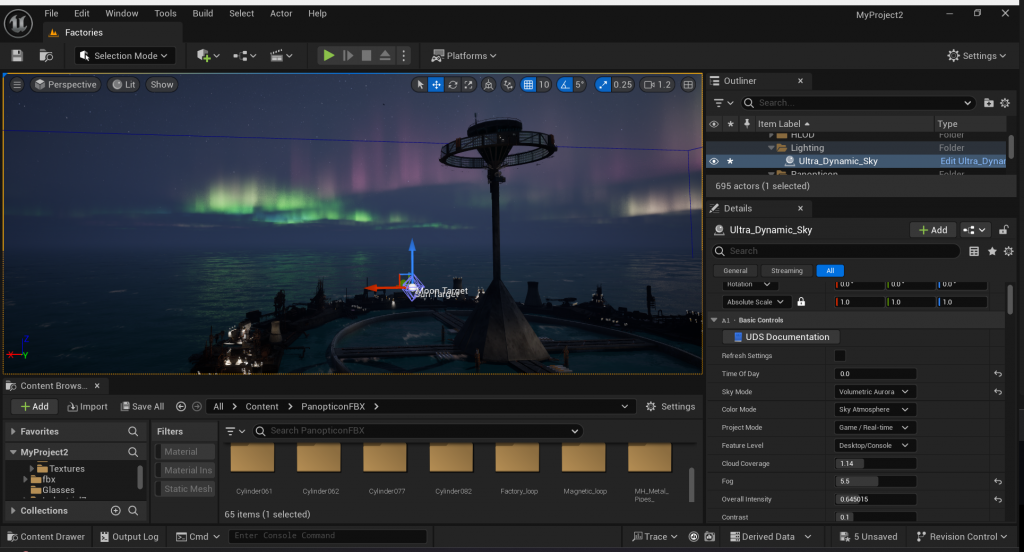
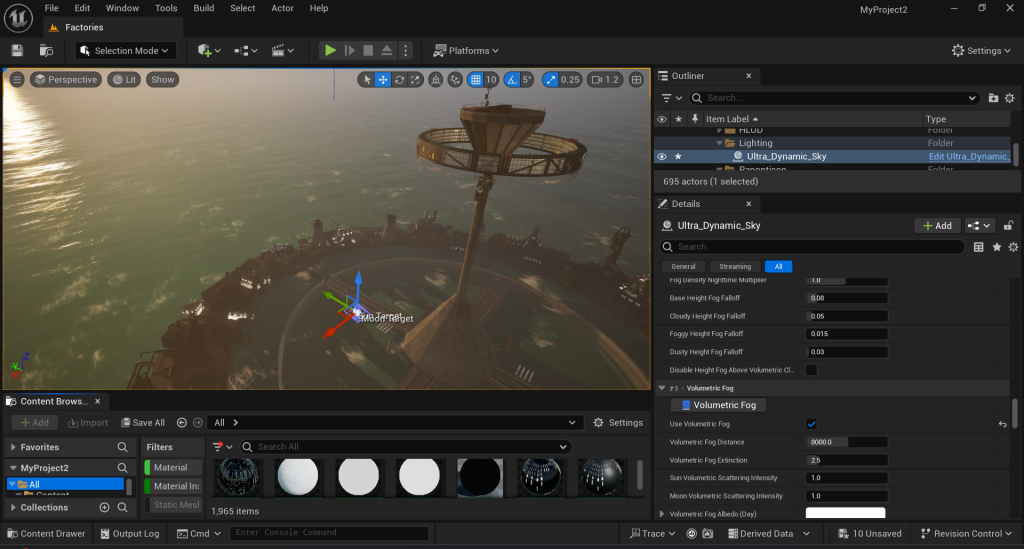

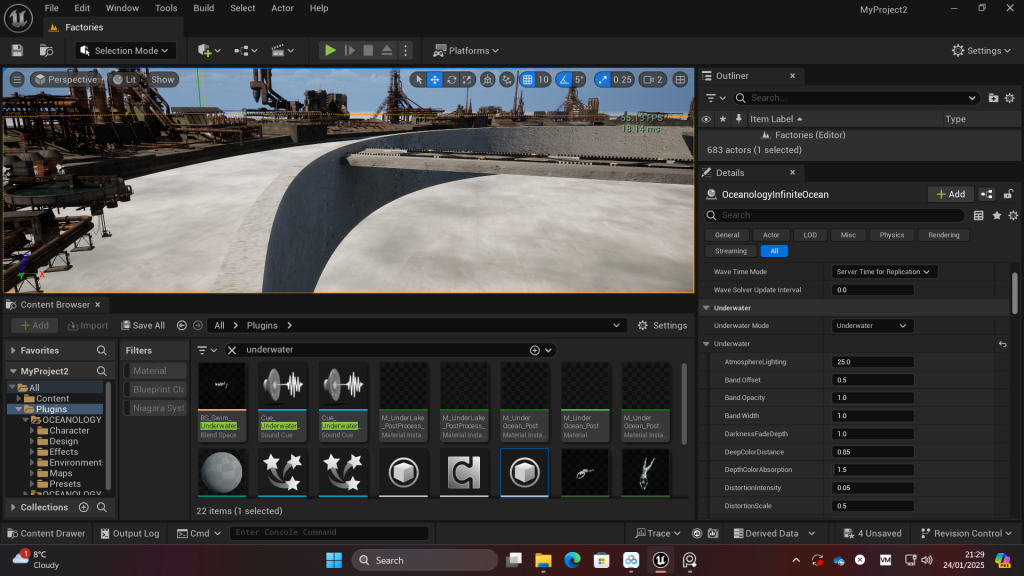
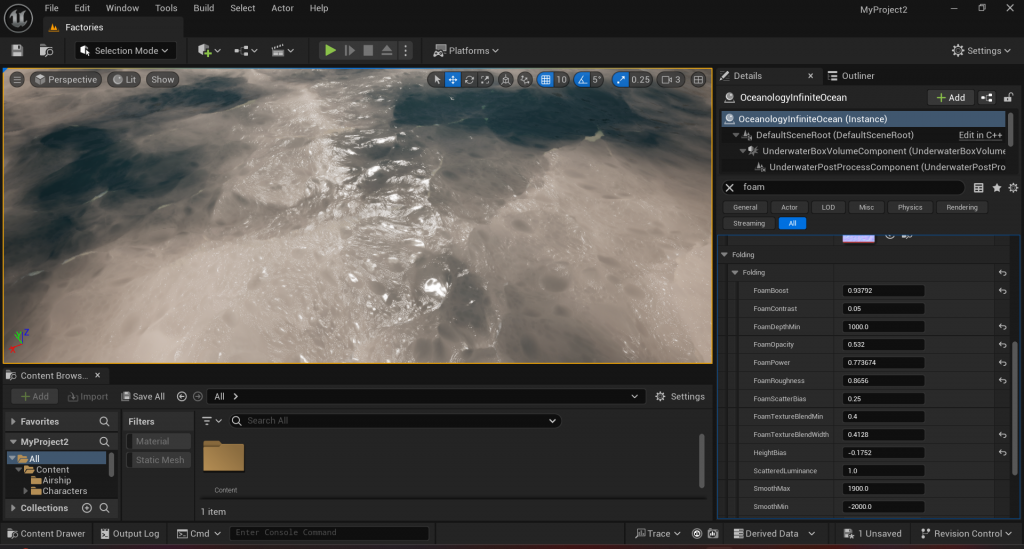
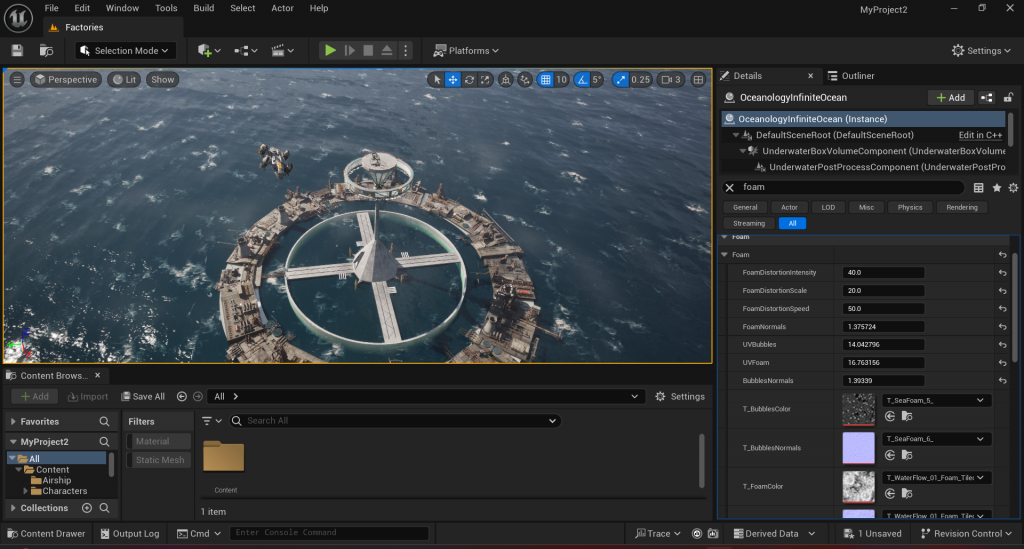
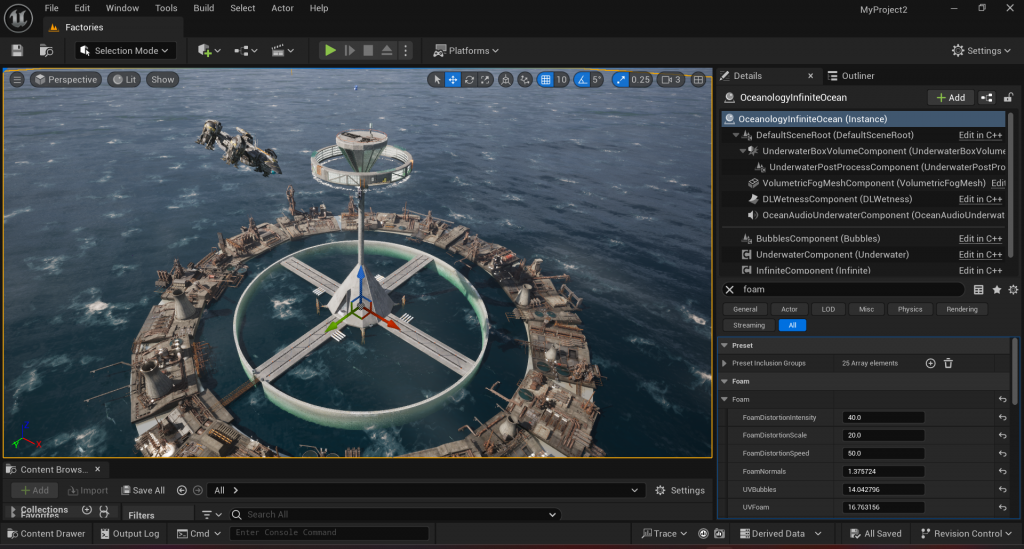
Ocean-Oceanology5.4
I spent lots of time tweaking this plugin. I encounter a big problem just after I load it. I can’t see the ocean surface. I tried to change all of the attributes and asked teachers and peers but no one knows. I can only see the bubbles and foams and the underwater scene.
Luckily, after long time of test, I accidentally use ctrl+L to adjust the directional light, and the ocean appears. It’s quite a surprise.
After the first problem solved, I found another one. I can’t find which one is the property for the water color. It has tons of different properties. I changed the ones related to colours one by one. Finally I find out the “Shoreline color” is the main property that relates to the colour of water body.
Then I adapt the choppiness, foam and bubbles, caustic related properties to the way I want. Eventually I got the ocean effect I expected.

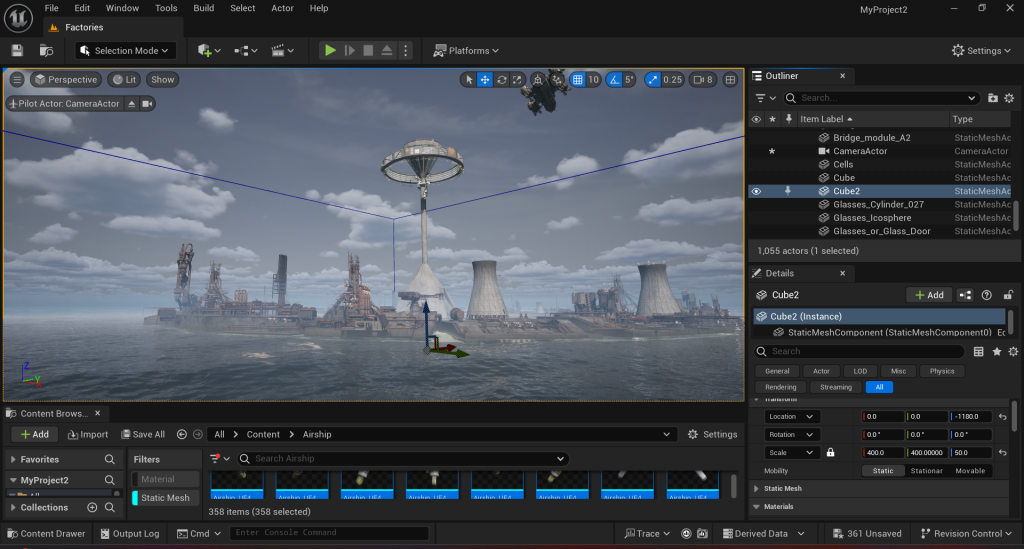
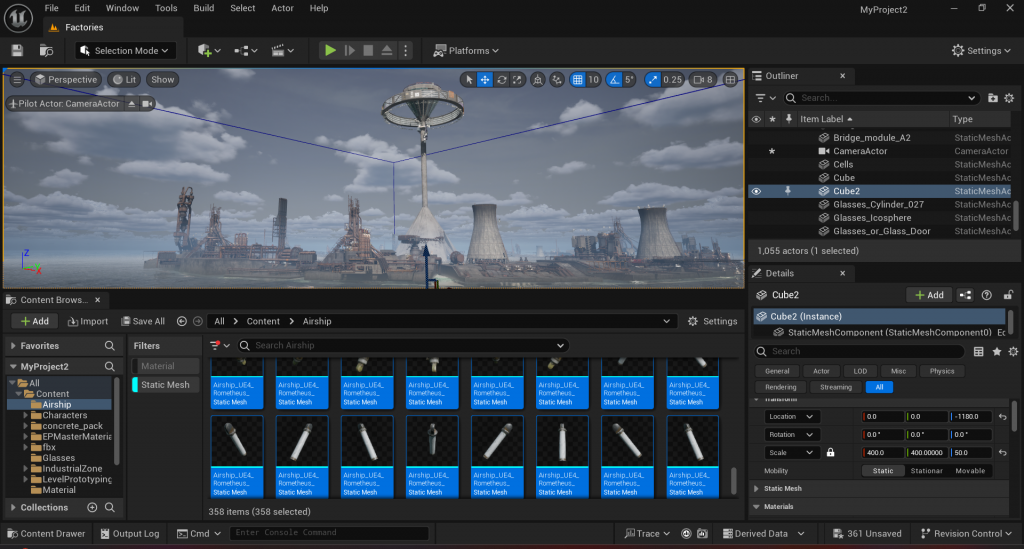
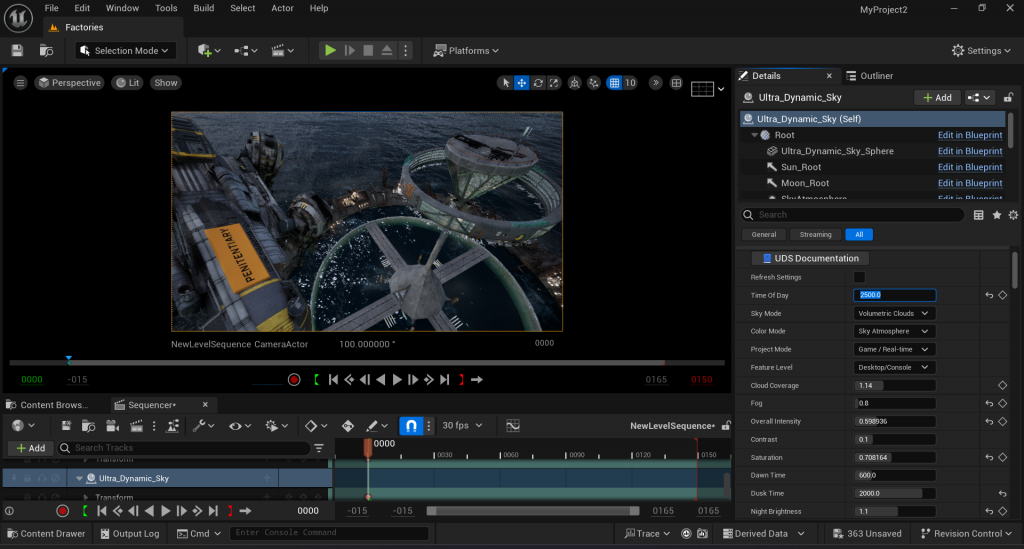
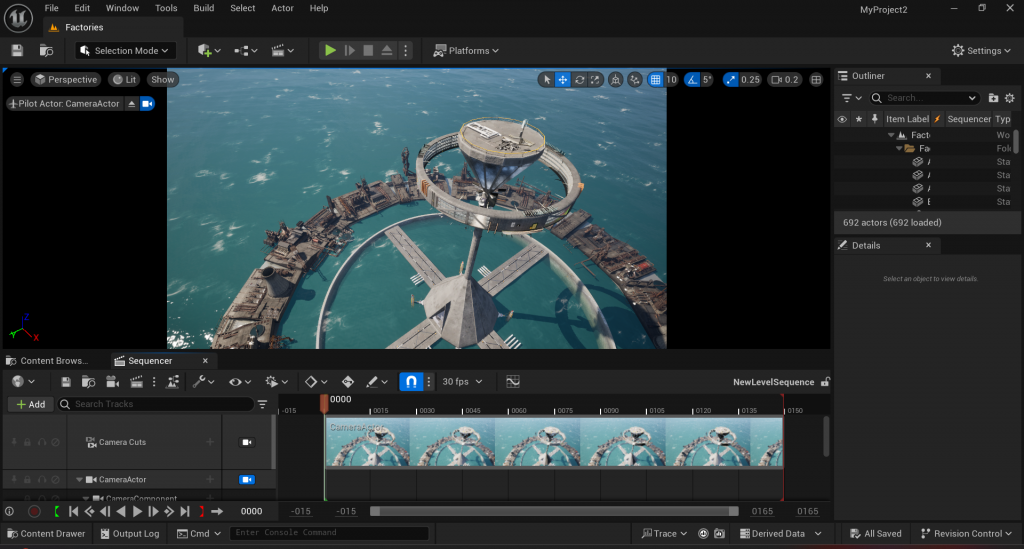
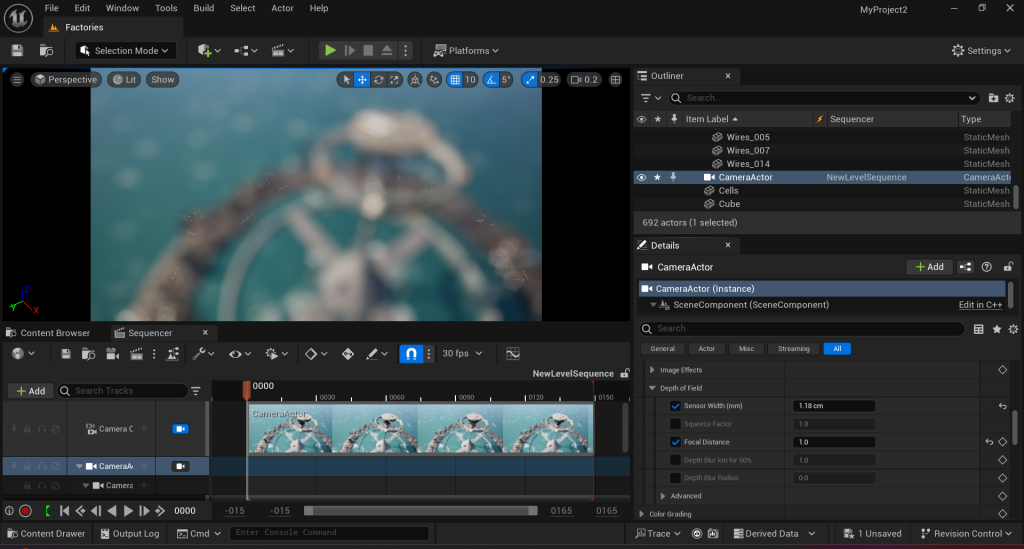
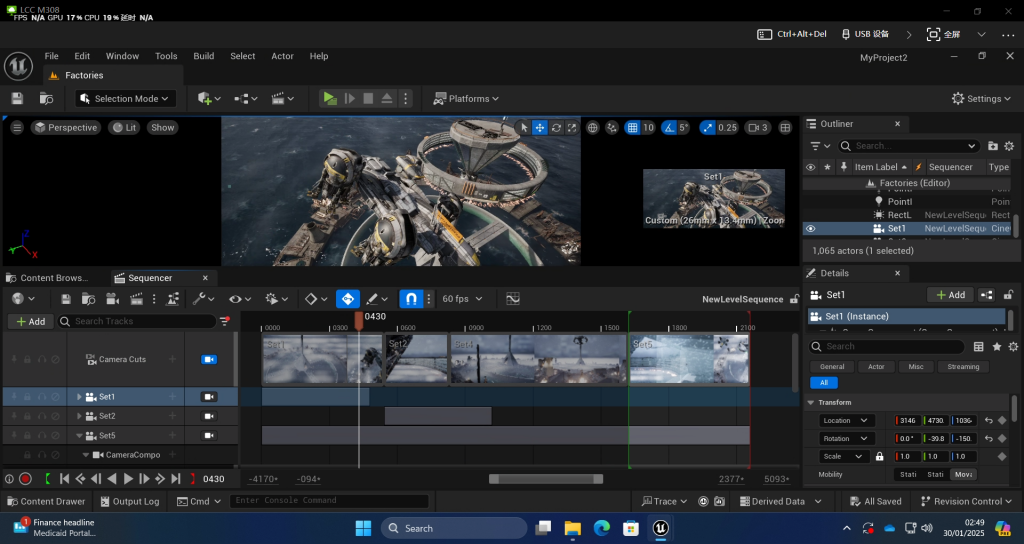
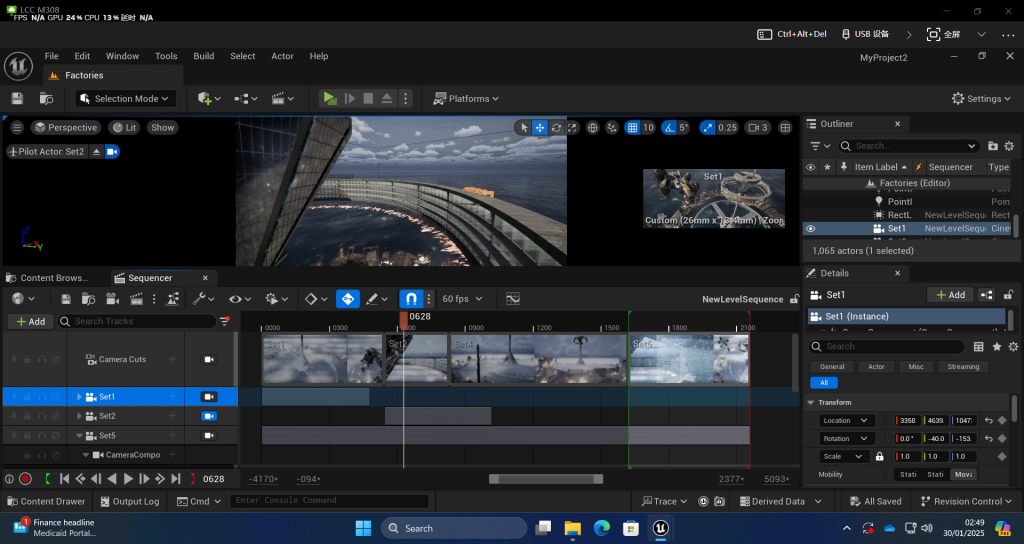
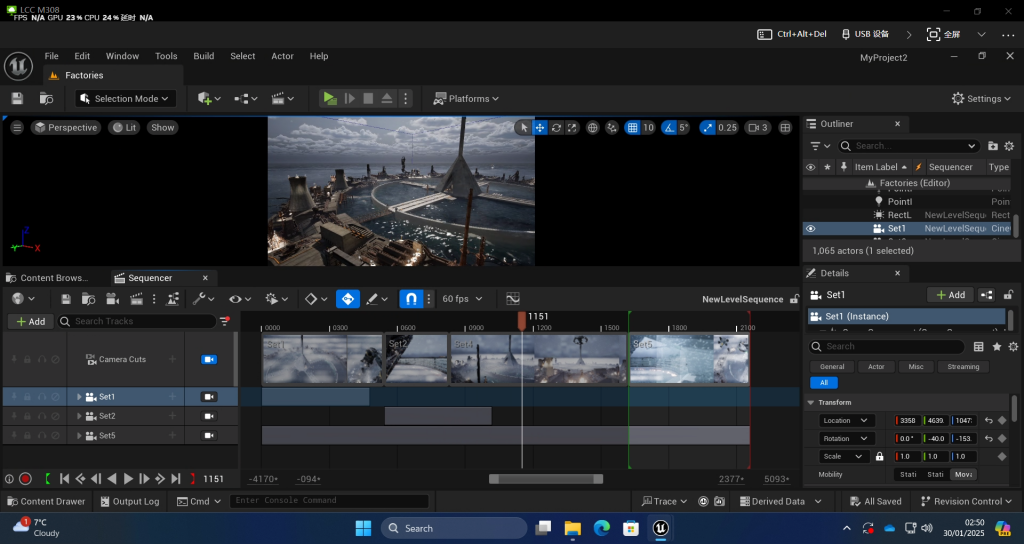
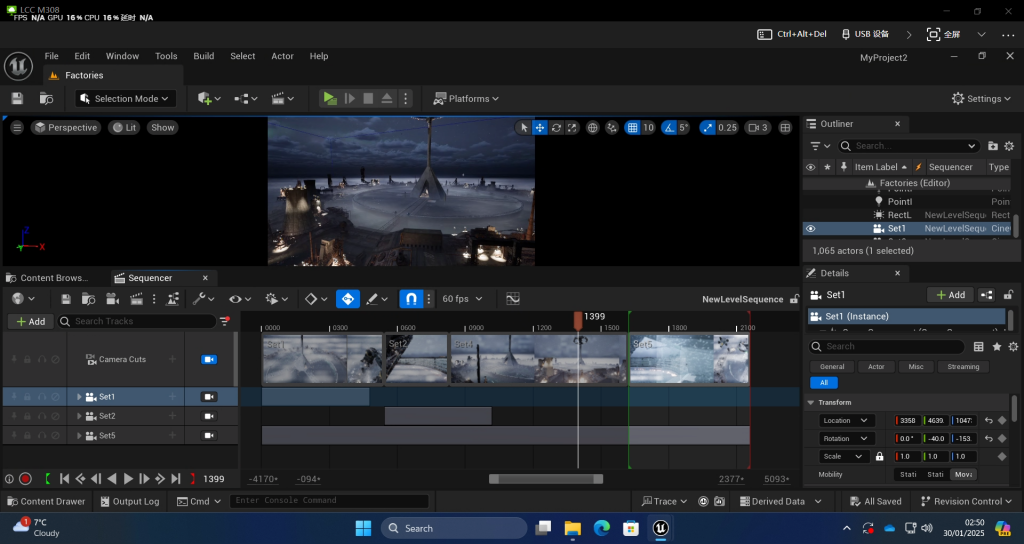
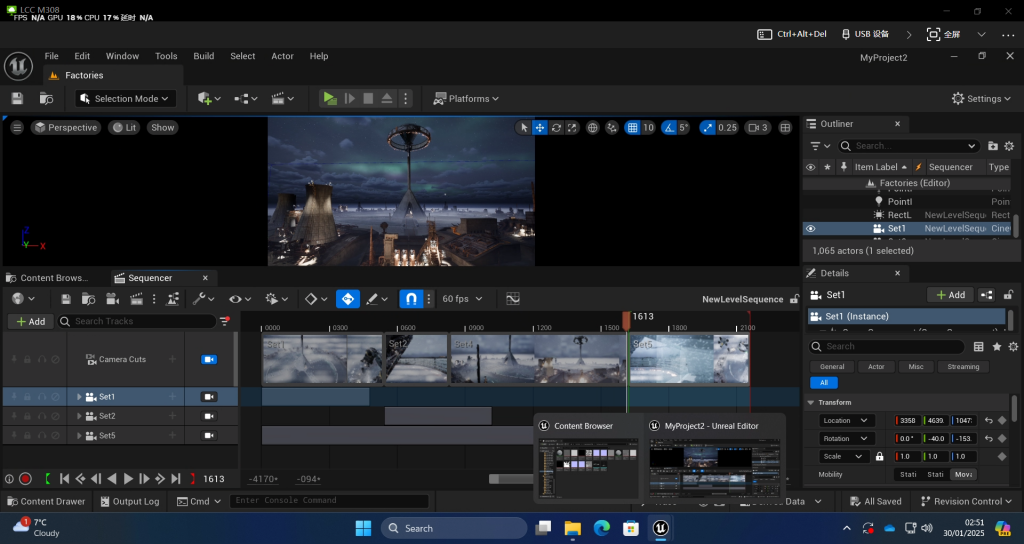
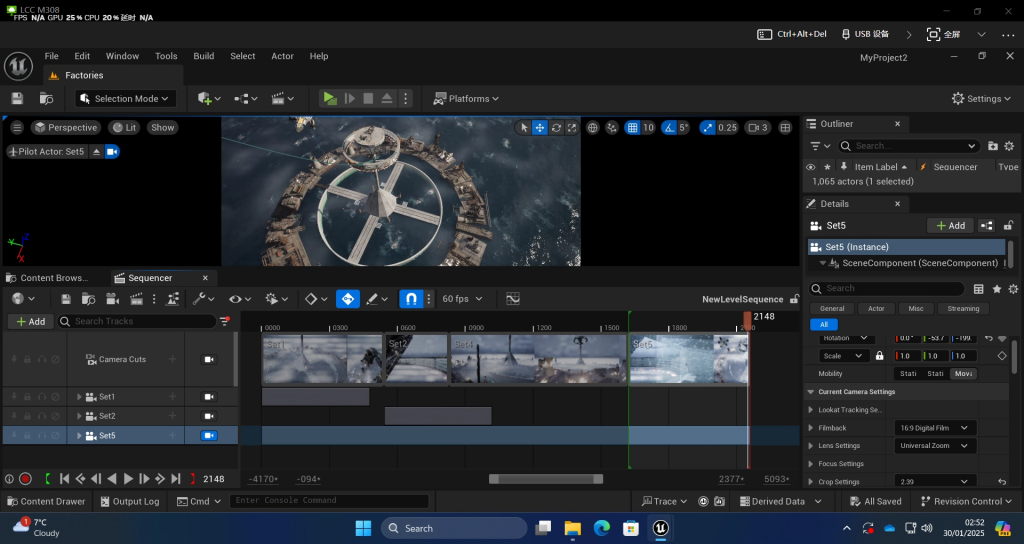
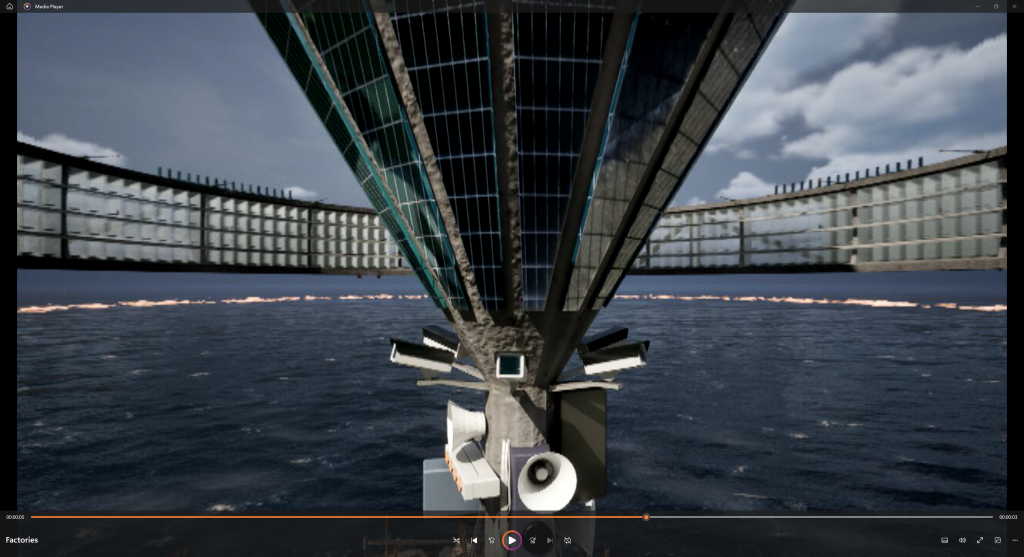
Camera&Video sequence
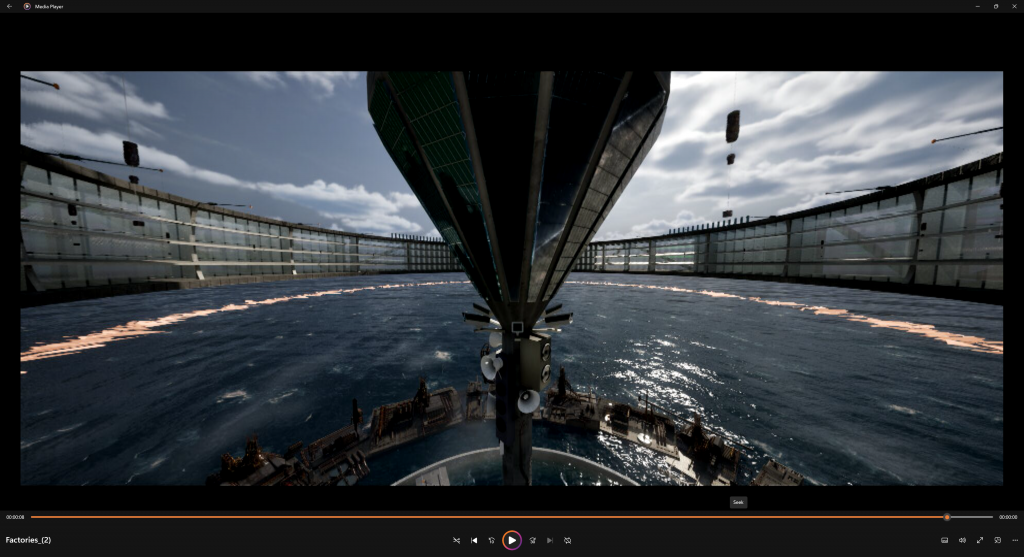
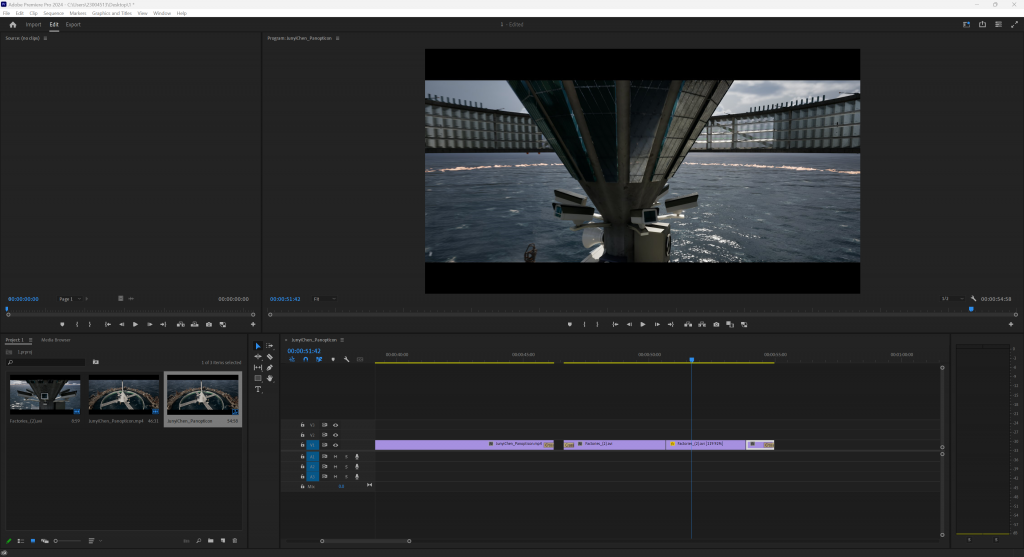
I then built five cameras and a level sequence. i used them to tweak the effects. I blueprinted and animated a few more combinations from the scene. Then rendered a few animations and combined them in Premiere Pro. I used high resolution screenshots to render some single frames that had different fogs, oceans, time of day, etc. and I used Photoshop to tweak the post effects a bit. Although the compatibility process between the two software, reviewing UE5 and tweaking various properties took me quite a bit of time, I’m happy with these final productions.
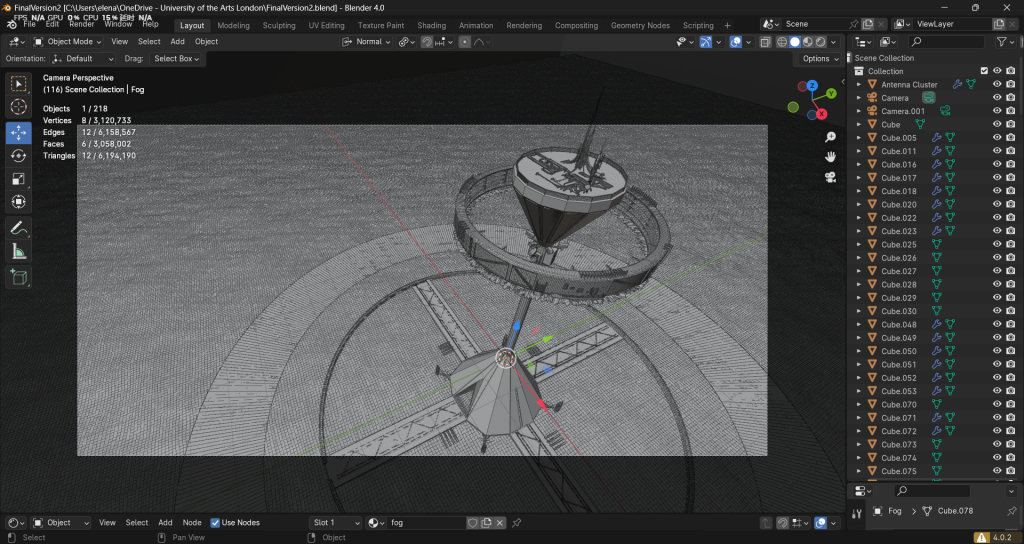
First I turn the whole airship and all things on the prison ring into blueprints. This have a better effect than merge, and also easier to do animation than the group.
P.S. after I turned them into blueprint, I suddenly found that I am a bit not satisfied with the concrete texture for the main building and I want to increase its roughness, but I found I can’t change its properties. I went to ask my classmate, and he told me I can do the changes in the content drawer. Everything in the scene is still based on the assets in the content folder. I think I learned more about the basic logic of how the Unreal Engine or any other game engine works, which is a meaningful knowledge for me although it is not a complex stuff.
Then I create a new level sequenve and several cameras to do the animation and single highres screenshots
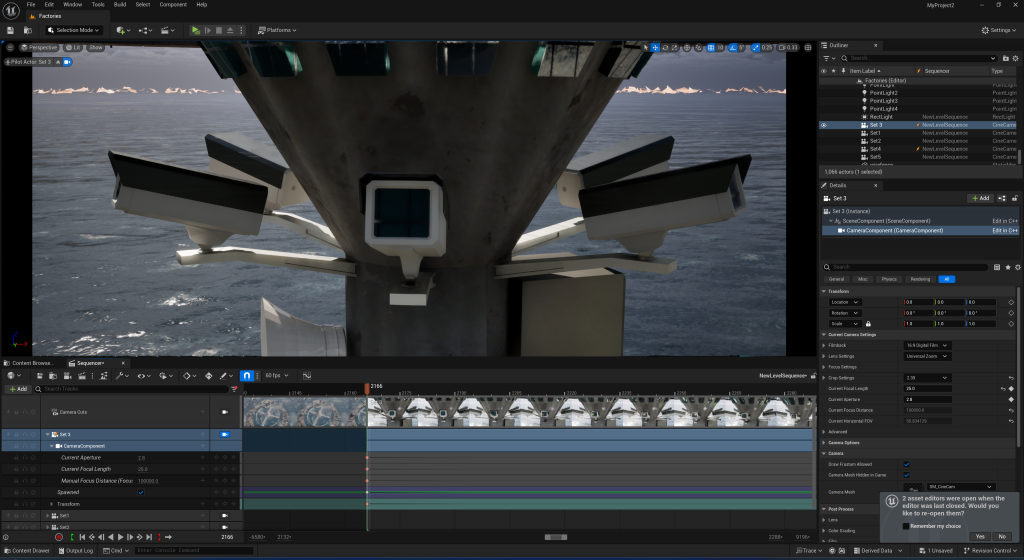
cameras:
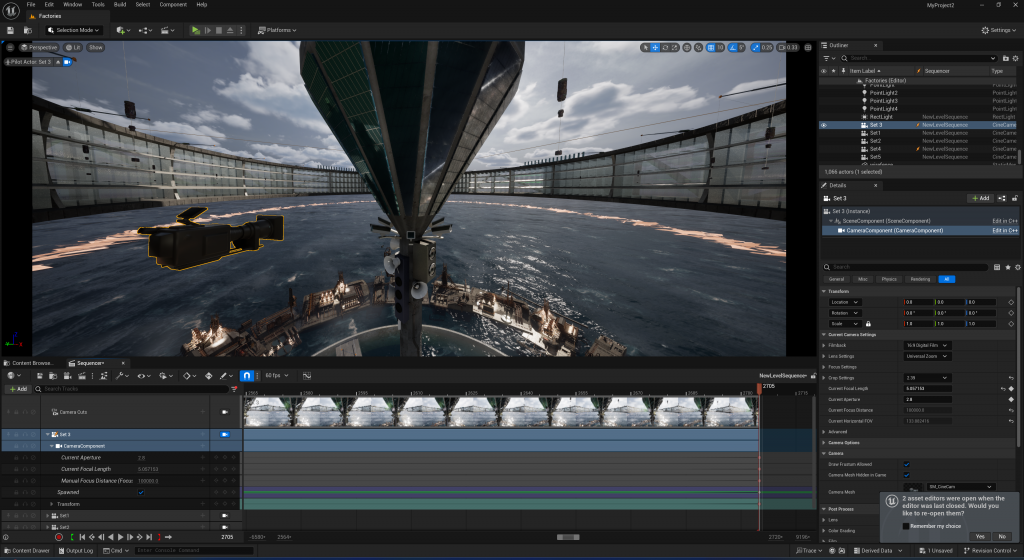
- airship animation&camera movement
- camera movement: from top to bottom
- camera movement, day time animation
- camera movement, animated focal length
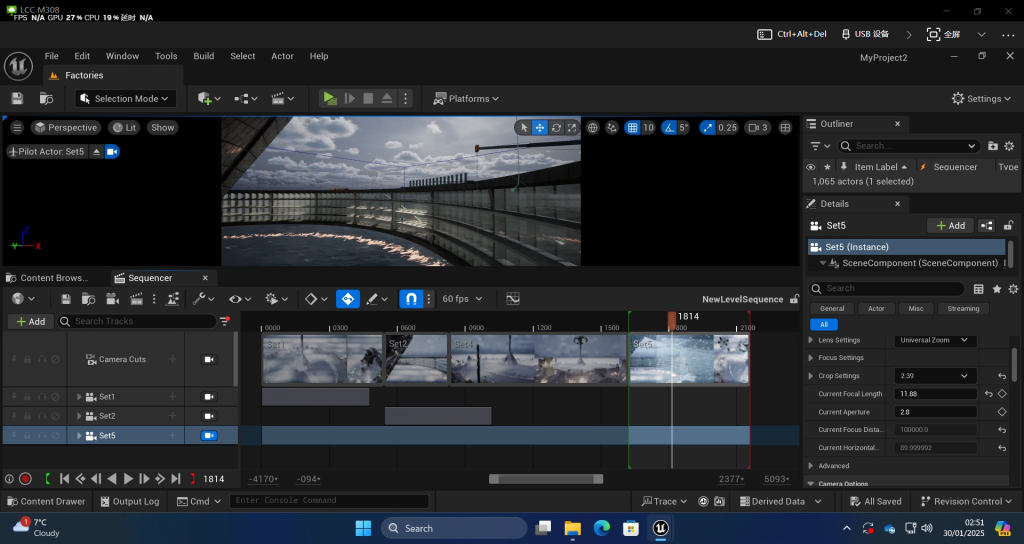
- I played with the focal length animation again
Test different properties, arperture, focal length, ISO, depth of field
I learned:
11.88mm is the most similar focal length to normal viewport.
16:9 filmback +2.39 crop can create a cinematic view
Problem I met:
mix the type of cameras. I chose the camera actor instead of cine camera actor first. Their properties are very different.

10 times amplification in HighRes screenshot often causes some problems, like there are black edges, splash screens, etc. I use Photoshop to fix some of them. I select the black edges and duplicate them. Then turn the blend mode to overlay, then adjust its brightness and hue. Collapse the layers together and use the applicator to refine the edges to make them mix together. And finally use the stamp tool to get back the texture of the ocean. I also did some post effects. I changed the contrast and brightness. Also I use the lasso to select certain areas and adjust their properties.
I rendered four videos. First time there are overlapping meshes in my scene. I found it is I didn’t delete the original meshes after I turned them into blueprints. I deleted them and rendered the second time and things went right. I put them all into Premiere Pro and connect them together. I use the cross dissolution to do the transition. And use Ctrl+R to change its speed. Some parts have render problems or sections I don’t like, I cut and deleted them as well.
Renderd video link: https://youtu.be/9UoBPj5d8Is
Critical appraisal
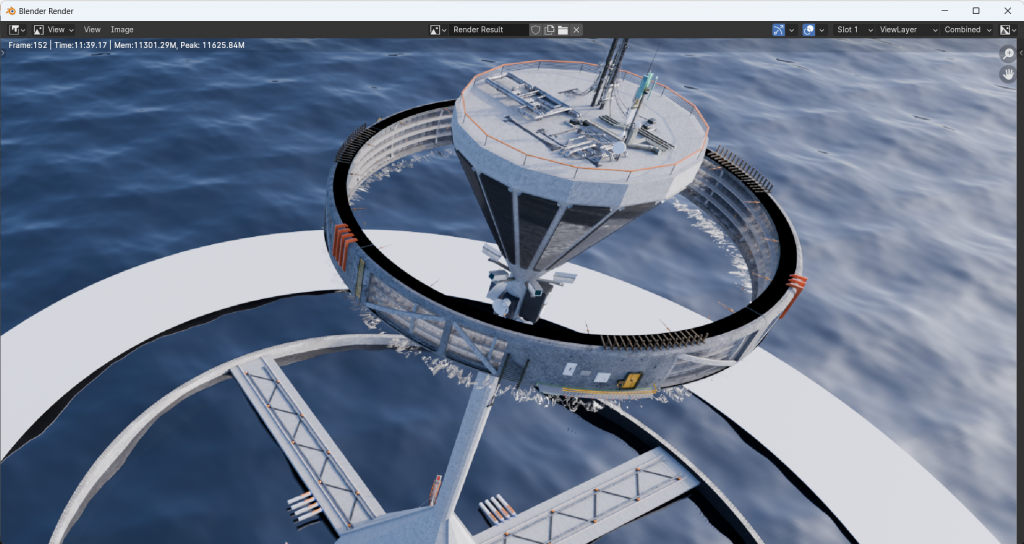
This project aimed to create an offshore Panopticon prison that blends Retro-Futurism and Brutalism, drawing inspiration from Jeremy Bentham’s Panopticon Theory while incorporating architectural influences from Soviet Avant-Garde, NASA Punk, Cassette Futurism, and other futuristic aesthetics. The environment is centered around a towering watchtower piercing through the clouds, with a circular floating prison complex surrounding it. Four cross-shaped pathways stretch across the ocean, leading to an outer industrial zone. The design reinforces the sense of isolation, oppression, and totalitarian control, where surveillance is inescapable. To enhance environmental storytelling, I placed a cargo ship in the foreground, marked with the prison’s insignia, subtly guiding the viewer’s interpretation of the setting’s function and purpose.
Throughout my research, I explored multiple architectural styles and real-world references, including 1984 , Control (Remedy Entertainment, 2018), Les Espaces d’Abraxas, Barbican Centre, the Monument to the Conquerors of Space in Moscow, TWA Flight Center, and various Soviet-era monuments. These structures, with their monumental scale, geometric forms, and raw concrete aesthetics, provided crucial inspiration for my design. My goal was to utilize Brutalist architecture’s stark, heavy presence alongside Retro-Futuristic technological aesthetics, creating a visual tension between rationality and oppression, between the past and an imagined future.
For technical execution, I primarily used Blender for modeling, Unreal Engine 5 (UE5) for asset placement, lighting, and rendering, Substance Painter for texturing, and Embergen for volumetric fog simulation. One of the biggest technical challenges was the compatibility issue between Blender’s procedural materials and UE5’s shading system. Since Blender’s node-based materials could not be directly transferred to UE5, I had to bake the textures and export them as FBX files, though some details were inevitably lost. Additionally, as the scene grew in complexity, Blender’s rendering capabilities became insufficient, prompting me to switch to UE5, leveraging its Nanite system for asset instancing and optimization. For texture baking, I used the SimpleBake plugin to refine UV maps and applied imperfections to the Roughness and Normal channels to enhance surface realism, particularly in the prison’s concrete exteriors.
Throughout development, I iterated upon my design based on feedback from both my tutor and peers. Initially, the scene conveyed a strong sense of brutalist oppression, but it lacked narrative clarity. Michael suggested adding interactive foreground elements to strengthen environmental storytelling, which led to the inclusion of the cargo ship with the prison’s insignia, making the setting’s function more explicit. Additionally, Amil recommended replacing the ground with an ocean and the surrounding cityscape with an industrial ring, reinforcing both the prison’s isolation and the logical functionality of the space. I also received valuable feedback from my peers, who helped me optimize Blender’s FBX export settings, asset instancing (Alt+D), and UE5’s automatic material instancing with Nanite LOD handling, allowing me to significantly improve the scene’s performance.
The final outcome met my expectations or I’ll say even better, particularly in terms of lighting, atmosphere, and material fidelity, thanks to UE5’s advanced real-time rendering capabilities. However, I believe there are areas for improvement. One of the biggest shortcomings was the volumetric fog effect, which did not fully achieve my intended atmosphere. Although I experimented with Embergen-generated fog, integrating it into UE5 proved challenging due to file format conversions and shader adjustments. Moving forward, I would like to explore more advanced volumetric fog techniques to improve the atmospheric depth of my environments. Additionally, I would refine camera composition and framing to better emphasize the watchtower’s dominance and the overall scale of the scene.
Reflecting on this project, my biggest takeaway was the importance of time management and technical compatibility planning. Initially, I had planned to render everything in Blender, but as the project evolved, I realized that UE5 was a better fit for large-scale scene rendering. This led to unexpected delays in asset migration, texture rework, and shader adjustments, making the final stretch of the project much more time-consuming than anticipated. Moving forward, I will consider my final rendering platform from the very beginning, ensuring seamless software integration and efficient workflow execution.
Beyond technical skills, this project deepened my understanding of Brutalist architecture and how monumental structures can shape player emotions and environmental storytelling. I plan to further explore UE5’s potential for immersive world-building, particularly in procedural materials, real-time lighting, and optimization strategies. Additionally, I aim to advance my Substance Designer skills, allowing me to create more complex, efficient textures rather than relying solely on baked textures.
This project not only strengthened my technical proficiency but also reinforced my belief that game environments are more than just visual spaces—they are vessels for emotion, narrative, and philosophy. As I continue developing my skills, I want to refine my ability to construct worlds that are not only visually striking but also conceptually rich and immersive, bridging artistic vision with technical execution.